background image

150

Apps

The Osaifu-Keitai compatible application performs 
communication which is necessary for providing the 
Osaifu-Keitai service in the background regardless of 
"STAMINA mode" (P.184) or the setting of "Data saver" 
(P.174).

Depending on your installed Osaifu-Keitai 
compatible application or its settings, your terminal 
may not respond even when you hover it over an IC 
card reader when the screen is locked, the display is 
off, or the terminal is powered off.

When the power of the terminal is turned on, the 
terminal is restarted, or the software is updated, 
unlock the screen lock and then hold over the reader 
to use the Osaifu-Keitai service.

Note that when you do not subscribe to sp-mode, 
some functions of Osaifu-Keitai compatible service 
may not be available.

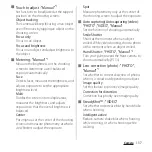
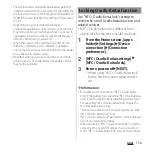
Use "NFC / Osaifu-Keitai lock" settings to 
restrict the use of Osaifu-Keitai function and 
related services.

NFC / Osaifu-Keitai lock is different from 
screen lock for the terminal, SIM card lock.

1

From the Home screen, [apps 
folder]

u

[Settings]

u

[Device 

connection]

u

[Connection 

preferences].

2

[NFC / Osaifu-Keitai settings]

u

[NFC / Osaifu-Keitai lock].

3

Enter a password

u

[NEXT].

When using "NFC / Osaifu-Keitai lock" 
for the first time, enter a password to 
set.

Information

Note that you cannot cancel "NFC / Osaifu-Keitai 
lock", if the battery runs out while "NFC / Osaifu-Keitai 
lock" is set. Be careful about remaining battery level. 
For canceling "NFC / Osaifu-Keitai lock", charge the 
terminal before canceling.

You need to unlock to use Osaifu-Keitai menu while 
"NFC / Osaifu-Keitai lock" is set.

"NFC / Osaifu-Keitai lock" password is not be deleted 
even if you reset the terminal.

When unlocking "NFC / Osaifu-Keitai lock", insert the 
same docomo nano UIM card as the one inserted 
when "NFC / Osaifu-Keitai lock" was set, then unlock.

Locking Osaifu-Keitai function

Содержание SO Series

Страница 1: ...18 10 INSTRUCTION MANUAL ...

Страница 2: ... PDF file Operations and settings of each function are explained It canbe downloadedfrom NTT DOCOMO website https www nttdocomo co jp english support trouble manual download soxxx index html The latest information can be downloaded The URL and contents are subject to change without prior notice Note Reproduction or reprint of all or part of this manual without prior permission is prohibited Import...

Страница 3: ...ations for Black wallpaper are provided In this manual explanations for docomo LIVE UX as Home application are provided P 79 If you set the other home application the operations may differ from the descriptions SO XXX クイックスタートガイド Quick Start Guide in Japanese only ご利用にあたっての注意事項 Notes on usage in Japanese only 3 5mmEarphonejackconversion TVAntenna cable SO01 You can check or purchase optional acces...

Страница 4: ...Application screen 69 Task manager 77 Split screen 78 One handed mode 79 Switching Home application 79 Searching information in the terminal and websites 80 Character entry 80 Setting character entry 86 docomo LIVE UX 87 docomo LIVE UX 87 Home screen 87 Managing the Home screen 88 Using Osusume Apps 91 Searching an application 91 Backing up and restoring the Home screen 92 My Magazine 92 Home appl...

Страница 5: ...luetooth function 212 NFC communication 214 External device connection 217 Connecting to PC 217 Connecting DLNA device 218 Connecting earphones or headphones 219 International roaming 220 Overview of International roaming WORLD WING 220 Available overseas service 220 Before using overseas 221 Making Receiving a call in the country you stay 224 International roaming settings 226 After returning to ...

Страница 6: ...converting voice into digital signals If a caller movesintoanareaofpoorradiowavecondition thedigitalsignalmaynotberestoredaccurately and the voice received in the call may differ slightly from the actual voice The terminal supports the function which allows User or Guest to use the terminal Therefore some services or applications recognize them as the same user even after the user is switched DOCO...

Страница 7: ...ations that used in the previous OS version may not be available or some unintended bugs may occur Setpasswordetc forscreenlocktoensurethe security of your terminal for its loss P 195 If your terminal is lost change your each account password to invalidate authentication using a PC to prevent other persons from using Google services such as Gmail or Google Play or SNS etc For using services and ap...

Страница 8: ...r commercially available optional equipment Forsafeandproperuseoftheterminal please read the Safety Precautions prior to use ALWAYS observe the safety precautions since they intend to prevent personal injury or property damage The following symbols indicate the different levels of injury or damage that may result if the guidelines are not observed and the terminal is used improperly Safety Precaut...

Страница 9: ...to high temperature or accumulation of heat e g by the fire near a heater under a kotatsu or bedding in direct sunlight in a car in the hot sun Doing so may cause fire burns injury electric shock etc Do not put the equipment in or place near microwave ovens cooking appliances such as IH cooking heaters or high pressure containers such as pressure cookers Doing so may cause fire burns injury electr...

Страница 10: ...or modify the equipment Doing so may cause fire burns injury electric shock etc Do not let the equipment get wet with liquids such as water drinking water sweat seawater urine of pet animals etc Doing so may cause fire burns injury electric shock etc For waterproofness see the following P 25 Waterproofness Dustproofness Do not allow liquids such as water drinking water sweat seawater urine of pet ...

Страница 11: ... implantable cardioverter defibrillator or other electronic medical equipment check with the medical electronic equipment manufacturer or vendor whether the operation can be affected by radio waves If charging does not finish after specified time has elapsed stop charging Failure to do so may cause fire burns injury etc due to overcharge etc Power off the terminal before you step into a place wher...

Страница 12: ...tion watching TV or video etc for a long time or charging If you are directly in contact with warmed part for a long time it may cause a redness of skin itch rash low temperature burn etc depending on your physical condition 2 Handlingtheterminal DANGER Do not throw the terminal into fire or apply heat Doing so may cause fire burns injury etc Do not put excessive force such as sticking a sharp obj...

Страница 13: ...The radio wave from the terminal may affect electronic equipment and electronic medical equipment Always keep the terminal away from your ear when you talk with hands free set while the ringtone is loudly sounding or in stand by mode Also when you play a game play back a video or music etc connecting the earphone microphone etc to the terminal adjust the volume adequately Loud sound is emitted fro...

Страница 14: ...e of them as provided for If the substance leaks out from the internal battery do not make it contact with your skin of face or hands clothes etc Doing so may cause injury etc on your eyes or skin If the internal substance gets into your eyes mouth etc or contacts skin or clothes immediately rinse the contacted area with clean water If the substance gets into your eyes mouth etc immediately see a ...

Страница 15: ...t the voltage converter for overseas travel travel converter to the AC adapter Doing so may cause ignition overheating electric shock etc Do not put an excessive force to the connection part with the adapter connected to the terminal Doing so may cause fire burns injury electric shock etc Do not charge a device with a wireless charger when the device is wet with liquids such as water drinking wate...

Страница 16: ...quipment When plugging unplugging an adapter into from the terminal plug unplug the adapter straightly toward the jack without applying excessive force such as pulling the cord etc Incorrect plugging unplugging may cause fire burns injury electric shock etc If the charging terminal is deformed such as being bent etc stop using immediately Do not use it with the deformation restored Doing so may ca...

Страница 17: ...brillator outside medical facilities when treating at home etc check with the relevant medical electronic equipment manufacturer whether the operation may be affected by radio waves The radio waves from the terminal may affect the performance of electronic medical equipment When you get close to other people within 15 cm just like not having enough space to turn around set the radio wave of the te...

Страница 18: ...side Stainless steel PVD Earpiece speaker upper part panel Polyester resin Dyeing Rubber gasket of the cover of docomo nano UIM card microSD card slot Silicon rubber Tray of docomo nano UIM card microSD card Polyacetal resin Screw on the inner side of the cover of docomo nano UIM card microSD card slot Iron Colored chromate treatment Catch of the tray of docomo nano UIM card microSD card Stainless...

Страница 19: ...n the last page in Japanese only or DOCOMO specified repair office Clean the terminal with a dry soft cloth such as used for cleaning eyeglasses Rubbing roughly may scratch the display Drops of water or dirt left on the display may cause stains Do not use alcohol thinner benzine cleaning detergent etc to clean the terminal These chemicals may erase the printing on the terminal or cause discolorati...

Страница 20: ...oud etc or note down in a separate note and keep it safely NTT DOCOMO is not liable for any loss of data saved in the terminal Donotinserttheplugofexternaldevice totheexternalconnectionjackataslant when connecting Or do not pull the plug when they are connected Doing so may cause a malfunction or damage It is not abnormal if the terminal becomes warm while in use and charging You can continue usin...

Страница 21: ...ecified repair office Charge the battery in an environment with the proper ambient temperature 5 to 35 The operating time of the internal battery varies depending on the operating environment and the degradation level of the internal battery To store the terminal avoid the following conditions so as not to degradetheperformanceorthebattery life of the internal battery The battery is fully charged ...

Страница 22: ...necessary force to insert remove the docomo nano UIM card Note that DOCOMO assumes no responsibility for any malfunctions resulting from inserting the docomo nano UIM card into another IC card reader writer and using it Clean the IC part occasionally and use it in a clean state If the IC is dirt it may not be used properly Clean the terminal with a dry soft cloth such as used for cleaning eyeglass...

Страница 23: ...tifying mobile units used in the manufacturing lines of plants radio stations requiring a license specified low power radio stations radio stations requiring no license and amateur radio stations hereinafter referred to as another station Before using this equipment confirm that another station is not being operated nearby In the event of the terminal causing harmful radio wave interference with a...

Страница 24: ...wireless LAN access points nearby and the same channel is used search may not work correctly 2 4GHz device cautions The operating frequency band of the WLAN device is used by industrial scientific consumer and medical equipment including home electric appliances such as microwave ovens premises radiostations foridentifyingmobileunits usedin the manufacturing lines of plants radio stations requirin...

Страница 25: ...rminaluseweakwaves requiring no licenses for radio stations They use 13 56 MHz frequency band When the other FeliCa or NFC reader writer P2P function is used in the surroundings keep the terminal away sufficiently from them Before using confirm that there are no radiostationsusingthesamefrequency band nearby For use in an aircraft contact the airline beforehand Some countries may restrict the use ...

Страница 26: ...ations conformity certification becomes invalid Do not use the terminal with the certification invalid as it is a violation of the Radio Law and Telecommunications Business Act Be careful when using the terminal while driving Useoftheterminalholdingwithyourhandwhile driving will result in a penalty However absolutely necessary cases such as rescue of a sick person or maintaining public safety are ...

Страница 27: ... has been shaken for 8 hours in an apparatus containing dust particles 75 μm or less in diameter You can talk without an umbrella in the rain for rainfall of 20 mm or less per hour Do not open or close the cover of docomo nano UIM card microSD card slot with wet hands or with water droplets on the terminal Youcanwashtheterminalwhenitgetsdirtor stained with liquid other than tap water Wash the term...

Страница 28: ...ait until the terminal reaches the room temperature Do not put hot water from a faucet or shower To avoid water ingress be sure to observe the following points Do not throw any liquid other than room temperature tap water on the terminal or soak it in such liquid Firmly close the cover of docomo nano UIM card microSD card slot Even a fine obstacle onehair one grainofsand tinyfiber etc put between ...

Страница 29: ...rd slot Push the tray all the way in the arrow direction and firmly press parts and make sure that there are no gaps between the terminal and the cover It is recommended to replace the parts for maintaining waterproof dustproof property once every two years regardless of whether any abnormality is present DOCOMO replaces the parts as a chargeable service Bring the terminal to a sales outlet such a...

Страница 30: ...The terminal does not float on water Do not leave water on the terminal In cold region theterminalfreezesupandmaycause malfunction Do not leave water droplet on the earpiece speaker mouthpiece microphone speaker and second microphone Such water may interfere with talking If the terminal gets splashed with water or other liquid while the cover of docomo nano UIMcard microSDcard slotis open theliqui...

Страница 31: ...of water come out shown left Do the same with the terminal upside down shown right c To wipe remained water off from the gaps or the following parts tap the terminal against a dry clean cloth or similar material about 10 times Earpiece speaker Mouthpiece microphone Speaker Second microphone USB Type C jack Power key Screen lock key Volume key Zoom key Camera key Fingerprint sensor Cover of docomo ...

Страница 32: ...quately drain it and wipe off water with a dry clean cloth etc Do not use the AC adapter in a bathroom shower room kitchen lavatory or other humid area Doing so may cause fire or electric shock Do not touch the AC adapter with wet hands Doing so may cause electric shock Never connect a Type C plug if the terminal is wet Although the terminal is waterproof inserting a Type C plug when the terminal ...

Страница 33: ...ast1secondtodisplay the menu where you can operate Restart Emergency mode or Screenshot P 45 P 53 j Camera lens k Flash Photo light Laser AF sensor RGBC IR sensor l Wi Fi Bluetooth antenna section 1 m LTE antenna section 1 n LTE FOMA antenna section 1 o LTE GPS antenna section 1 p mark q Nameplate 2 r Headset jack s Second microphone Reduces noise so that the other party can hear your voice clearl...

Страница 34: ...c Youcanusetheterminalwithadocomonano UIMcard IfyouhaveadocomominiUIMcard UIM orFOMAcard bringittoadocomoShop to replace it with a docomo nano UIM card When docomo nano UIM card is not inserted to the terminal making calls packet communication etc are not available For details on the docomo nano UIM card refertothedocomonanoUIMcardmanualor NTT DOCOMO website Turn off the terminal before installing...

Страница 35: ... the card is oriented properly Be sure to fit the docomo nano UIM card into the tray so that it does not shift 4 Holdthe terminal horizontally and insert the tray with the card into the terminal and push it straight Check the orientation of the terminal and the tray 5 Push the tray deeply and firmly press the parts indicated with and make sure that there are no gaps betweentheterminal andthe cover...

Страница 36: ...erminal P 33 3 Remove the docomo nano UIM card from the tray 4 Holdthe terminal horizontally and insert the tray into the terminal and push it straight Check the orientation of the terminal and the tray 5 Firmly push the tray deeply and make sure that there are no gaps between the terminal and the cover P 33 Removing docomo nano UIM card ...

Страница 37: ... will be erased on an SDXC compatible device When copying data to from a non SDXC compatible device use a card microSDHC card microSD card etc complying with standards of device The terminal supports microSD cards of up to Class 10 and UHS speed class 1 Note that the speed class indicates performance of microSD cards and all the functions may not be performed at the speed class rate Although a mic...

Страница 38: ...to the tray so that it does not shift 4 Holdthe terminal horizontally and insert the tray with the card into the terminal and push it straight Check the orientation of the terminal and the tray 5 Push the tray deeply and firmly press the parts indicated with and make sure that there are no gaps betweentheterminal andthe cover When the terminal is turned on appears on the status bar ...

Страница 39: ...d microSD card slot P 27 2 Draw the tray straight to remove from the terminal P 36 3 Remove themicroSDcardfromthe tray 4 Holdthe terminal horizontally and insert the tray into the terminal and push it straight Check the orientation of the terminal and the tray 5 Firmly push the tray deeply and make sure that there are no gaps between the terminal and the cover P 36 Removing microSD card ...

Страница 40: ...imated available time P 247 The internal battery is a consumable part Each time the internal battery is recharged the battery usage time per one charge gradually decreases When the battery usage time per one charge becomes about half of that at the time of purchased replacing the internal battery is recommendedbecausethe internalbatteryis near the end of life Using the application or shooting vide...

Страница 41: ... thenotificationLED oftheterminallightsinthecoloraccordingto the battery level P 55 You can check the battery level on the status baratthetopofthescreen orfromtheHome screen tap apps folder u Settings u Battery If you start charging with the terminal powered off the screen indicating charging status activates although you cannot operate the terminal Therefore do not charge the battery in a place w...

Страница 42: ...does not start because incomplete of the learning and normal charging will be performed If you remove charging equipment during Battery Care charging the terminal may not be fully charged To charge the battery using the Desktop Holder SO27 optional and AC Adapter 07 optional operate the following steps 3 types attachments 52B 60A 60B are supplied to the desktop holder Use the suitable attachment d...

Страница 43: ...eck the position of the USB Type C jack of the terminal and then insert it horizontally to the Type C plug of the desktop holder 3 When charging is complete holding thedesktopholder lift the terminal up to remove 4 Remove the power plug of AC adapter from the power outlet and then remove the Type C plug from the desktop holder Note Do not forcibly install the terminal Doing so may cause damage A t...

Страница 44: ...tachment and the desktop holder Removing 1 Lift both ends ofthe attachment to remove it while holding the desktop holder When using AC Adapter 07 optional for charging do the following procedures 1 Insert the Type C plug of the AC adapter horizontally into the USB Type C jack of the terminal 2 Unfold the power plug of the AC adapter and insert it into a power outlet When charging is started with t...

Страница 45: ...to the Qi specification developed by Wireless Power Consortium WPC Notesonchargingwithwireless When charging meet the positions of the wireless charging touch point of the terminal P 31 and a wireless charger correctly If a cover commercially available etc is attached to the terminal remove the cover etc and then charge the terminal Settheterminalnottovibratewhilecharging When the terminal is move...

Страница 46: ...emperature of the terminal from rising To charge the terminal by connecting to a PC USB cable A to C 01 optional is required 1 Insert a Type C plug of the USB cable A to C horizontally into the USB Type C jack of the terminal 2 Insert a USB plug of the USB cable A to C to a USB port of a PC When charging is started with the power on the charging start sound is heard and the notification LED of the...

Страница 47: ... and the lock screen appears after a while When you first turn on the power and ようこそ Welcome is displayed follow the onscreen instructions to make initial settings P 47 2 Cancel the screen lock Canceling the screen lock P 46 Information If the notification LED flashes in red several times or the low battery icon is displayed when you press the power key with the terminal powered off the battery le...

Страница 48: ... mode Depending on the settings or operating condition Ambient display P 198 may activate in sleep mode The lock screen appears when you turn on the power or press the power key to exit from sleep mode WhenAmbientdisplay P 198 isactivated the lock screen appears by double tapping the screen or pressing the power key 1 On the lock screen swipe flick the screen Information On the lock screen swipe f...

Страница 49: ...oogle Assistant Setting Xperia services Home application setting 2 When the initial settings screen for docomo service appears tap of Agree to above u NEXT Follow the onscreen instructions to make the following settings d ACCOUNT settings Set all docomo services Review additional apps Anything else settings 3 When the setup completion screen appears FINISH Information The displayed setting items m...

Страница 50: ...h screen Operation with fingers wet with sweat or water Operation under water Operationsonthetouchscreen Tap Touch an item such as icon or menu with your finger lightly and release it Double tap means tapping twice quickly Touch and hold Touch and hold an icon or menu item long Swipe flick Touch the screen and flick up down or left right Drag Touch the screen drag to the desired position and relea...

Страница 51: ...nch Touch the screen with two fingers and widen pinch out or narrow pinch in the fingers distance to zoom in out screen display Side sense is a feature that supports one hand operations by the side edge of the screen Using Side sense ...

Страница 52: ...f Side sense in the Sensor sensitivity P 187 or Sensor enabled P 187 UsingSidesensemenu 1 Double tap the side edge of the screen The Side sense menu appears If the explanation appears tap START a Navigation information Appears depending on usage condition Tap it to open the setting screen etc according to the displayed information b Application icon list Icons of recommended applications which are...

Страница 53: ...displayed P 138 To close the Side sense menu operate as follows Tap or Tap outside of the Side sense menu Double tap the side edge of the screen In this manual the key icon operations are described with and Information Swipe flick the key icon area to use One hand mode P 79 The color of key icon may differ depending on displayed screen Basic key icon operation Back Go back to the previous screen O...

Страница 54: ...de is on the following sounds are not muted the shutter sound the sounds produced when starting and ending video recording alarms sounds from video and music and the sound produced when you tap during a call If the sound volume is adjusted in Ring and notification volume P 189 in silent mode the silent mode setting is canceled You can adjust media sound by dragging up down the slider on the volume...

Страница 55: ... andhold thepower key for at least 1 second 2 Emergency mode u IMPORTANT INFORMATION uConfirm the important informationu CLOSE 3 Mark I have read the important information u TURN ON The terminal restarts Information To cancel Emergency mode operate any of the following The terminal restarts when canceling Press and hold the power key for at least 1 second u Emergency mode u TURN OFF Drag the statu...

Страница 56: ...same task Select another application in the Use a different app area as needed Information Some tasks may require you to select an application each time with JUST ONCE or ALWAYS not displayed on an application selection screen To deselect the application which is set to ALWAYS from the Home screen tap apps folder u Settings u Apps notifications u See all XX apps uTap an application you want to can...

Страница 57: ...be omitted Notification LED provides information on the terminal status incoming calls mail reception etc Flashing in sleep mode Information If the notification LED flashes in red several times when you press the power key with the power off the battery level is not sufficient When charging is started with the power off the notification LED lights in red first Notification LED LED color and lighti...

Страница 58: ... Signal strength 1 4G LTE available 2 HSPA available 3G available During International roaming Out of service Connected to Wi Fi 1 P 169 Connected to a Wi Fi network with no access to the Internet The Wi Fi signal is poor P 170 Status bar Notification icon Status icon Portable hotspot Wi Fi tethering ON P 175 Connected to Bluetooth device P 213 Airplane mode activated P 177 Silent mode Vibrate ON ...

Страница 59: ... dialing during a call Video call is incoming dialing or during a call P 99 Call is on hold P 100 Missed call P 102 Message is recorded in Answering Machine P 97 P 102 New voice mail Notification from Schedule Memo P 72 P 162 Stopwatch is running P 164 Timer is in use P 164 Alarm is sounding Alarm is snoozing Next alarm exist P 164 Playing a truck in Music P 158 Watching TV Notification of reserve...

Страница 60: ... Tap it to turn on off each function Touch and hold it to display the setting screen etc depending on function b Open the Quick settings panel Drag down to open the Quick settings panel P 60 2 or more tethering functions in use AUTO GPS is set P 200 Omakase Lock is set Notification from docomo Data Copy P 165 Available internal storage is getting low Notification of data transfer to microSD card e...

Страница 61: ...he operation menu such as CALL BACK or DELETE may be displayed when it is opened For some notifications operations such as replying a message of Message may be available by tapping the item of the operation menu on the Notification panel g CLEAR ALL Clear all notifications However some notifications may not be cleared Information To close the Notification panel tap or drag the Notification panel u...

Страница 62: ...s swipe flick the quick setting tools left or right to switch the page In the edit screen u Reset to restore to the default f Settings Display the setting menu P 168 Information The quick setting tool may be automatically added depending on usage condition You can also open the Quick settings panel by dragging down the Notification panel or dragging down the status bar on the lock screen To close ...

Страница 63: ...ts applications or folders They are always displayed even if the page of the Home screen switches g Wallpaper h Shortcuts applications Touch and hold to display the shortcut menu where you can perform specified operations or check the application information When is displayed tap it to add a shortcut for specified operation to the Home screen i Apps button Display the Application screen P 69 Infor...

Страница 64: ...d screen can be added However new pages cannot be added in the left of Google feed screen AddingfoldersontheHomescreen You can put shortcuts etc added to the Home screen into a folder to manage them 1 From the Home screen touch and hold an iconuDrag it over another icon Information To move an icon into a folder touch and hold the icon on the Home screenuDrag it over the folder To rename a folder t...

Страница 65: ...ow the onscreen instructions Information To remove a shortcut on the Home screen touch and hold the shortcutuDrag it to Remove from home screen which appears at the top of the screen Changingwallpaper You can change the wallpaper of the Home screen and the lock screen 1 Touch and hold an area of the Home screen where no icons etc are displayed 2 Wallpapers 3 Tap an image to set as wallpaper For so...

Страница 66: ...gHomescreen 1 Touch and hold an area of the Home screen where no icons etc are displayed 2 Settings Google feed Set whether to add Google feed screen to the Home screen App recommendations Set whether to show app recommendations on the search screen of Xperia Home Search Set contents that can be searched by the search screen of Xperia Home Auto rotation Set whether to switch the Home screen or the...

Страница 67: ...o かんた んキーボードに設定する Set Kantan keyboard かんたんキーボード Kantan keyboard can be set only when the language is set to 日本語 Japanese Show names in dock Set whether to show names of shortcuts etc arranged in the dock P 61 Quick add icons Set to add a shortcut to the Home screen by touching and holding an icon on the Application screen and dragging to any direction a little Automatically place icons together Se...

Страница 68: ... to easily make a call or send a message Saving contacts Save phone numbers andmail addresses to Contacts application beforehand 1 On the Simple Home screen Speed dial u OK 2 Select a contact to save The name of Speed dial displayed in the Simple Home screen changes to the one saved in the Contacts application Maps P 160 Chrome P 127 Settings P 67 My Apps P 68 Tools Contacts P 72 Calendar P 70 Clo...

Страница 69: ...ntry Edit contact UsingSettings 1 On the Simple Home screen Settings My profile Check your own phone number and mail address etc Display Wallpaper Set the wallpaper for the Simple Home screen or the lock screen Brightness Adjust the screen brightness Adaptive brightness Adjust the screen brightness automatically according to the ambient brightness etc with reference to the brightness set in Bright...

Страница 70: ...pplication to newlydisplay select the location to move to Grayout applications cannot be changed 4 OK Information In Step 2 tap Reset u OK to restore the defaults Note that speed dial contact and applications saved in My Apps folder are not reset Sound Silent Vibrate mode Set silent mode Ringtone Set ringtone Vibrate on touch Set whether to vibrate the terminal when the key icon is tapped Touch so...

Страница 71: ...me screen c Indicator Display the number of pages and current page position Swipe flick the Application screen left or right to switch the pages The left end indicates the search screen of Xperia Home d Menu This menu allows you to rearrange application icons and set the Home screen P 64 e Machi chara Activate my daiz Information A dot or number may appear for the application icon or folder when t...

Страница 72: ...ders etc Disaster kit 1 An application for using Disaster Message Board Disaster Voice Messaging Service and Early Warning Area Mail P 124 Schedule 1 An application for creating managing schedule whose data is shared with Memo application P 162 Sketch 2 An application that allows you to write characters or create drawings by touching the screen or load photos to edit etc Also publish created sketc...

Страница 73: ...lets and computers P 114 Drive 3 View manage share files stored in Google Drive Instruction Manual Display the terminal instruction manual You can directly call up functions from the explanation in Japanese only See About manuals of SO XXX in Introduction News 4 Read a collection of the latest news and topics of interest Hanashite Hon yaku 1 An application for translating spoken words into the lis...

Страница 74: ... GOLF SIE 2017 FW Memo 1 An application for creating managing memos whose data is shared with Schedule application Contacts Open the Xperia phonebook application to manage contact information for your friends and family ローソン LAWSON An official application from LAWSON You can display your digital membership card on the phone search for LAWSON stores and find money saving trial coupons Amazon Shoppi...

Страница 75: ...u An application shortcut for dmenu In dmenu you can easily access sites recommended by docomo as well as convenient applications P 146 Duo 3 An application that allows you to make video calls Dx2 5 It is a new complete RPG game for smartphones that utilizes classic Shin Megami Tensei systems such as devil negotiation mergers press turn battle system etc SHIN MEGAMI TENSEI Liberation SEGA ATLUS Em...

Страница 76: ...can add useful tie up services such as a recipe search home delivery etc My docomoアプリ My docomo app You can check your data usage or usage fee or establish various procedures or applications online Play Store Download or purchase various applications games etc from Google Play P 147 Play Movies TV 3 Rent or purchase movies etc from Google Play Play Music 3 Play Music allows you to play purchase or...

Страница 77: ...ly When you download via mobile network drag down the status baruOpen the notification which indicates update of application P 59 uTap USE MOBILE DATA Some pre installed applications can be uninstalled Even if uninstalled some applications can be downloaded from Play Store P 147 etc again Some applications require downloading and installation Having multiple applications running can consume more b...

Страница 78: ...ld an application to delete 2 Uninstall Some applications can be uninstalled by tapping For applications that cannot be uninstalled Uninstall is not shown When Disable or DISABLE is shown you can disable the application P 182 3 OK When the order of application icons is set to Own order in the menu P 69 you can manage your application icons on the Application screen by putting them in folders 1 On ...

Страница 79: ...s to confirm open switch between or close them 1 Applications are displayed as thumbnails Information Tap a thumbnail to open or switch the application However depending on the displayed thumbnails the application may not be opened To delete the application thumbnail swipe flick the thumbnail left or right or tap u displayed at the upper right of the thumbnail To clear all thumbnails tap CLEAR ALL...

Страница 80: ...l is not displayed tap No recent items to activate the application to display Information Alternatively touch and hold when the application is activated to open the split screen The application windows of the split screen can be displayed up and down in the portrait view and left and right in the landscape view The application window displayed in the lower part right part for the landscape view ca...

Страница 81: ... to change the size of the reduced screen To end the one hand mode tap or outside of the reduced screen The one hand mode may end automatically depending on operation condition for example when the screen turns off or the screen is switched to the landscape view etc You can switch the Home application of the terminal to docomo LIVE UX Xperia Home or Simple Home 1 From the Home screen apps folder u...

Страница 82: ... search key word by voice 1 From the Home screen tap on the Google Search widget 2 Speak a search key word to the mouthpiece microphone Enter characters using the software keyboard On screen keyboard which appears when you tap the character input box in a mail phonebook etc Information To hide software keyboard tap displayed at the lower left of the screen Character input method for the terminal i...

Страница 83: ...age keyboards u of the input method you want to use For Xperia Japanese keyboard the following software keyboard can be used Character input method P 82 Information Besides using the software keyboards voice input is available for entering characters Display the tool list to switch between software keyboard and voice input use plug in applications extensions or change the settings 1 From the chara...

Страница 84: ...oard Change the keyboard size for one handed operation My Words P 86 Settings Change Xperia Japanese keyboard settings Keyboard skins Change software keyboard skin Online help P 80 For beginners Select Online help to display POBox Plus 日本語入力 使い方ガイド Online help for Xperia Japanese keyboard in Japanese only P 80 Select Simple keyboard to change to the software keyboard with bigger texts and simple d...

Страница 85: ... and hold Display the tool list P 81 f Delete the character before the cursor g Move the cursor to the right When there is an unfixed character string with the cursor positioned at the right end tap this key to enter the same character as the last entered one h Enter spaces In Kana mode highlight and select word in the candidate list i Enter a line feed Appears before fixing character and fixes th...

Страница 86: ...d to the key To enter a character assigned to the same key wait for changing the color of tapped key to the original approx 1 second then enter the next character for entering the next character soon tap to change the color of key to the original With the key in the original color tap to enter the last entered character again Example Entering あお 1 Tap あ onceuWait approximately 1 second until the k...

Страница 87: ...ers 1 From the character entry screen in the quick tool bar Details of the quick tool bar P 82 2 Contact Picker 2 3 u CONTACTS tab 3 Select a contact to quote 4 Mark items to quoteu OK If the quoted information is not displayed tap the character entry field Information The HISTORY tab displays your own contact information and contact information you retrieved when you entered characters previously...

Страница 88: ...se keyboard or check the application information or use method of Moji Henshu 1 From the Home screen apps folder u Settings u System u Languages input 2 On screen keyboard uSelect the input method Tap an item displayed on the screen to set If the sign in screen etc appears follow the onscreen instructions Information The items vary depending on the input method When entering characters with Xperia...

Страница 89: ...pear on upper right of application icon or folder when the application has a notification a Widgets Activate widgets Google Search Touch and hold to display the shortcut menu where you can perform certain operations b Machi chara Activate my daiz c Application icons Tap to activate an application Touch and hold to display the shortcut menu where you can perform specified operations or check the ap...

Страница 90: ...ay download the application P 75 1 In the Home screen touch and hold an icon you want to move The shortcut menu appears 2 Drag it to a desired position To move to the next page drag it to left right end of the Home screen Alternatively tap Move in the shortcut menu and then drag an application icon etc 1 In the Home screen touch and hold a widget you want to remove The shortcut menu appears 2 Remo...

Страница 91: ... Home screen tap a folder 2 Tap the folder name 3 Enter a folder name When entry is finished tap on the software keyboard 1 Touch and hold an area of the Home screen where no icons etc are displayed Uninstalling the applications Renaming folder Setting Home screen Create folder Add a folder Wallpaper and Kisekae Change wallpaper or Kisekae Create widgets Display widgets list To add a widget to the...

Страница 92: ...Kisekae contents by tapping Search on the web 1 Touch and hold an area of the Home screen where no icons etc are displayedu Home setting u Machi Chara setting 2 of キャラ表示 Show character 1 Touch and hold an area of the Home screen where no icons etc are displayedu Home screens Alternatively in the Home screen tap u Home screens 2 Add Home screen To delete the page of the Home screen tap of the thumb...

Страница 93: ... screen for app appears Information On the Application screen u of each setting to switch on off It is a function which allows you to search an application in a list sorted by used or installed order or by an application name 1 From the Home screen 2 3 In Search app field enter an application name Tap By most recently used By installation date By app name to display a list of all applications sort...

Страница 94: ...d Restore from backup data list select the data you want to restoreu Restore u RESTORE My Magazine is a search service for displaying articles for categories you selected By your tendency of read articles or profile information the more you use the more it comes close to your preference Also you can set to enable notifications of notice or customizing of My Magazine using your docomo service subsc...

Страница 95: ...per right of the screen to sort the categories You can check the version information etc of docomo LIVE UX 1 From the Home screen u 2 About If the update of docomo LIVE UX is available Update now is displayed in the application information screen Tap it to update docomo LIVE UX Setting the category display Home application information ...

Страница 96: ...d Enable VoLTE P 223 is ON With VoLTE HD you can make voice and video calls with sound that is much higher quality than with VoLTE TouseVoLTE HD theusagerequirementsofVoLTE must be met and both you and the other party must have models which support VoLTE HD On a video call both speakers can see each other while talking When you make a video call voice call and packet communication charges will app...

Страница 97: ... and give your phone number and your current location precisely for checking callback from the Emergency call acceptance organization such as police Also make a point to call in a stationary position to prevent the call from being dropped Do not power off the terminal for at least 10 minutes after the emergency call just in case the Police or Fire Ambulance may have to get in contact with you Note...

Страница 98: ...hen the call is made and a confirmation screen asking if you send the additional number appears 1 From the Home screen u 2 Enter a phone numberu u Add wait uEnter an additional number u 3 On the confirmation screen YES 4 When the call is finished Makinganinternationalcall WORLD CALL WORLD CALL is a service for making international calls which is available from DOCOMO s mobile phones in Japan For d...

Страница 99: ...ing a call Packet communication charge is applied when receiving video call AnsweringcallswithAnswering Machine EvenwhenAnswering Machine is not set you can activate Answering Machine manually 1 On the incoming call screen swipe flick Information If there is a recorded message is displayed in the status bar Drag the status bar downwardsuTap the notification of the Answering Machine to display the ...

Страница 100: ...w message to create and send a message Information To edit a message beforehand from the Home screen tap u u Settings u Calls u Reject call with message uSelect a message and edit itu OK Receivingaphone videocallwhenan applicationisrunning If the screen is turned on except on the lock screen or an application is running when a call comes in the notification appears in the upper screen 1 ANSWER You...

Страница 101: ...D and high sound quality is displayed during calls in VoLTE HD d Mute Set to turn on off the mouthpiece microphone e Dial key Send a push signal while on a call f Add call Add voice call g Video call Switch from a voice call to a video call Tap this icon and when the other party switches to video call video call is available If the other party declines switch to video call or he she is out of VoLT...

Страница 102: ...mage o The other party s image Note Do not bring the terminal close to your ear with the speakerphone on to avoid from hearing damage Information To hold add a call Call waiting subscription is required P 104 The notification icon appears on the status bar while dialing incoming calling or holding Even if you have switched to the other screen such as the Home screen returning to the calling screen...

Страница 103: ...t Add to a contact Send a message Number blocking and Call details Touch and hold to display the menu of Copy number Edit number before call Add prefix Number blocking and Delete d An image set to a contact etc Tap to display the profile screen of the Contacts e History The call type outgoing call incoming call missed call video call number of calls how long the time has been passed since the call...

Страница 104: ... Clear call history u OK When you have missed calls appears in the status bar 1 Drag the status bar downwards 2 Missed call Information When there is a missed call you can make a call or send message to the caller of the missed call from CALL BACK MESSAGE below Missed call in the Notification panel For multiple missed calls number of calls appears below Missed call When a missed call notification ...

Страница 105: ...wering Machine tap a messageu CheckingmessagesinAnswering MachineviaPhoneapplication To check messages in Answering Machine via Phone application operate as follows 1 From the Home screen tab appears when any messages are saved in Answering Machine and number of items is indicated if there are any messages that have not been checked yet 2 tab A list of Messages in Answering Machine is displayed An...

Страница 106: ...ming calls by message while the power is off or you are out of service area Network service English guidance Switch the voice guidance to English or Japanese Remote operation settings Set to operate Voice Mail Service or Call forwarding Service using land line phone public phone or DOCOMO mobile phone etc Publicmode power OFF setting While the terminal is OFF or in Airplane mode a guidance message...

Страница 107: ...e service for corporate customer Suguden setting Answer Set whether to answer calls by holding up the terminal to ear Mute Hold Set whether to turn off the mouthpiece microphone of the terminal mute by detaching the terminal from your ear after saying the word including a Mute Hold keyword while talking Disconnect Motion Voice command Set whether to end a call by motion or voice command When the M...

Страница 108: ...sensor does not respond well to black objects When answering calls if you press the earpiece speakeroveryourhair theproximity sensor may have trouble working and may cause failure to answer the call In this case please press the earpiece speaker directly to your ear When disconnecting rejecting a call flipping over the terminal on a black desk etc may cause the operation to fail cannot disconnect ...

Страница 109: ...nect Voice command When the disconnect keyword is heard a call will be disconnected even in the following cases When the other party puts the call on hold When the Answering Machine is running playing the answering message recording a message Mute Hold Disconnect Voice command While calling with Mute Hold Disconnect Voice command ON other application using the mouthpiece microphone or a voice reco...

Страница 110: ...formation For more information about Suguden functions or notes for usage refer to the following website https www nttdocomo co jp service suguden in Japanese only On the phonebook you can enter various information for contacts for example phone numbers mail addresses and various service accounts 1 From the Home screen apps folder u docomo phonebook u Contacts tab The Contacts list screen appears ...

Страница 111: ... the index character to search entries in the order of Japanese syllabary alphabet etc Addinganewcontact 1 From the Home screen apps folder u docomo phonebook u Contacts tabu Register 2 On the profile edit screen enter necessary information such as name To add items tap Add other items 3 Save Information The contacts are listed in alphabetical order of the first names and then order of Japanese sy...

Страница 112: ...dit 3 Select a required item and edit 4 Save RegisteringacontacttoFavorites 1 From the Home screen apps folder u docomo phonebook u Contacts tabuSelect a contact you want to add to Favorites 2 On the profile screen Favorites Information To display contacts added to Favorites on the Contacts list tap Group tabu Favorites Usingmenu 1 From the Home screen apps folder u docomo phonebook u Contacts tab...

Страница 113: ...rder of contacts Accounts to display Set an account to be displayed in the Contacts screen Service quality improvement Set whether to send user information to DOCOMO It turns on when use of the cloud is started Help Display Help of docomo phonebook Number of registered contacts Display the number of contacts registered to each account About Display version etc of docomo phonebook Share Send a disp...

Страница 114: ...the group adding screen select the account and set account group name icon and coloru OK The items vary depending on the account type Information Groups in docomo account can be sorted To do so tap Sort in Step 2 and follow the onscreen instructions Groups added to your docomo account as well as your Google account etc can be edited deleted To edit delete a group touch and hold a groupu Edit group...

Страница 115: ...tacts P 202 For exporting to importing from a microSD card insert a microSD card in advance P 35 1 From the Home screen apps folder u docomo phonebook u Contacts tabu u SD card SIM card common 2 Select an item When Send all data common is tapped confirm the displayed content and the drag the status baruTap the notification of docomo phonebook and then select the application to be used for sending ...

Страница 116: ...anese only 1 From the Home screen After this step follow the onscreen instructions You can send receive images videos stamps etc as well as text message in chat format using a mobile phone number as a recipient Also you can exchange messages not only on one to one but also among multiple people as group messages If the other party is not a Message user you can use the short message service SMS ins...

Страница 117: ...ssages photos stamps etc among the contacts with this icon displayed e Contacts Tap to check detail of contact f Add a contact with QR code add a new contact g Profile image The other party s profile image is displayed The image that the other party registered to his her own profile takes precedence over the image you registered to the contact h Message Open the message screen i Display the menu R...

Страница 118: ...phone number directly For group message select multiple recipients and then tap OK 4 Enter a message in the message fieldu Send If the recipient is a Message user sending photos videos or stamps is available Message screen a Activate Phone application and make a call b Display the menu You can register contacts change the call settings etc c Switch to the stamp selection screen d Activate camera T...

Страница 119: ...sageService SMS information You can send receive text messages to from customers using overseas network operators Refer to NTT DOCOMO website for the countries overseas network operators that provide this service To send SMS to users of overseas network operators enter Country code and then the recipient mobile phone number Enter the phone number without a leading 0 if any Alternatively enter 010 ...

Страница 120: ...er a recipient and messageu Send 1 From the Home screen メッセー ジ Message 2 uSelect a thread 3 Touch and hold a messageu u DELETE Only messages on the terminal can be deleted You cannot delete messages on the recipient device Note that deleted messages cannot be restored 1 From the Home screen メッセー ジ Message 2 uTouch and hold thread 3 u DELETE If you delete a thread of group message you will be left ...

Страница 121: ...screen tap apps folder u Email u u Settings u Add account 2 Enter an email addressu NEXT 3 Enter a passwordu NEXT To set up an email account manually tap MANUAL SETUP and follow the onscreen instructions Changing the settings of Message Message Set for messages back up restore etc Photos and videos Set for file attachment etc such as photos or videos when sending receiving Screen display Set the t...

Страница 122: ...te wipe the data saved in the terminal may be deleted 1 From the Home screen apps folder u Email 2 Write new message 3 Enter the email address of recipient When you enter a name or email address in the email address field contacts matched to the entered numbers or letters are listed To enter multiple email addresses directly separate with a comma or a space input and then enter the next email addr...

Страница 123: ...r the address to the Contacts If the addresses has already registered tap View contact to display the contact Tap in the Inbox or the email message window to highlight the star and add the email to the Starred filter To see a list of starred emails tap in the Inboxu uTap the email accountu uTap of Filters u Starred Savingattachmentfileofemail 1 From the Home screen apps folder u Email 2 Tap an ema...

Страница 124: ...tion screen appears after is tapped Tap DELETE Example Setting up an email account that supports IMAP 1 From the Home screen apps folder u Email 2 u Settings 3 Tap an Email account you want to change the settings for Deleting email Changing Email account settings Notification Set notification method for Email Sync settings Check frequency Set how often the Email application checks for new emails D...

Страница 125: ...When a message indicating that auto sync is off appears after you set up your Google account follow the onscreen instructions to set Information For details on Gmail from the Home screen tap Google u Gmail u u Help feedback to see Gmail Help General settings Account name Change account name Your name Change your name sender name Incoming settings Specify a username password and other settings for ...

Страница 126: ...etc delivered by the Meteorological Agency and disaster evacuation information delivered by the national government or local governments without being influenced by congestion Area Mail is a free service for which subscription is not required Up to 50 messages can be saved If savable amount of Area Mail exceeds the limit of maximum the oldest one is deleted in order Area Mail cannot be received in...

Страница 127: ...tbe changed 1 Receive Area Mails automatically 2 The buzzer or the ringtone sounds appears on the status bar 3 A message of Area Mail appears CheckingreceivedAreaMaillater 1 From the Home screen apps folder u Disaster kit 2 Early Warning Area Mail 3 Select an Area Mail from the Area Mail list DeletingAreaMail 1 From the Home screen apps folder u Disaster kit 2 Early Warning Area Mail 3 Mark Area M...

Страница 128: ...ree times at 15 minutes intervals in 15 minutes after Area Mail is received Use full volume Set volume of beep sound of incoming Area Mail When it is set to ON the terminal emits sound at the maximum volume even in silent mode When it is set to OFF the terminal emits sound according to the alarm volume setting However ringtone volume is set to 0 the terminal does not follow the alarm volume settin...

Страница 129: ... To go back to the previous page tap Information To copy text in a web page touch and hold a textu Drag or to select a range of textuTap Copy Addinganewtab Open multiple tabs and view websites 1 From the Home screen u u New tab 2 View website A number in the icon next to the address entry field indicates the number of tabs that are opened Openingincognitotab You can view websites without recording...

Страница 130: ...anging Chrome settings SIGN IN TO CHROME Sign in to Chrome with your Google account Search engine Set the search engine Autofill and payments Set whether to use autofill or set an address when using autofill Passwords Set whether to save the passwords entered to websites Notifications Set notification method for Chrome Home page Set the Home page Privacy Set the display of suggestions for navigati...

Страница 131: ...From the Home screen u u Bookmarks 2 Tap the bookmark you want to open Information You can edit or delete a bookmark move to folder etc by tapping in the bookmark list or touching and holding the bookmark Checkinghistory 1 From the Home screen u u History 2 Tap a history to check Information To delete history tap of history To delete all history CLEAR BROWSING DATA u Select a period to clear the d...

Страница 132: ...the copyright law is not available Shooting sending images Please be considerate of the privacy of individualsaroundyouwhentakingandsending photos using camera equipped mobile phones If you cause the public any trouble using the terminal you may be punished under law or regulations for example nuisance prevention ordinance 1 From the Home screen Camera A shooting screen appears UsingSmartlaunch Wh...

Страница 133: ...wipe flick up or down in landscape view or right or left in portrait view m Shutter still picture Start stop pause recording video Depending on setting an icon of Self timer or Touch capture icon is displayed n Changing the capturing mode P 132 o Shortcut of capturing mode The icon of recently used capturing mode is displayed You can switch to the capturing mode immediately by tapping this icon In...

Страница 134: ...hase are saved to the internal storage Some applications may not be able to play back sound from images taken using the Sound Photo mode To save the next shot data to the microSD card using a microSD card Speed Class 10 or UHS speed class 1 which supports high speed writing is recommended 4K Super slow Super slow one shot Slow motion For details on the features of the camera refer to the following...

Страница 135: ...or balance of joined image may be unstable If the brightness color balance focus point of whole image etc are extremely differentbetweentheentireangleviewof Panorama shot and the focused angle view the image may not be shot properly Shooting with the shutter icon 1 From the Home screen Camera 2 Swipe flick the screen to display PHOTO mode shooting screen 3 Tap the shutter icon You can shoot contin...

Страница 136: ... mode Set Auto capturing P 137 to Hand Shutter 1 From the Home screen Camera 2 Swipe flick the screen to display PHOTO mode shooting screen 3 Switch to the front camera and then turn your palm toward the camera When a palm mark appears a photo is taken Tap to set self timer Information When Side sense P 138 is set to ON you can shoot photos by double tapping the side edge of the screen with the sh...

Страница 137: ...gain to stop shooting Shooting with the volume key Set Use Volume key as P 138 to Shutter in advance 1 From the Home screen Camera 2 Swipe flick the screen to display the shooting screen in VIDEO mode 3 Press the volume key Press the volume key again to stop shooting Information When Side sense P 138 is set to ON you can start shooting by double tapping the side edge of the screen with the shootin...

Страница 138: ...pturing mode of Slow motion Super slow motion Shoot a moment when is tapped while shooting a video with the Super slow motion mode Super slow one shot Shoot a moment when is tapped with the Super slow motion mode Slow motion Shoot video in 120 fps and then select scene to show in slow motion By shooting with Slow motion 120fps video is saved and a separate video file with slow motion scene set is ...

Страница 139: ...the shooting screen and measure photometry at whole view finder to adjust the exposure Spot Measure photometry only at the center of the shooting screen to adjust the exposure Auto capturing Auto capturing video PHOTO VIDEO Manual Set the function of shooting automatically Smile Shutter Shoot at the moment when an object smiled Whilevideoshooting shootaphoto at the moment when an object smiled Han...

Страница 140: ...g screen appears while acquiring location information To pictures shot while acquiring location information geotags are not added Touch capture Set whether to allow the camera to shoot when tapping the shooting screen If you set Only front camera the Touch captureisavailablebyswitchingtothefront camera Grid lines Set whether to show a gridline on the shooting screen as a guide Auto photo preview S...

Страница 141: ...u arerecommendedto use theself timer for avoiding camera shake Preview Creative effect Sound Photo Set whether to display the preview screen or the edit screen after a photo is shot 1 Only available for shooting with the back camera 2Only available forshooting with thefront camera Changingsettingsusingicons Tap the icon displayed on the shooting screen to change the setting The displayed icons or ...

Страница 142: ...y set to AUTO Aspect ratio PHOTO Manual Set aspect ratio of photo to shoot Still image size varies by the setting 16 9 4 3 1 1 Self timer PHOTO Manual Portrait selfie Set the number of seconds for the self timer The shutter icon changes into a timer icon Tap it to shoot after set period of time seconds elapses Use the self timer to take a self portrait or groupphoto You arerecommended touse the se...

Страница 143: ... With ISO sensitivity down you can shoot with noise kept low However images maybedimand blurredwhen shotunder poor lighting condition When ISO resolution is set HDR is turned off Shutter speed Set a shutter speed according to a moving speed of object etc uTap a point on the bar or drag the marker Focus mode Set according to distance from an object to focus on uTap a point on the bar or drag the ma...

Страница 144: ...tos or videos 1 From the Home screen Album Images are displayed in a list in chronological order Image list screen a Menu Tap to select contents to display make settings etc u Select items uTap an image to select for displaying a menu of deletion share etc Tap images continuously to select multiple files b Video file c HDR video file is displayed for HDR video file shot with 4K d Continuous shot f...

Страница 145: ...t of screen a photo or video can be played with Google Cast devices Tap and then follow the onscreen instructions to connect To play with Google Cast devices connect the terminal to the Wi Fi network same with a Google Cast device connected to in advance P 169 1 From the Home screen Album uTap an image The photo is played Tap the screen to show hide information such as shooting date or icons such ...

Страница 146: ...Information To zoom in out image display pinch out in on the photo viewing screen or double tap The display or menu may differ depending on use condition of the application or selected file Also some files cannot be operated 1 From the Home screen Album uTap a video A preview screen appears The icon of 4K video Slow motion HDR video etc are displayed according to file type Tap the screen to show h...

Страница 147: ...he setting icon for repeat play f Progress bar Tap on the bar or drag a marker left or right to change a playback position Information To zoom in out a video display pinch out in on the video playing screen The display or menu may differ depending on use condition of the application or selected file Also some files cannot be operated ...

Страница 148: ... packet communication charge is applied separately Some applications automatically perform packet communications Paid applications are included to the applications introduced in dmenu dmarket provides a variety of services offering digital content such as music videos and books and giving you access to a shopping site travel booking site and other sites 1 From the Home screen dmarket Information F...

Страница 149: ... LLC For the application which you installed from Play Store and provided by the third party including Google LLC contact each provider 1 From the Home screen Play Store 2 Search applicationsuTap an application to install Check the displayed contents carefully and follow the onscreen instructions Information Some applications automatically perform packet communications Packet communication is kept...

Страница 150: ...issuance restoration temporary preservation or transfer of data contact Osaifu Keitai compatible service providers For important data be sure to use a service with backup service To use Osaifu Keitai compatible services that utilize data on the docomo nano UIM card you need to install and configure the appropriate application provided by the Osaifu Keitaicompatibleserviceprovider This applies even...

Страница 151: ...ompatible service set services from the Osaifu Keitai application 1 From the Home screen apps folder u Osaifu Keitai If the initial settings are not complete the initial setting screen appears Follow the onscreen instructions 2 Select a service 3 Set the service Set it from the service application or the website 4 Hold mark of the terminal over an IC card reader Information You can use the service...

Страница 152: ... settings to restrict the use of Osaifu Keitai function and related services NFC Osaifu Keitai lock is different from screen lock for the terminal SIM card lock 1 From the Home screen apps folder u Settings u Device connection u Connection preferences 2 NFC Osaifu Keitai settings u NFC Osaifu Keitai lock 3 Enter a passwordu NEXT When using NFC Osaifu Keitai lock for the first time enter a password...

Страница 153: ...apps folder u Settings u Device connection u Connection preferences 2 NFC Osaifu Keitai settings u Tap pay 3 Select a service iD refers to electronic money offered by DOCOMO Once you have set up iD on your Osaifu Keitai you can make shopping easier and more comfortable just hovering the terminal over an IC card reader at various shops Card information for more than two cards can be registered and ...

Страница 154: ...asting enterprises stations etc A communication fee for receiving video picture and sound is not required Contact NHK for details on your NHK viewing fees There are 2 types of information displayed in the data broadcasting area Data broadcasting and Data broadcasting site Data broadcasting is displayed using airwave along with images and sounds while Data broadcasting site is displayed by connecti...

Страница 155: ...nna cable or moving to another location may improve signal reception TVantennacable To watch TV with the terminal use the supplied 3 5mm Earphone jack conversion TV Antenna cable SO01 P 219 1 From the Home screen apps folder u TV When using for the first time make channel settings according to the onscreen instructions P 156 TV watching screen a Broadcasting service in watching Full seg 1Seg b Swi...

Страница 156: ...g operate any of the following Tap the channel selection key Flick an image on the TV watching screen left or right Touch and hold an image on the TV watching screenuSelect a channel from the displayed channel list It may take a time to acquire image data or broadcasting data when you activate TV or change channels due to characteristic of digital broadcasting According to the airwave condition im...

Страница 157: ...ecorded program list P 157 Reserve Recording Viewing Reserve programs to record view or display the failed reservation list TV link Display TV link list For some data broadcasting programs TV links are displayed and by registering you can connect to related websites Change area Register or change broadcasting area P 156 Settings Superimpose setting Set whether to display superimpose for Full seg o...

Страница 158: ...tecontrolnumber Change TV remote control number assigned to each broadcasting station Each broadcasting station can be called up via the corresponding TV remote control number 1 From the Home screen apps folder u TV 2 Touch and hold an image 3 Tap the broadcasting station to change the remote control numberuTouch and hold the image 4 Touch and hold the number of remote control to set to 5 YES If y...

Страница 159: ...recording file that can be saved is 2 GB and the maximum continuous recording time is about 640 minutes You can record up to 99 Full seg and 1Seg recordings Recorded data is saved on a microSD card Recording is not available if a microSD card is not attached When you use the microSD card from another application while recording recording may fail Playingarecordedprogram 1 From the Home screen apps...

Страница 160: ...ata in high resolution audio equivalent from the Music Home tap u Settings u Audio settings uTap of DSEE HX It is available only when the high resolution audio headphones are connected to the terminal using the supplied 3 5mm Earphone jack conversion TV Antenna cable SO01 When is displayed at the upper right of screen music can be played with Google Cast devices Tap and then follow the onscreen in...

Страница 161: ...alfunction or any other problems of the terminal or the power failure You cannot use the terminal as a navigation device for an aircraft vehicle and person Note that DOCOMO shall have no liabilities whatsoever even if you suffer damage or loss while performing a navigation using the location information You cannot use the terminal as a high accuracy measurement GPS Note that DOCOMO shall have no l...

Страница 162: ...ffic P 172 is enabled NTT DOCOMO is not liable for navigation services or for the accuracy of location services ActivatingGPS Locationservices You can position your current location using GPS Wi Fi and information sent from mobile network base stations 1 From the Home screen apps folder u Settings u Lock screen security u Location 2 of Use location 3 Read the notes on location information and tap ...

Страница 163: ...ears follow the onscreen instructions ViewingStreetview 1 From the Home screen Google u Maps 2 Touch and hold a point to show in the street view 3 Tap a photo displayed at the lower left of screen Searchingforalocation 1 From the Home screen Google u Maps 2 Fill out the search bar 3 Tap on the software keyboard 4 Tap a destination Displayinginformation Display information such as traffic informati...

Страница 164: ...t for the day which the cursor is located 1 From the Home screen apps folder u Schedule 2 uEnter the item For setting alarms tap Display input option 3 Save Information When an alarm of event is set appears on the status bar at the set time Drag the status baruTap It s time to display details of the event DisplayingeventsofSchedule 1 From the Home screen apps folder u Schedule uDisplay a scheduled...

Страница 165: ... word search uEnter a search wordu OK u OK u Use alarm world clock stop watch and timer 1 From the Home screen apps folder u Clock 2 uSet a timeu OK 3 MORE SETTINGS uSet each item 4 SAVE Tap to close the settings screen Information To edit an alarm time in Step 2 tap of the alarm to editu Edit time To delete an alarm in Step 2 touch and hold the alarm to deleteu Enabling Disablingalarm 1 From the ...

Страница 166: ...older u Clock u World clock tab 2 Tap here to set home city uEnter a city nameuSelect a city from the list To change the city tap u Set home city To add a city tap Information To delete a city touch and hold an added cityuTap Time difference during summer time may differ from the displayed one 1 From the Home screen apps folder u Clock u Stopwatch tab 2 START 3 STOP 1 From the Home screen apps fol...

Страница 167: ...installed download from NTT DOCOMO website Communication method differ depending on your model or the OS For the supported models or detailed use method refer to NTT DOCOMO website You can transfer or back up restore the data such as phonebook contacts or images using a microSD card Do not remove the microSD card or turn off the terminal during backup or restoring The data may be damaged If phoneb...

Страница 168: ...p u BACKUP The selected data can be saved to the microSD card 5 Back to top Restoring Restore the data such as phonebook entries or media files backed up to the microSD card to the terminal 1 From the Home screen apps folder u Data Copy u Backup Restore 2 Restore 3 Tap Select on data type to restore uMark data to restoreu Select Tap Select latest data to select the latest data for each data type 4...

Страница 169: ...loud 1 From the Home screen apps folder u Data Copy 2 u Backup Restore to Cloud 3 Backup or Restore After this step follow the onscreen instructions When you do not log in to docomo cloud on the confirmation screen tap Log in then follow the onscreen instructions to log in Information The periodical backup cannot be executed when the screen is locked or STAMINA mode P 184 is activated It will be e...

Страница 170: ...s u Network internet Appeared when Advanced is tapped Viewing the Settings menu Network internet P 168 Device connection P 179 Appearance P 180 Apps notifications P 180 Battery P 184 Display P 185 Sound P 188 Call P 104 Storage P 190 Lock screen security P 191 docomo service cloud P 200 Accounts P 201 Xperia Assist P 202 Accessibility P 203 Google P 204 System P 205 Network internet Wi Fi P 169 Mo...

Страница 171: ... Bluetooth device Forusingwithin approximately10m turn off the Bluetooth device TurningonWi Fi 1 From the Home screen apps folder u Settings u Network internet 2 of Wi Fi It may take a few seconds to turn on the Wi Fi Information Even when Wi Fi is on packet communication is available When a Wi Fi network is disconnected the connection is automatically switched to the mobile network Note that pack...

Страница 172: ...e network not via Wi Fi To use docomo services via Wi Fi you need to set up your d ACCOUNT From the Home screen tap apps folder u Settings u docomo service cloud u d ACCOUNT setting to set DeletingconnectingWi Finetwork setting 1 From the Home screen apps folder u Settings u Network internet u Wi Fi 2 Tap the Wi Fi network that is connected 3 FORGET AddingaWi Finetworkmanually Turn Wi Fi on before...

Страница 173: ...terminal s name displayed on the detected Wi Fi Direct compatible device tap u Rename device Information Wi Fi Direct function becomes available when you install a compatible application Turn on Wi Fi automatically Set whether to automatically turn on Wi Fi when the terminal detects a saved high quality Wi Fi network and connect to it Open network notification Set whether to notify you when a high...

Страница 174: ...nese only For using mopera U and Business mopera Internet add the access point manually For details on mopera U refer to mopera U website https www mopera net in Japanese only Mobile network Mobile data P 172 Data roaming P 222 App data usage Check mobile data usage of each application for the usage cycle which is specified in App data usage cycle P 175 To set restriction of background mobile data...

Страница 175: ...K 4 APN uEnter an access point name u OK 5 Tap and enter all other information required by your network operator 6 u Save u OK Information Do not change the MCC MNC If you change them to the values other than the default 440 10 the access point will not be displayed on the APN screen If the set access point is not displayed in Step 2uTap Reset to default or tap and then set the access point again ...

Страница 176: ...arning limit Set a usage cycle measuring period for amount of mobile data usage or a warning level or upper limit of mobile data usage 1 From the Home screen apps folder u Settings u Network internet u Data usage Data usage XXXX used Amount of usage mobile data for the usage cycle which is specified in App data usage cycle P 175 is displayed Data saver P 174 Mobile data Enabling Disabling mobile d...

Страница 177: ...ailable when the docomo nano UIM card is not inserted mobile data communication is disabled or use of mobile network is not available due to out of service area Up to 15 portable hotspot Wi Fi tethering 10 USB tethering 1 Bluetooth tethering 4 can be connected at the same time EnablingPortablehotspot You can use the terminal as a Wi Fi access point to connect up to 10 wireless LAN devices to the I...

Страница 178: ... network name SSID of the Wi Fi access point you want to set The device name of the terminal is set by default 4 Tap Security setting itemuTap a security type of the Wi Fi access point you want to set 5 Enter a password of the Wi Fi access point to set as required By default a password is set in a random manner 6 SAVE EnablingUSBtethering 1 Connect the terminal to a PC with USB cable A to C 01 opt...

Страница 179: ...al from a Bluetooth device perform pairing P 212 and then set the connection method for connecting the terminal For operation on a Bluetooth device refer to the manuals of the Bluetooth device In this mode the functions of using radio wave transmissions such as calling accessing to the Internet including sending receiving mails etc are disabled 1 From the Home screen apps folder u Settings u Netwo...

Страница 180: ...set required items of VPN settings 4 SAVE Information To edit VPN tap of VPN in Step 2uEnter or set each itemu SAVE To delete VPN tap of VPN in Step 2u FORGET ConnectingtoaVPN 1 From the Home screen apps folder u Settings u Network internet u Advanced u VPN 2 Tap a VPN to connect to 3 CONNECT When you are connected to a VPN appears in the status bar If the username or the password is not entered w...

Страница 181: ...vice or pair with a Bluetooth device Received files 1 P 214 Cast 1 Display the terminal s screen on a device that supports Google Cast etc Screen mirroring 1 2 Connect to a TV or tablet compatible with Screen mirroring to display the screen on the terminal Media server 1 P 218 NFC Osaifu Keitai settings 1 P 148 P 214 USB Connectivity 1 Install software Set whether to display a confirmation screen ...

Страница 182: ... authentication etc with an animation display like wave pattern Grid size Set the grid size of Home screen Xperia Home or Application screen P 64 Pane transitions Set the operation of page switch when swiping flicking the Home screen Xperia Home left or right P 64 Widgets Add widgets to the Home screen Xperia Home P 62 Shortcuts Add shortcuts to the Home screen Xperia Home P 63 Apps notifications ...

Страница 183: ...ons 2 Tap the application to force stop 3 FORCE STOP uConfirm the content of the screen and then OK Uninstallingapplications Before uninstalling application back up contents you want to save including data saved in the application 1 From the Home screen apps folder u Settings u Apps notifications u See all XX apps 2 Tap the application to uninstall 3 UNINSTALL u OK UNINSTALL DISABLE P 181 P 182 FO...

Страница 184: ... them but they are not uninstalled 1 From the Home screen apps folder u Settings u Apps notifications u See all XX apps Tap u Show system to show all applications 2 Tap the application to disable 3 DISABLE uConfirm the content of the screen and then DISABLE APP Information When you disabled an application some other applications linked to the disabled application may not be operated correctly Enab...

Страница 185: ...ication sound P 190 Do not disturb Sound vibration Set to allow sound and vibration when Do not disturb is On Notifications Set notification operation when Do not disturb is On Calls Set to allow incoming call operation when Do not disturb is On Messages events reminders Set to allow notification sound and vibration of Message when Do not disturb is On Also set whether to allow notification sound ...

Страница 186: ...level and usage condition is displayed Apps are running normally 1 Battery usage condition etc is displayed STAMINA mode Restrict the operations and a part of functions of the terminal to save the battery power Select Auto start at XX battery to set to enable STAMINA mode when the battery level reaches to a specified level Tap to specify a battery level to enable the function Tap STAMINA level to ...

Страница 187: ...h consuming a lot of battery Device usage 2 Displays the elapsed time from the last full charge to the present time and the time used by the screen Usesincelastfull charge 2 Displays applications or functions which use the battery since the last full charge Display Brightness level P 186 Adaptive brightness Adjust the screen brightness automatically according to the ambient brightness etc based on...

Страница 188: ... screen brightness or turn off the screen according to the cover commercially available you use Glove mode Increase touch sensitivity to enable touch operation with gloved hand Depending on the material of gloves touch operation may be difficult Smart backlight control Set the screen not to turn off when you hold the terminal in your hand but touch operation is not performed The screen may turn of...

Страница 189: ...engine to use location information to improve application predictability for showing in the Side sense menu Sensor sensitivity Double tap speed Adjust recognition of double tapping speed for the side edge of the screen P 49 Slide length Adjust recognition of sliding length for the side edge of the screen P 49 Sensor enabled Select available range of the side edge of the screen P 49 from on both si...

Страница 190: ...even if they have different volume levels Accessory settings Automatic optimization Optimize sound quality by analyzing your ear shape or characteristic of connected headphone Wireless playback quality Set to use LDAC compatible device or aptX HD compatible device for playback of high sound quality audio The setting can be made when a compatible device is connected Media volume P 189 Dynamic Vibra...

Страница 191: ...ou can adjust In call volume by pressing the volume key during a call Pressing the volume key or the power key mutes ringtone for incoming calls Do not disturb P 183 Phone ringtone P 190 Notification sound Default alarm ringtone Dialpad tones Set whether to emit sound when tapping the dialpad Screen locking sounds Set whether to emit sound when pressing the power key to lock the screen or unlockin...

Страница 192: ...ormat the USB storage or microSD card 1 From the Home screen apps folder u Settings u Storage 1 Displayed items vary depending on recognition condition of USB storage or microSD card 2 Only data in specific folders stored in the internal storage will be transferred to the microSD card Setting the ringtone notification sound alarm ringtone Storage XX XXGB Total used of 64 00 GB 1 Used memory and to...

Страница 193: ...re that formatting will erase all their data 1 From the Home screen apps folder u Settings u Lock screen security Lock screen security Google Play Protect 1 Set whether to scan the terminal regularly and check security threats Find My Device 1 Set ON OFF of Find My Device or check a way of searching the terminal Software update 1 Check availability of Software update P 243 Screen lock P 195 Finger...

Страница 194: ...rsknowyour security code If your security code is known by anyone else DOCOMO shall have no liability for any loss due to any unauthorized use of it Ifyouforgetyoursecuritycodes youmust bring your official identification such as driver s license the terminal and docomo nano UIM card with you to the nearestdocomoShop Fordetails contact the General Inquiries on the last page SIM card lock 2 3 P 194 ...

Страница 195: ...er to NTT DOCOMO website https www nttdocomo co jp english support trouble password network PIN code The docomo nano UIM card has a security code of PIN code The code is set to 0000 at subscription which you can change by yourself P 194 PIN code is a 4 to 8 digit security number code that must be entered for user confirmation to prevent unauthorized use of docomo nano UIM card by a third party eve...

Страница 196: ...nt Google account is an ID password to use Google services By setting Google account to the terminal you can use Gmail to send Email use Google Play to download applications or contents such as games For setup of Google account see Setting up a Google account P 201 By entering PIN code when powered on you can protect from improper use 1 From the Home screen apps folder u Settings u Lock screen sec...

Страница 197: ...n the Pattern is set Lockingthescreen Screen lock is activated automatically when you press the power key to put the terminal into sleep mode after the screen lock unlocking method P 195 is specified or when the time specified in Automatically lock has elapsed after the screen turns off To unlock the screen 1 While the screen is locked press the power key to turn on the screenuSwipe flick up the s...

Страница 198: ...ur terminal recognizes a fingerprint based on its unique characteristics For this reason someusersmaynotbeabletousefingerprint authentication if their fingerprints are not sufficiently unique Authentication performance how successfully your fingerprint can be recognized when you touch the fingerprint sensor properly varies depending on the condition of your fingers Fingerprint registration may fai...

Страница 199: ...t sensor or paint it with ink or something similar When the fingerprint sensor is soiled fingerprint recognition or authentication performance may be degraded Occasionally clean the surface of the fingerprint sensor Registeringyourfingerprint 1 From the Home screen apps folder u Settings u Lock screen security u Fingerprint Manager If you have already registered fingerprint the entry screen for un...

Страница 200: ... set If fingerprint authentication failed 20 times consecutively the fingerprint sensor is disabled Swipe flick the screen up and then enter the screen lock unlocking method that you set Make settings for the lock screen and Ambient display While Ambient display is ON you can display an image in sleep mode or check date time or notifications 1 From the Home screen apps folder u Settings u Lock scr...

Страница 201: ...n when the unlocking method of the screen lock is Pattern PIN Password Album art Set whether to display an album art of music which is playing paused as a background of the lock screen Lock screen message Enter a message to be displayed on the lock screen Show notifications Set whether to show notification details on the lock screen 2 Keep notifications Set whether to keep the notification content...

Страница 202: ...k up restore data of docomo apps or check the list of apps whose backup data stored docomo apps management Manage the docomo apps or set the notifications or auto update Osusume Apps Set for Osusume Apps or check received notifications Osusume hint Set whether to display Osusume hint check hints displayed in the past etc AUTO GPS Set to use the services supporting AUTO GPS docomo location informat...

Страница 203: ...oogle Drive on the Google Services screen when registering P 205 You can use the terminal without setting your Google account however the Google services such as Gmail Google Play etc are not available To set ON OFF of each auto sync item from the Home screen apps folder u Settings u Accounts uTap the set Google accountu Account sync Settingotheraccount 1 From the Home screen apps folder u Setting...

Страница 204: ... sync uSelect items to sync You can check Xperia使いこなしガイド Guide for using Xperia which introduces use of the terminal or view the support page Also you can set for battery or optimization of storage and memory 1 From the Home screen apps folder u Settings u Xperia Assist Setting auto sync of accounts Xperia Assist Xperia使いこなしガイド Guide for using Xperia View Xperia使いこなしガ イド Guide for using Xperia to ...

Страница 205: ...or correction Correct color when distinguishing colors is difficult Color inversion Set whether to invert color of screen Large mouse pointer Set whether to enlarge the pointer when using the mouse Remove animations Set whether to turn off the animation effect of screen display Click after mouse pointer stops moving Set whether to click when the mouse pointer stops while using a mouse Power button...

Страница 206: ...es 1 From the Home screen apps folder u Settings u Google 2 Set each item Information To search by voice using Bluetooth device in Step 2 Search u Voice uTap of Bluetooth headset Setting Text to speech output Preferred engine Select and set the engine for Text to speech output Language Set language for Text to speech output Speech rate Set speed at reading out text Pitch Set the pitch of voice to ...

Страница 207: ...ontents appear and you can set auto restoration etc Reset options 1 Reset network settings Reset the network settings Reset app preferences P 182 Erase all data factory reset P 208 Multiple users 1 P 209 About phone Software Update P 243 Application update Check application updates or set the auto update Device name Register a name of the terminal Phone number Your own phone number is displayed Em...

Страница 208: ...Key Keyboard Make settings of SwiftKey Keyboard This item is displayed when the language is set to English Xperia Japanese keyboard P 86 Google voice typing Moji Henshu Manage keyboards Set the input method to be switched when entering characters Physical keyboard Show on screen keyboard Set whether to display the software keyboard on the terminal when entering characters with a peripheral keyboar...

Страница 209: ...Date time Information Correction of the time differences may not be performed correctly depending on the overseas network operator In that case set time zone manually Spell checker 1 2 Set whether to run the spell checker Autofill service 1 Select autofill services or make the settings Personal dictionary 1 Add words used in the spell checker and other applications Pointer speed 1 Set pointer spee...

Страница 210: ...reen apps folder u Settings u System u Advanced u Reset options u Erase all data factory reset 2 RESET PHONE Enter the screen lock unlocking method Pattern PIN Password as required 3 ERASE EVERYTHING Information Some preinstalled content can be re downloaded even if it is deleted when you reset your terminal To download from the Home screen tap apps folder u Xperia Lounge Japan u u サポート ブラウザで開きます ...

Страница 211: ... or use of applications or functions are restricted Multiple users You Owner Check or edit profile information Guest Tap this item to add a guest or switch to the guest when the owner uses the terminal Also set whether to allow a guest to use the phone by tapping When a guest is using the terminal Remove guest is displayed You can tap it to delete the applications and data that the guest has used ...

Страница 212: ...p to display the item in the menu 2 Tap the folder as required 3 Tap a file Data can be displayed with the compatible application Information To search data tap in Step 2 and enter a file name then tap of the software keyboard Storage structure Phone Internal shared storage Alarms Stores alarm sounds etc Android Stores setting data for system or each application temporary files etc DCIM Stores sti...

Страница 213: ...Touch and hold a folder or file you want to rename 4 u Rename uEnter a nameu OK Deleting a folder or file 1 From the Home screen apps folder u File manager 2 Tap the folder as required 3 Touch and hold a folder or file you want to delete 4 u OK Copying Moving a folder or file 1 From the Home screen apps folder u File manager 2 Tap the folder as required 3 Touch and hold a folder or file you want t...

Страница 214: ...ccur or the communications speed may lower Also you may hear noise or have a connection problem In these cases do the following Keep the Bluetooth device approximately 10 m or more away from a wireless LAN device Withinapproximately10m turnoffeither the Bluetooth device or the wireless LAN device 1 From the Home screen apps folder u Settings u Device connection 2 Pair new device Tap Device name to...

Страница 215: ...to the device tap a name or on the right of paired Bluetooth device name To unpair tap a name or on the right of the Bluetooth device to be unpairedu FORGET u FORGET DEVICE 1 From the Home screen apps folder u Settings u Device connection 2 Previously connected devices uA name of Bluetooth device you want to connect Information Up to 7 devices can be connected at the same time Depending on profile...

Страница 216: ...folder u Settings u Device connection u Connection preferences u Received files You can send receive data to from a device with NFC such as a mobile phone To send receive data enable NFC Reader Writer P2P and Android Beam in advance P 215 Hold 2 terminals in parallel and place marks face to face Do not move them until sending receiving is complete mark location differs depending on mobile phone Ch...

Страница 217: ...reen tap OK Information While NFC Osaifu Keitai lock P 150 is set the NFC Reader Writer P2P function cannot be turned on While the camera is activated the Reader Writer function is not available By using the Android Beam with a NFC compatible Android device you can send or receive images music photos or videos taken with the terminal with simple operations Turn on Reader Writer P2P and Android Bea...

Страница 218: ...erminal for sending When the data is received the application which corresponds to the data activates When data such as still image or video or music is received may appear on the status bar Drag the status bar downwardsuTap Beam complete to launch the application associated with the received data Follow the onscreen instructions ...

Страница 219: ...e https www sonymobile co jp support software xperia companion in Japanese only 1 Connect the terminal to a PC with USB cable A to C 01 optional etc P 44 When a screen for installing driver software appears wait for a while until the installation is complete When the confirmation screen of installing software appears on the terminal tap SKIP or CANCEL 2 ALLOW The terminal is displayed on the PC sc...

Страница 220: ... folder u Settings u Device connection u Connection preferences u Media server 2 of Share media appears on the status bar Tap Change server name to rename the terminal media server displayed on a DLNA device 3 Connect the DLNA device to the terminal using an application on the DLNA device Access request for media server is notified to the terminal 4 On the Media server settings screen of the termi...

Страница 221: ...of 3 5mm Earphone jack conversion TV Antenna cable SO01 1 Insert a connecting plug of commercially available headphones or earphones into the headset jack of 3 5mm Earphone jack conversion TV Antenna cable SO01 2 Insert the Type C plug of the 3 5mm Earphone jack conversion TV Antenna cable SO01 into the USB Type C jack of the terminal Information The terminal supports a quadrupole headset which is...

Страница 222: ...ailablein countries and areas supporting 3G 850MHz GSM 850MHz Information For Country codes International call access numbers Universal number international prefix supported countries areas and network operators refer to NTT DOCOMO website To use packet communication during roaming setting Data roaming to ON in Mobile network is required P 222 Information To use Message application overseas settin...

Страница 223: ...er For operations for each application ask the application provider Networkservicesettings If you subscribe to network services you can use network services such as Voice Mail Service Call Forwarding Service Caller ID Display Request Service etc even overseas However some network services cannot be used Tousenetworkservicesoverseas youneedto set Remote operation settings P 104 to Activate Remote o...

Страница 224: ...ng uRead the notes and tap OK Settingnetwork By default the terminal automatically searches available network and connect to it To switch network manually set as follows 1 From the Home screen apps folder u Settings u Network internet u Mobile network u Advanced 2 of Automatically select network If the note appears tap OK Perform network search 3 Tap a network from available networks Information I...

Страница 225: ...l clock are corrected by receiving the information related to time and time differences from the network of overseas network operator you connect to Correction of the time time differences may notbeperformedcorrectlydependingonthe network of overseas network operator In that case set time zone manually Timing of correction varies by the overseas network operator Setting Date time P 207 Aboutinquir...

Страница 226: ...and hold 0 uEnter Country code Area code City code a phone number in the order If the area code city code begins with 0 omit 0 However 0 may be required to dial to some country or area such as Italy To call an overseas WORLD WING user enter 81 Japan for the country code 3 To make a video call tap u Make video call 4 When the call is finished Information For details on the Video call see Making Rec...

Страница 227: ... the call is finished When the other party uses international roaming service make a call as an international call to Japan even when you stay in the same country as the other party You can receive a call using the international roaming service 1 Swipe flick upontheincoming screen 2 When the call is finished Information When you received a call during the international roaming regardless of which ...

Страница 228: ...ss number and 81 Country code of Japan International access number 81 90 or 80 70 XXXX XXXX Make settings for using international roaming services For some overseas network operators settings may not be made 1 From the Home screen u 2 Settings u Calls u Roaming settings International roaming settings Restricting incoming calls Set to restrict incoming calls during international roaming Incoming ca...

Страница 229: ...g International dialing assist Auto conversion Add international prefix or country code automatically Country code Select a country code used for auto conversion International prefix Select an international prefix used for auto conversion Setting Network service overseas Remote operation charged Set whether to start Remote operation Caller ID request charged Play a guidance asking for notifying ca...

Страница 230: ... before you traveled When using packet communication overseas Turn off Data roaming P 222 If you cannot connect to DOCOMO network automatically after returning to Japan Set Preferrednetworktype P 223 to 4G preferred 3G GSM Turn on Automatically select network P 222 After returning to Japan ...

Страница 231: ...aseitwhentheterminalvibrates3 times consecutively to force stop Note that some data and settings may be erased due to force quit operation Charging Cannot charge The notification LED does not turn on or the icon does not indicate charging status Check if the adapter s power plug is correctly inserted to a power outlet or accessory socket Check if the adapter and the terminal are set correctly P 42...

Страница 232: ...tion You can continue to use the terminal When the temperature of the terminal is raised a message appears on the Notification panel and some applications or services may become unavailable In this case wait until the temperature of the terminal drops and use again The operation time provided by the battery is short Is the terminal left for a long time under the state of out of service area Out of...

Страница 233: ... card is attached in the right direction P 33 The clock is not on time The clock time may become wrong when the power is turned on for a long time Check if Automatic date time Automatic time zone and Automatic 24 hour format are ON and turn the power off and on in a place with strong radio wave conditions P 45 P 207 The terminal operation is unstable Instability may be caused by applications that ...

Страница 234: ... forwarding service 0 sec P 104 Check if Pick up after in Answering Machine is set to 0 seconds P 103 Check if you set Call Blocking P 104 Cannot call Even when moving does not disappear or although radio waves are enough making receiving calls is unavailable Turn the power OFF and ON or remove and attach docomo nano UIM card P 33 P 45 Due to the nature of radio waves making receiving calls may be...

Страница 235: ...equency in Email account settings to Manual P 122 Camera Still pictures and video taken with the camera are blurred Check if clouds dirt or film attach to the lens of camera Set SteadyShot and then shoot P 137 Photo or video shot with flash is whitish If there is your finger or cover around the camera lens flash light may reflect and affect photo or video shooting TV Unable to watching Full seg 1S...

Страница 236: ...data communication overseas Turn on Data roaming P 222 The terminal suddenly became unavailable while using overseas Check if usage amount exceeds the limit of maximum charges for use Foruseof International roaming WORLD WING the limit of maximum charges for use is set in advance If the limit of maximum charges for use is exceeded pay the charges Cannot receive calls overseas Is Restricting incomi...

Страница 237: ...al and the Bluetooth device commercially available P 212 Calls cannot be made from the terminal connecting to external device such as car navigation or handsfree device If calls are made several times when the other party does not answer or is out of service the call to this number may be disabled Inthiscase turnterminaloffand on External device connection An external device connected using USB ca...

Страница 238: ... 200 No service The terminal is out of service area or the received signal is too weak Move to a location where radio signal can be reached The docomo nano UIM card is not working properly Removing and inserting docomo nano UIM card may solve the problem If the problem persists contact Repairs Inquiries Request on the last page of this manual in Japanese only Mobile network not available Install d...

Страница 239: ...e service Appears when normal voice call service is not available No voice service or emergency calling Appears when normal emergency voice call service is not available No mobile data service Appears when the data service is not available SIM card is locked Enter your PIN code P 193 correctly SIM card is PUK locked Enter your PUK PIN Unlock Key P 194 correctly PIN lock disable code is locked PIN ...

Страница 240: ... subscribers or LINE for inquiries of the operator The screen sharing service is not available when using LINE for inquiries 1 Call あんしん遠隔サポートセンター Anshin Enkaku Support center From DOCOMO mobile phones No prefix 15710 toll free From land line phones 0120 783 360 Business hours 9 00 a m to 8 00 p m open all year round To make a call to the Anshin Enkaku Support center from the terminal from the Hom...

Страница 241: ...cost free repair warranty The specifications or outer appearance of the terminalincluding theaccessoriesare subject to change for improvement without prior notice Data saved in the Contacts etc may be changed lost due to the trouble repairs or handling of the terminal DOCOMO recommends making a copy of the Phonebook data etc in case You can save Phonebook data in a microSD card inserted to the ter...

Страница 242: ...4 The malfunction or damage is due to connected devices other than specified or consumable items 5 The malfunction or damage is due to water infiltration wetting is detected by wetting detectable sticker of the terminal signs of submergence or water stain is found or corrosion by condensation is found 6 The product has been repaired by other than a repair counter specified by DOCOMO c This warrant...

Страница 243: ...NTT DOCOMO website https www nttdocomo co jp support trouble repair shop compatible index html in Japanese only However depending on the defective portion repairmaynotbepossiblebecause of a shortage of repair parts For details contact DOCOMO specified repair office Precautions Never modify the terminal or accessories Doing so may result in fire injuries or malfunctions The modified terminal may be...

Страница 244: ...minal because the card may become unavailable The terminal is waterproof If inside of the terminal gets wet or moist however turn the power off then bring the terminal to a repair office as soon as possible Note that repair may not be possible depending on the condition of the terminal Createddataanddownload information Note that data you created or data you retrieved or downloaded from sources ot...

Страница 245: ...in using the terminal more comfortable Improving quality Update the preinstalled applications or functions of the terminal to improve the quality resulting in using the terminal more comfortable Security patch update Apply the security patch software that manages the vulnerability so that you can use the terminal safer For detail of the updates which provided to the terminal and the period refer t...

Страница 246: ...backup for each application varies by application For procedure of data backup for each application contact the developer of application Startingtheupdate To start updating perform the either operation in the following From the update notification From the status bar of the terminal tap the notification of Started distributing software update or Softwareupdatestartverification and then start updat...

Страница 247: ...ompletion When the update is complete Software update complete appears on the status bar of the terminal For Android OS version upgrade an introduction of the latest functions appears after Software update complete is selected After the Android OS version upgrade check if there are updates of the applications that you have installed personally Without updating them operations may become unstable o...

Страница 248: ...date failed and all operationsbecomedisabled pleasecontacta DOCOMO specified repair office Software update is unavailable in the following cases Solve the phenomenon and then retry During a call Tethering in use as an access point When date and time are not set correctly When the remaining battery is not sufficient When the available memory is not sufficient in the internal storage During Internat...

Страница 249: ...ity 2 3200mAh Continuous stand by time 3 4 LTE Stationary Auto Approx 440 hours 3G Stationary Auto Approx 510 hours GSM Stationary Auto Approx 380 hours Continuous call time 4 5 LTE VoLTE Approx 1 310 min LTE VoLTE HD Approx 1 200 min LTE VoLTE Video call Approx 300 min 3G Approx 940 min GSM Approx 630 min Charging time AC Adapter 07 Approx 170 min Wireless LAN Standards Compliant with IEEE802 11a...

Страница 250: ...ackside illumination layered CMOS Front camera Backside illumination layered CMOS Size Camera 1 2 3 inches Front camera 1 3 06 inches Camera effective pixels Camera Approx 19 2 million pixels Front camera Approx 13 2 million pixels Camera recorded pixels Max Camera Approx 19 2 million pixels Front camera Approx 13 2 million pixels Recording file format Video MP4 Still image JPEG Zoom digital Video...

Страница 251: ...nds on the amount of available memory on your terminal File format media The terminal supports the display or playback of the following file formats Still images are saved in JPEG format when shot with Camera in the terminal Type File format Sound AAC LC mp4 m4v 3gp 3gpp 3g2 3gpp2 ts aac m4a AAC mp4 3gp 3gpp 3g2 3gpp2 ts aac eAAC mp4 3gp 3gpp 3g2 3gpp2 ts aac AAC ELD mp4 3gp 3gpp 3g2 3gpp2 AMR NB ...

Страница 252: ...se Asturian language Bamanankan Bengali Bashkir language Bhojpuri Bislama Bodo language Bosanski jezik Breton Bulgarian Burmese Catala Cebuan Chamorro Chechen language Chewa Chinese Hong Kong Chinese Simplified Chinese Taiwan Chinese Yue Chuvash language Coptic Cornish Corsu Croatian Czech Dagbani l Danish Maldivian language Dogri Dutch Belgium Dutch Holland English Australia English Canada Englis...

Страница 253: ...Alba Papiamento Curacao Pashto language Persian Latin Persian Piedmontese language Polish Portuguese Brazil Portuguese Portugal Romanian Russian Rusyn language Rwandan Yakut language Samoan language Samogitian dialect Sango language Sanskrit Santali language devanagari Santali language Ol Ciki Saramaccan Sardinian language Sassarese language Scottish Scottish Gaelic Serbian Serbian Cyrillic Sotho ...

Страница 254: ...are solely in conjunction with the Device on which it is installed or delivered Ownership of the Software is not sold transferred or otherwise conveyed Do not use any means to discover the source code or any component of the Software reproduce and distribute the Software or modify the Software You are entitled to transfer rights and obligations to the Software to a third party solely together with...

Страница 255: ...th your device is provided with additional terms and conditions such provisions shall also govern your possession and usage of the Software This product and its accessories may be covered and controlled by Japans export control regulations Foreign Exchange and Foreign Trade Law and related laws and regulations And they are also under coverage of Export Administration Regulations of the U S When ex...

Страница 256: ... infringement of their right of portrait Trademarks The company names and product names appearing in this manual are trademarks or registered trademarks of their respective holders FOMA sp mode mopera U WORLD WING WORLDCALL iD Xi mydaiz LIVE UX logoof Osaifu Keitai logoof iD logoof Area Mail logo of Instruction Manual logo of dmenu logo of dmarket logo of Anshin Enkaku Support logo of Anshin Scan ...

Страница 257: ...HC logo and microSDXClogoaretrademarksofSD 3C LLC USB Type C is a trademark of USB Implementers Forum is a registered trademark of FeliCa Networks Inc FeliCa is a contactless IC card technology developed by Sony Corporation Twitter and Twitter logo are trademarks or registered trademarks of Twitter Inc The Qi symbol is a trademark of the Wireless Power Consortium Google and Google logo Android Goo...

Страница 258: ...se of a consumer for i encoding video in compliance with the MPEG 4 visual standard MPEG 4 video or the AVC standard AVC video and or ii decoding MPEG 4 or AVC video that was encoded by a consumer engaged in a personal and non commercial activity and or was obtained from a video provider licensed by MPEG LA to provide MPEG 4 and or AVC video No license is granted or shall be implied for any other ...

Страница 259: ...er other than NTT DOCOMO Available services and functions may be limited DOCOMO is not liable to any failures or malfunctions For details of SIM unlock procedure refer to NTT DOCOMO website 1 Insert SIM card provided by other company 2 Power on the terminal 3 Enter the SIM unlock codeu UNLOCK SIM unlock ...

Страница 260: ...X 87 List 69 Resetting 182 Search docomo LIVE UX 91 Search Xperia Home 69 Uninstalling docomo LIVE UX 89 Uninstalling Play Store 147 Uninstalling Xperia Home 76 Xperia Home 69 Application screen Adding 77 Folder 76 Rearranging 77 Simple Home 66 Switching 69 Xperia Home 69 Application selection screen 54 Apps button 61 Apps notifications 180 AR effect 72 Area Mail 124 AUTO GPS 200 Automatically syn...

Страница 261: ...2 Portrait selfie 141 Settings 136 Shooting screen 131 Shooting still pictures 133 Shooting videos 135 Smart launch 130 Still image size 132 Video size 132 Character entry 80 Editing 85 Input method 82 Settings 86 Charging 38 Desktop holder 40 Using a PC 44 Using a wireless charger 43 Using AC adapter 42 Using DC adapter 43 Chrome 127 Adding tab 127 Bookmarks 129 History 129 Incognito tab 127 Link...

Страница 262: ...Saving attachment file 121 Sending 120 Email account Changing 122 Settings 119 Emergency call 95 Emergency mode 53 Enable VoLTE 223 English guidance 104 Enkaku support 238 EVERYBODY S GOLF 72 F Facebook 73 File manager 210 Fingerprint authentication 196 Authentication 198 Registration 197 Flick input 84 Full seg 152 Function that allows users and a guest to use the terminal 209 G Gmail 123 Google ...

Страница 263: ...ng screens 64 Wallpaper docomo LIVE UX 90 Wallpaper Simple Home 67 Wallpaper Xperia Home 63 Widget docomo LIVE UX 89 Widget Xperia Home 62 Xperia Home 61 Home Settings Xperia Home 64 I iD application 151 In call volume Setting 189 Initial settings 47 Instagram 74 International call Making a call from Japan 96 Making a call in the country you stay 224 International roaming 220 K Key icons 51 Keypad...

Страница 264: ...cation LED 55 Notification panel 58 Notification sound 190 Notification volume 189 Nuisance call blocking service 104 O One handed mode 79 Osaifu Keitai 148 NFC Osaifu Keitai lock 150 Osaifu Keitai compatible service 149 Tap pay 151 Osusume Apps 91 Own number My profile 109 P Phone Ringtone volume 97 When an application is running 98 Phonebook 108 Adding a new contact 109 cloud 109 Cloud menu 111 ...

Страница 265: ...sage 98 Remote operation settings 104 Remove account 201 Reset 208 Ring volume 189 Ringtone 190 Roaming settings 226 S Schedule Creating 162 Display 162 Screen lock 195 Canceling 46 Setting 195 Searching 80 Security code Network security code 193 PIN code 193 PIN Unlock Key PUK code 194 Setting menu 168 Shooting still pictures 133 Shooting videos 135 Side sense 49 Setting 187 Silent mode 52 SIM ca...

Страница 266: ...229 Turning power on off 45 TV 152 Program guide 155 Recording 157 Reserve Recording Viewing 155 Settings 155 TV antenna cable 153 TV link 155 Watching TV 153 Twitter 74 U USB connection 217 USB Storage 190 V Vibrate Settings 188 Vibration Silent mode 52 Video call 94 Declining a call 98 Making a call 94 Receiving a call 97 When an application is running 98 Video TV SideView 74 Viewing photos 143 ...

Страница 267: ...Xperia Assist 202 Xperia Japanese keyboard 86 Online help 80 Xperia Lounge Japan 74 Y YouTube 74 Symbols Message Deleting a message 118 Receiving 118 Setting 119 Numerics 1Seg 152 3D Creator 75 Message 114 Deleting a thread 118 Forwarding 118 Sending 116 ...

Страница 268: ...bile phone while walking That extremely narrows your field of view and may lead an accident possibly involving surrounding people Stop and stay in a safe place and then use smartphone Have good manners Silent mode P 52 Silentmodemutesthesoundsoftheterminalsuch as the operation sounds and the ringtone Shutter sound cannot be muted Public mode power OFF P 104 Tells the caller via a guidance message ...

Страница 269: ...le phones In Japanese only No prefix 113 toll free Unavailable from land line phones etc From land line phones In Japanese only 0120 800 000 toll free Unavailable from part of IP phones Business hours 24 hours open all year round From land line phones International call access number of your country of stay 81 3 6832 6600 charges apply Voice communication charges to Japan apply For international c...

Отзывы: