Performance Verification
N-550
13
Note
:
A decimal point to the right of the value in either window display
indicates that the alarm limits are not power-on default values.
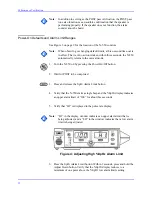
7. Press the SpO
2
Alarm Limit button two times rapidly (twice within three
seconds). Verify that the N-550 emits two beeps and that the %SpO
2
display indicates “85” for three seconds. Verify that “LO” is displayed in
the pulse rate window.
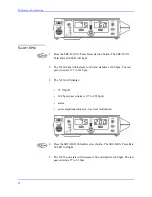
Figure 5: Adjusting Low %SpO
2
Alarm Limit
8. Press the SpO
2
Alarm Limit button two times rapidly. Within three
seconds, press and hold the Adjust Down button and verify that the
%SpO
2
display reduces to a minimum of “20.” Press and hold the Adjust
Up button and verify that the %SpO
2
display cannot be raised past the
upper alarm limit setting minus one point.
9. Turn the N-550 off by pressing the Power On/Off button.
10. Turn the N-550 on by pressing the Power On/Off button.
11. Wait for POST to be completed. The %SpO
2
and pulse rate alarm limits
will be reset to the default values.
Содержание OxiMax N-550
Страница 1: ...N 550 Pulse Oximeter Service Manual min min SpO2 N 550 SatSeconds SpO2 ...
Страница 10: ...Blank Page ...
Страница 38: ...Blank Page ...
Страница 64: ...Blank Page ...
Страница 81: ...Disassembly Guide N 550 71 Figure 39 Equipotential Ground Terminal Removed ...
Страница 82: ...Blank Page ...
Страница 86: ...Spare Parts 76 Figure 40 Exploded View ...
Страница 90: ...Blank Page ...
Страница 108: ...Blank Page ...
Страница 120: ...Blank Page ...
Страница 130: ...Figure 56 Main PCB Parts Locator Diagram 129 Technical Description N 550 ...
Страница 131: ...Figure 57 Front Panel Parts Locator Diagram 131 N 550 Technical Description ...
Страница 136: ...Blank Page ...
Страница 137: ... ...

