System Configuration 4-23
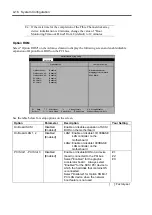
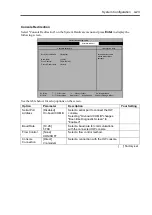
Console Redirection
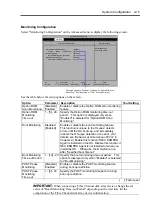
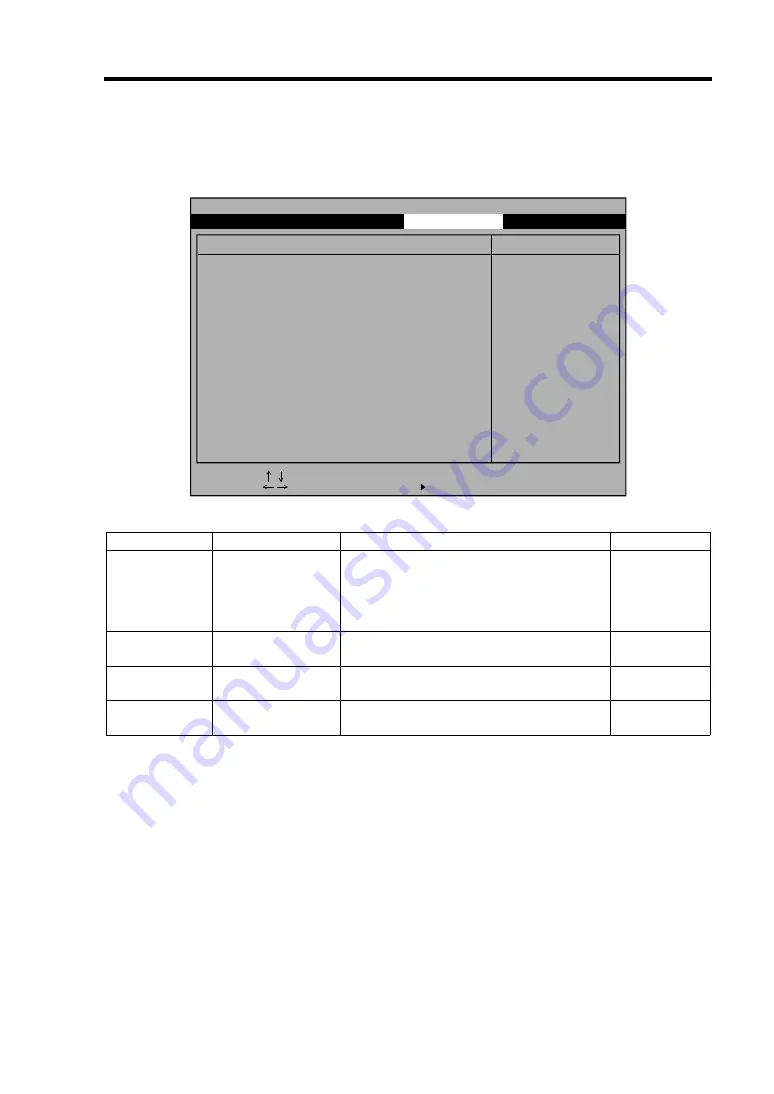
Select "Console Redirection" on the System Hardware menu and press
Enter
to display the
following screen.
Serial Port Address:
Baud Rate:
Flow Control:
Console Connection:
If enabled, the console
will be redirected to
this port.
Item Specific Help
Console Redirection
[Disabled]
[19.2K]
[XON/XOFF]
[Direct]
System Hardware
Phoenix BIOS Setup Utility
F1 Help
-/+ Change Values
F9 Setup Defaults
F10 Save Changes & Exit
Sub-Menu
Enter Select
Esc Exit
Select Item
Select Menu
See the table below for setup options on the screen.
Option Parameter Description
Your
Setting
Serial Port
Address
[Disabled]
On-board COM B
Select a serial port to connect the HW
console.
Selecting "On-board COM B" changes
"Boot-time Diagnostic Screen" to
"Enabled".
Baud Rate
[19.2K]
57.6K
Select a baud rate for communications
with the connected HW console.
Flow Control
[None]
XON/XOFF
Select a flow control method.
Console
Connection
[Direct]
Via modem
Select a connection with the HW console.
[ ]: Factory-set
Содержание Express5800/320Lb FT Linux
Страница 1: ...N8800 027F 028F NEC Express5800 320Lb 320Lb R User s Guide 1st Edition 02 2003 856 122693 901 A ...
Страница 10: ...iv This page is intentionally left blank ...
Страница 16: ...x This page is intentionally left blank ...
Страница 19: ...Precautions for Use 1 3 Label A Label B Label C Label E Label D ...
Страница 20: ...1 4 Precautions for Use Rack mount model Label B Label A Label C Label D ...
Страница 21: ...Precautions for Use 1 5 Label D Label C Label B Label A ...
Страница 22: ...1 6 Precautions for Use PCI CPU Modules PCI Module CPU Module Label A Label A Label A ...
Страница 36: ...1 20 Precautions for Use This page is intentionally left blank ...
Страница 44: ...2 8 General Description Front View inside Tower model Rack mount model ...
Страница 70: ...2 34 General Description This page is intentionally left blank ...
Страница 71: ...Chapter 3 Setup This chapter describes setup procedures to make NEC Express5800 ft series ready for use ...
Страница 118: ...3 48 Setup This page is intentionally left blank ...
Страница 162: ...4 44 System Configuration This page is intentionally left blank ...
Страница 217: ...Installing and Using Utilities 5 55 Also at this time the state of the mirrored disks change to Normal Mirror Disk ...
Страница 294: ...6 14 Maintenance This page is intentionally left blank ...
Страница 295: ...Chapter 7 Troubleshooting If the product does not work properly see this chapter before deciding that it is a breakdown ...
Страница 336: ...7 42 Troubleshooting This page is intentionally left blank ...
Страница 355: ...System Upgrade 8 19 15 Check the disk you selected and click Next 16 Click Complete ...
Страница 399: ...System Upgrade 8 63 Cable ties included with cabinet ...
Страница 410: ...8 74 System Upgrade This page is intentionally left blank ...
Страница 412: ...A 2 Specifications This page is intentionally left blank ...


