System Configuration 4-7
Boot
To change the boot order of devices connected to the server
Select [Boot] and specify the boot order.
To display POST check results
Select [Advanced]
→
[Advanced]
→
[Boot-time Diagnostic Screen]
→
[Enabled].
You can also press
Esc
while the NEC log is on the screen to display POST check results.
To control from the HW console
Remote operation via LAN
Select [Advanced]
→
[Advanced]
→
[RomPilot Support]
→
[Enabled].
Remote operation via WAN
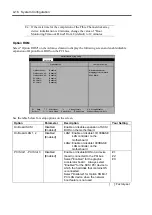
Select [System Hardware]
→
[Console Redirection] and set each item.
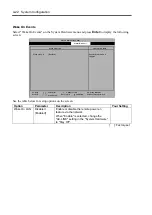
Memory
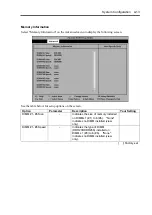
To check the installed memory (DIMM) status
Select [Advanced]
→
[Memory Reconfiguration] and check the status indications.
Saving the Configuration Data
To save the BIOS configuration data
Select [Exit]
→
[Save Changes & Exit] or [Save Changes].
To discard changes to the BIOS configuration data
Select [Exit]
→
[Exit Without Saving Changes] or [Load Previous Value].
To restore the factory-set BIOS configuration data
Select [Exit]
→
[Get Default Values].
Содержание Express5800/320Lb FT Linux
Страница 1: ...N8800 027F 028F NEC Express5800 320Lb 320Lb R User s Guide 1st Edition 02 2003 856 122693 901 A ...
Страница 10: ...iv This page is intentionally left blank ...
Страница 16: ...x This page is intentionally left blank ...
Страница 19: ...Precautions for Use 1 3 Label A Label B Label C Label E Label D ...
Страница 20: ...1 4 Precautions for Use Rack mount model Label B Label A Label C Label D ...
Страница 21: ...Precautions for Use 1 5 Label D Label C Label B Label A ...
Страница 22: ...1 6 Precautions for Use PCI CPU Modules PCI Module CPU Module Label A Label A Label A ...
Страница 36: ...1 20 Precautions for Use This page is intentionally left blank ...
Страница 44: ...2 8 General Description Front View inside Tower model Rack mount model ...
Страница 70: ...2 34 General Description This page is intentionally left blank ...
Страница 71: ...Chapter 3 Setup This chapter describes setup procedures to make NEC Express5800 ft series ready for use ...
Страница 118: ...3 48 Setup This page is intentionally left blank ...
Страница 162: ...4 44 System Configuration This page is intentionally left blank ...
Страница 217: ...Installing and Using Utilities 5 55 Also at this time the state of the mirrored disks change to Normal Mirror Disk ...
Страница 294: ...6 14 Maintenance This page is intentionally left blank ...
Страница 295: ...Chapter 7 Troubleshooting If the product does not work properly see this chapter before deciding that it is a breakdown ...
Страница 336: ...7 42 Troubleshooting This page is intentionally left blank ...
Страница 355: ...System Upgrade 8 19 15 Check the disk you selected and click Next 16 Click Complete ...
Страница 399: ...System Upgrade 8 63 Cable ties included with cabinet ...
Страница 410: ...8 74 System Upgrade This page is intentionally left blank ...
Страница 412: ...A 2 Specifications This page is intentionally left blank ...

