


General Description 2-13
Hard Disk Drive LED
The disk LED located on the drive carrier indicates the following depending on the status:
Flashing (green)
The LED indicates that the hard disk drive is accessed.
On (amber)
The LED indicates a failure of a hard disk drive mounted in RAID System.
NOTE:
Even if one (two hard disk drives in RAID6) of the hard disk
drives fails in Logical Drive (RAID1, RAID5, or RAID6), the server
can continue operation. However, replace the hard disk drive as soon as
possible, and perform reconstruction (rebuild) processing. (The failing
hard disk drive can be replaced in hot swap mode.)
Flashing switching back and forth between green and amber
The LED indicates that reconstruction (rebuild) processing is being performed for the hard
disk drive. (This flashing does not indicate a failure.) When a failing hard disk drive is
replaced in RAID System, the system automatically rebuilds the data. (Auto-rebuild
function) The LED switches back and forth between green and amber during rebuild
processing.
The LED goes off when the rebuild processing has terminated. It turns amber when the
rebuild processing fails.
IMPORTANT:
If the server is turned off during rebuild processing, the
processing is stopped. Restart the server, mount the new hard disk drive
in hot swap mode, and then perform rebuild processing again. Observe
the following notes on using the auto-rebuild function.
Do not turn the power off. (Once the power is turned off, the auto-
build function does not start.)
Let 90 seconds or more pass between when dismounting a failing
hard disk drive and when mounting the new one.
Do not replace a failing hard disk drive while rebuild processing is
being performed for another hard disk drive.
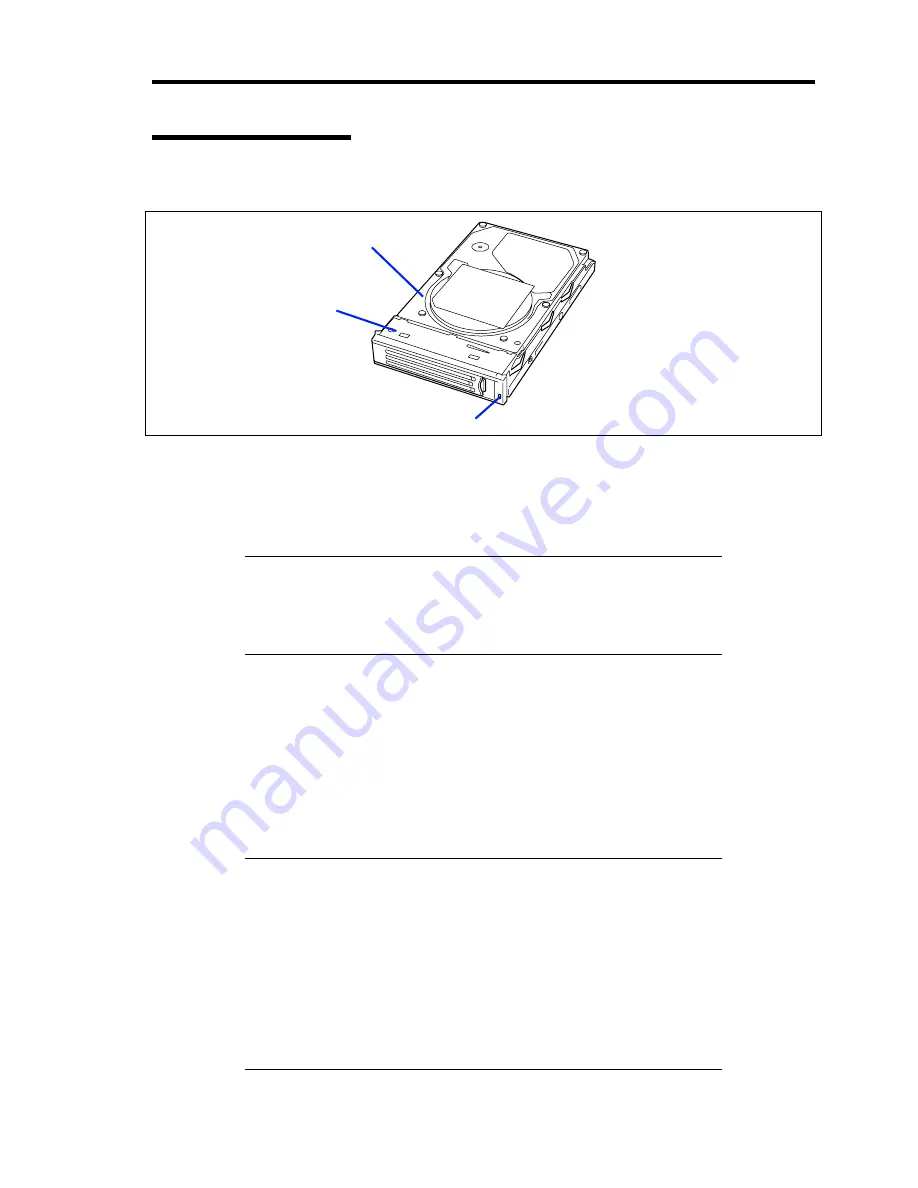
LED
Drive carrier
Hard disk drive
Содержание Express5800/120Rj-2
Страница 16: ...x This page is intentionally left blank ...
Страница 19: ...Notes on Using Your Server 1 3 Internal View ...
Страница 34: ...1 18 Notes on Using Your Server This page is intentionally left blank ...
Страница 90: ...3 24 Setting Up Your Server This page is intentionally left blank ...
Страница 129: ...Configuring Your Server 4 39 The detailed settings is continued to the next page Click Next to view more information ...
Страница 140: ...4 50 Configuring Your Server Use this menu to define several physical drives PD as a disk group DG ...
Страница 164: ...4 74 Configuring Your Server 3 Setting menu for VD 0 is displayed ...
Страница 172: ...4 82 Configuring Your Server This page is intentionally left blank ...
Страница 215: ...Installing and Using Utilities 6 9 4 Click Parameter File Creator Parameter File Creator will appear ...
Страница 240: ...7 12 Maintenance This page is intentionally left blank ...
Страница 350: ...9 74 Upgrading Your Server Removal Remove the backup device in reverse order of the installation steps ...
Страница 354: ...9 78 Upgrading Your Server This page is intentionally left blank ...
Страница 364: ...C 2 IRQ This page is intentionally left blank ...
Страница 412: ...E 24 Installing Windows Server 2003 This page is intentionally left blank ...
Страница 414: ...F 2 Using a Client Computer Which Has a CD Drive This page is intentionally left blank ...
Страница 418: ...G 4 Product Configuration Record Table This page is intentionally left blank ...


