Upgrading Your Server 9-71
11.
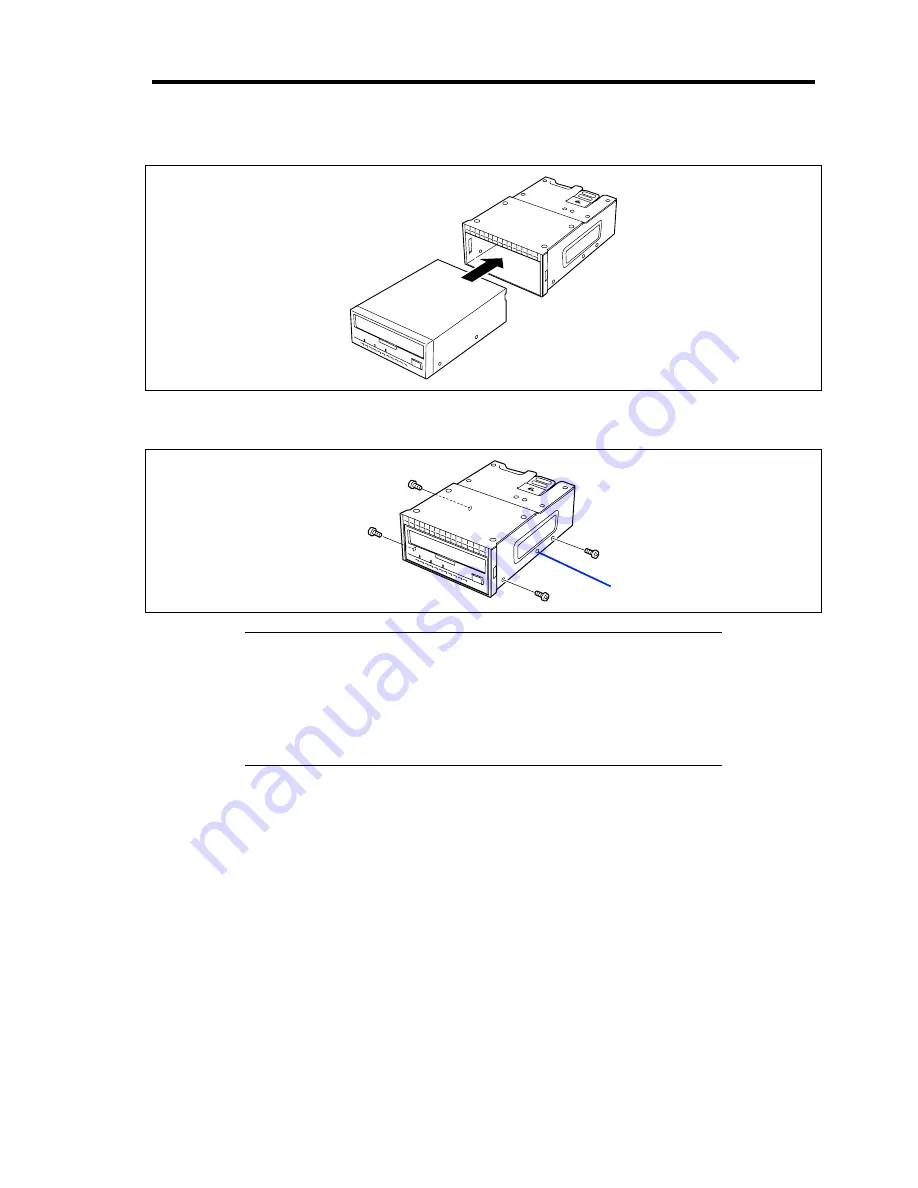
Insert the backup device into the device carrier.
12.
Secure the backup device with the provided screws.
Tighten two screws on each side.
NOTES:
Be sure to use the screws provided with the backup device.
Position the backup device so that the device screw holes align with
the screw holes in the device carrier.
If you feel difficult to connect the cable of the long device, slide the
device to the front and then connect the cable.
Screw hole not used
Содержание Express5800/120Rj-2
Страница 16: ...x This page is intentionally left blank ...
Страница 19: ...Notes on Using Your Server 1 3 Internal View ...
Страница 34: ...1 18 Notes on Using Your Server This page is intentionally left blank ...
Страница 90: ...3 24 Setting Up Your Server This page is intentionally left blank ...
Страница 129: ...Configuring Your Server 4 39 The detailed settings is continued to the next page Click Next to view more information ...
Страница 140: ...4 50 Configuring Your Server Use this menu to define several physical drives PD as a disk group DG ...
Страница 164: ...4 74 Configuring Your Server 3 Setting menu for VD 0 is displayed ...
Страница 172: ...4 82 Configuring Your Server This page is intentionally left blank ...
Страница 215: ...Installing and Using Utilities 6 9 4 Click Parameter File Creator Parameter File Creator will appear ...
Страница 240: ...7 12 Maintenance This page is intentionally left blank ...
Страница 350: ...9 74 Upgrading Your Server Removal Remove the backup device in reverse order of the installation steps ...
Страница 354: ...9 78 Upgrading Your Server This page is intentionally left blank ...
Страница 364: ...C 2 IRQ This page is intentionally left blank ...
Страница 412: ...E 24 Installing Windows Server 2003 This page is intentionally left blank ...
Страница 414: ...F 2 Using a Client Computer Which Has a CD Drive This page is intentionally left blank ...
Страница 418: ...G 4 Product Configuration Record Table This page is intentionally left blank ...


