


Upgrading Your System 4-15
Installing a Processor
1.
Observe the safety and ESD precautions listed under
General Information
and
Static Precautions
at the beginning of this chapter.
2.
Prepare your system for upgrade. See
Preparing Your System for Upgrade
described earlier in this chapter.
3.
Remove the left-hand side access panel as described earlier in this chapter.
!
CAUTION
Observe static precautions. Use an antistatic wrist strap.
Hold the processor only by its edges.
4.
If your system has one processor (CPU #1) and you are adding a second
processor (CPU #2), then you must remove the termination board in the
secondary connector and store it appropriately.
!
To remove a terminator, perform step 7. Otherwise, continue.
5.
If your system has one processor and you are replacing it, leave the
terminator board intact in the empty secondary processor connector. Remove
the processor you want to replace. See
Removing a Processor or Terminator
Board
later in this chapter.
6.
If your system has two processors and you are replacing one or both, remove
the appropriate one(s). See
Removing a Processor or Terminator Board
later
in this chapter.
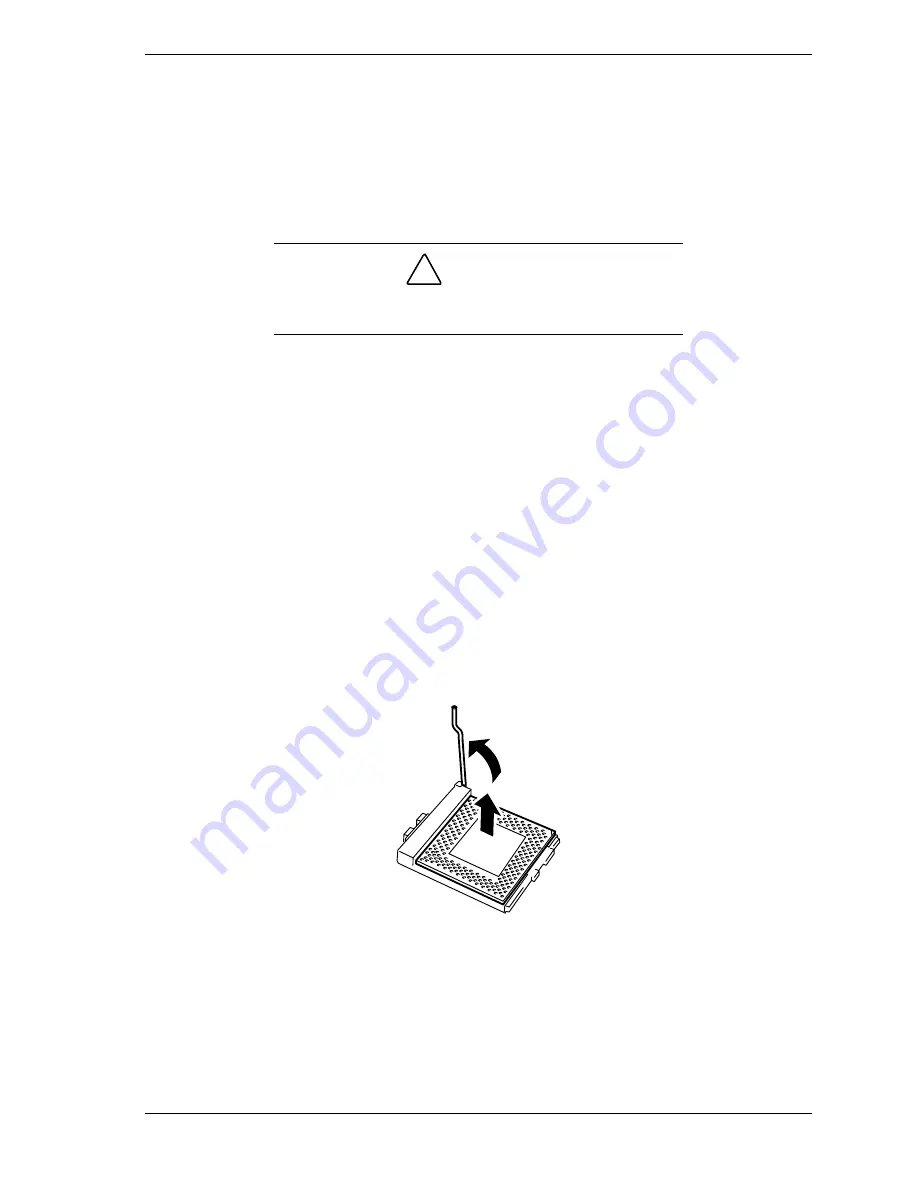
7.
Raise the lever on the socket to its up position and remove the terminator or
processor and place it on a grounded, static-free surface or conductive foam
pad. See Figure 4-11.
Figure 4-11. Removing a Processor or Terminator
8.
Put the old processor in a piece of conductive foam and store in an antistatic
package.
9.
Remove the new processor from its antistatic package and place
it on a grounded, static-free surface or conductive foam pad.
Содержание EXPRESS5800/120Lf
Страница 1: ... U s e r s G u i d e EXPRESS5800 120Lf ...
Страница 2: ...NEC ...
Страница 3: ... U s e r s G u i d e EXPRESS5800 120Lf ...
Страница 9: ...Contents vii ...
Страница 10: ...viii Contents ...
Страница 36: ...1 20 System Overview ...
Страница 99: ...Upgrading Your System 4 13 Figure 4 9 Replacing the Real Time Clock Battery ...
Страница 146: ...4 60 Upgrading Your System Figure 4 60 Installing a Power Supply ...
Страница 170: ...5 24 Problem Solving ...
Страница 171: ...A Technical Specifications Server Unit ...
Страница 174: ...A 4 Technical Specifications ...
Страница 175: ...B Connectors Overview External Device Connector Pin Information ...
Страница 190: ...10 Glossary ...
Страница 196: ...Index 4 ...
Страница 197: ...xx ...
Страница 198: ... 456 01575 N00 ...


