


ALAN MAP 600
user’s manual
28
10.1.2 Activating for Navigation
To navigate using a previously programmed
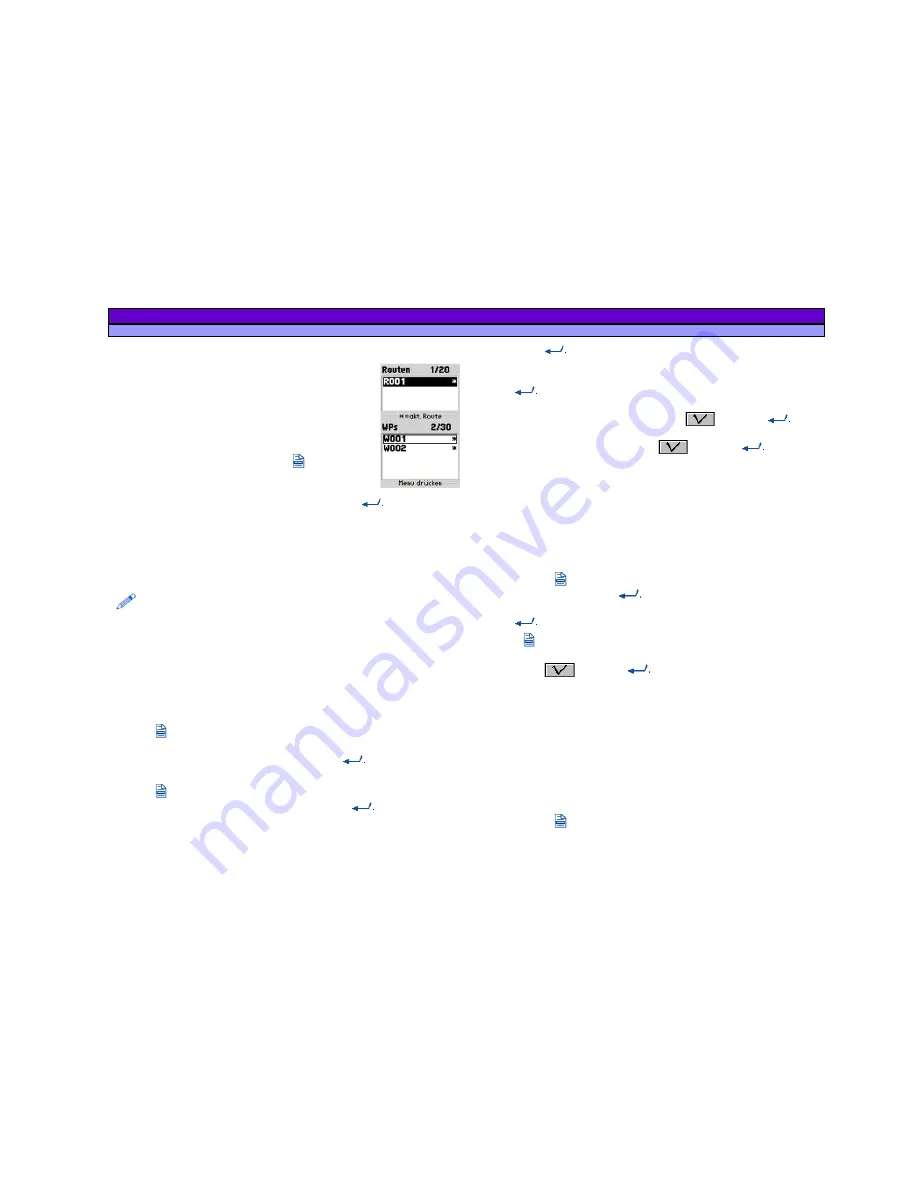
route:
1. Enter the
Routes
menu
(steps 1 through 3 in the
previous paragraph. The display (picture) will
show a list of programmed routes.
2. Move the Joystick up/down to select the route
desired for navigation and press
. The display
will show the options available.
3. Use the Joystick to select
Set Navi
and press
. To the right
of the route, an asterisk will appear to signal that the route has
been activated.
4. Press to
ESC
exit. At this point, the
Map
and
Compass
pages
will refer to the first waypoint.
Obviously, only one navigation route can be activated at a time.
Selecting another route overrides the previous route selected.
If you wish to turn off the navigation of all routes, follow the above procedure,
selecting
Cancel Navi
at step 3.
10.1.3 Adding a Waypoint to a Route
To add waypoints to a route:
1. Enter the
Routes
menu (steps 1 through 3 of paragraph 10.1).
2. Move the Joystick up/down to select the route to modify.
3. Press
. The display will show the options available on the
Routes
menu.
4. Using the Joystick, highlight
Edit
and press
. The display will
show the route, including the previously inserted waypoints.
5. Press
. The display will show the available options.
6. Using the Joystick, select
Add WP
and press
. The display
will highlight the entire list of previously programmed waypoints.
Press again
.
7. You can now select an individual waypoint by moving the
Joystick up/down. Once you have selected the first waypoint,
press
.
8. Press
ESC
to exit.
9. Move the Joystick down to highlight
and press
to
confirm.
10. Move the Joystick to highlight
and press
to confirm.
11. Press
ESC
to return to the main screens.
10.1.4 Inverting the Order of Waypoints
You can invert the order of waypoints so that the starting
waypoint becomes the destination waypoint, and vice-versa. This
is a useful function, particularly when you are navigation on a
route which you would like to return upon. From any page:
1. Press twice
.
2. Select
Routes
and press
.
3. Select the route where to invert the order of waypoints and
press
.
4. Press
.
5. Select
Invert
.
6. Highlight
and press
to confirm. The display will show
the modified route.
7. Press
ESC
to return to the main screens.
10.1.5 Inserting a Waypoint between two existing Waypoints
If you wish to drastically modify the waypoint sequence of a
route, it may be easier to insert a waypoint between two
previously programmed waypoints.
From any page:
1. Press twice
.


