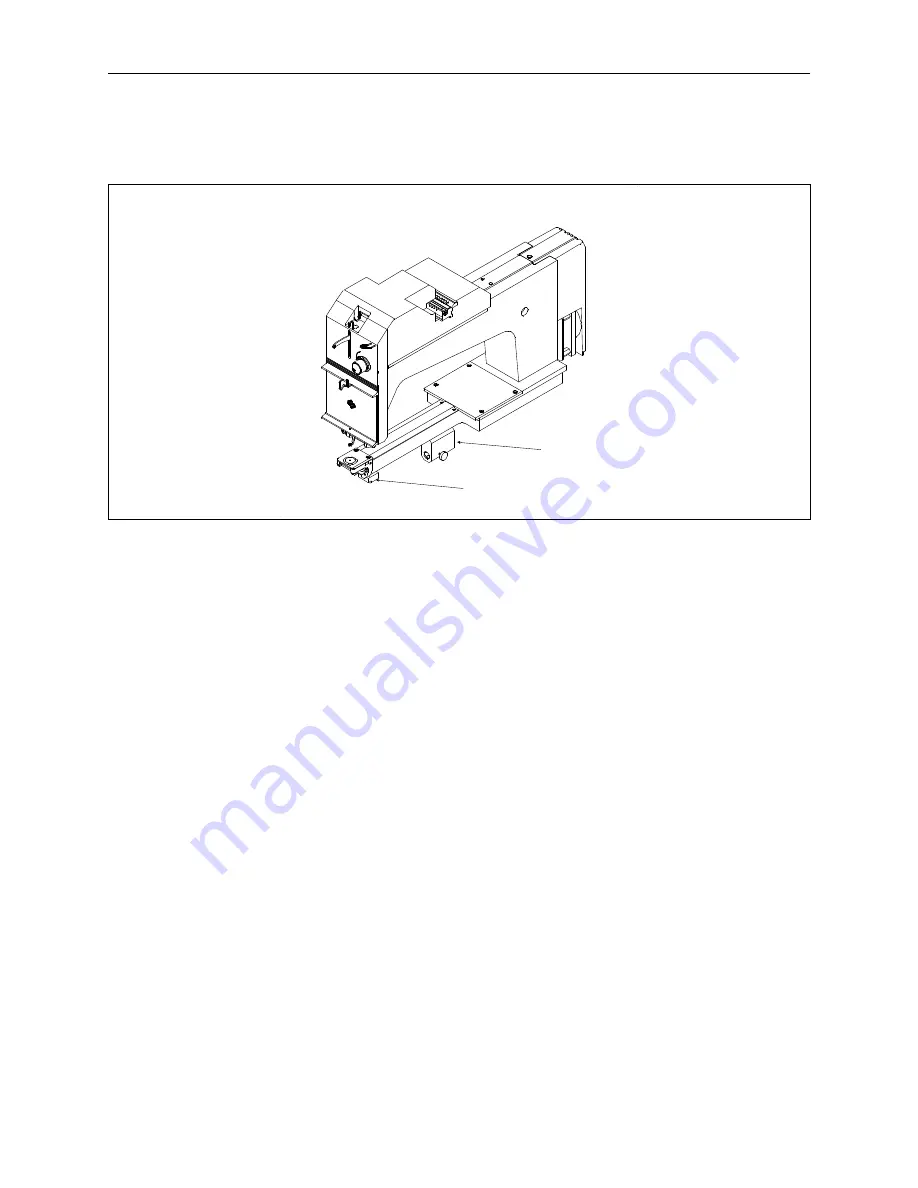
3. Under the cylinder arm, locate the dove-tail mount under the needle area and a bracket with a
round hole at the rear of the embroidery head (see Figure 2-12).
4. Loosen the thumb screw on the rear bracket.
5. Loosen the thumb screw on the cap frame drive dove tail bracket.
6. The cap frame drive has a hoop bracket on top of it. Pulling the cap frame drive shaft towards
you, attach the hoop bracket to the X carriage. It attaches just like a regular hoop.
7. Guide the cap frame drive shaft into the hole in the rear mounting bracket. At the same time,
insert the cap frame drive dove-tail bracket into the dove-tail mount.
8. Push the cap frame drive shaft into the bracket hole as far as it will go.
9. Tighten the thumb screw on the rear bracket.
10. Tighten the thumb screw on the dove-tail bracket.
Rear Mounting Bracket
Dove-Tail Mount
Figure 2-12
2 - 10
Hooping
Advantage 18 Operation Manual
Melco Embroidery Systems
Содержание Advantage 18
Страница 6: ...Table of Contents Operation Manual iv Advantage 18 ...
Страница 14: ...1 8 Start Up Messages Advantage 18 Operation Manual Melco Embroidery Systems ...
Страница 92: ...C 2 Advantage 18 Operation Manual Melco Embroidery Systems ...
Страница 94: ...Advantage 18 Operation Manual Melco Embroidery Systems ...
Страница 96: ...Quick Reference Guide for Advantage 18 Part Number 110265 01 Rev A ...


