Select the Thread Position
3. Press [
⇑
] to increase the thread position by 1 or [
⇓
] to decrease the thread position by 1. Press
and hold to scroll.
Select the Tension Setting
4. Press [
⇒
] to increase the tension by 1 or [
⇐
] to decrease the tension by 1. Press and hold to
scroll.
5. Press [ENTER] when finished.
Orientation Menu
Scroll through the top level menus, or press [ENTER] from the Tension Menu to reach the
Orientation Menu.
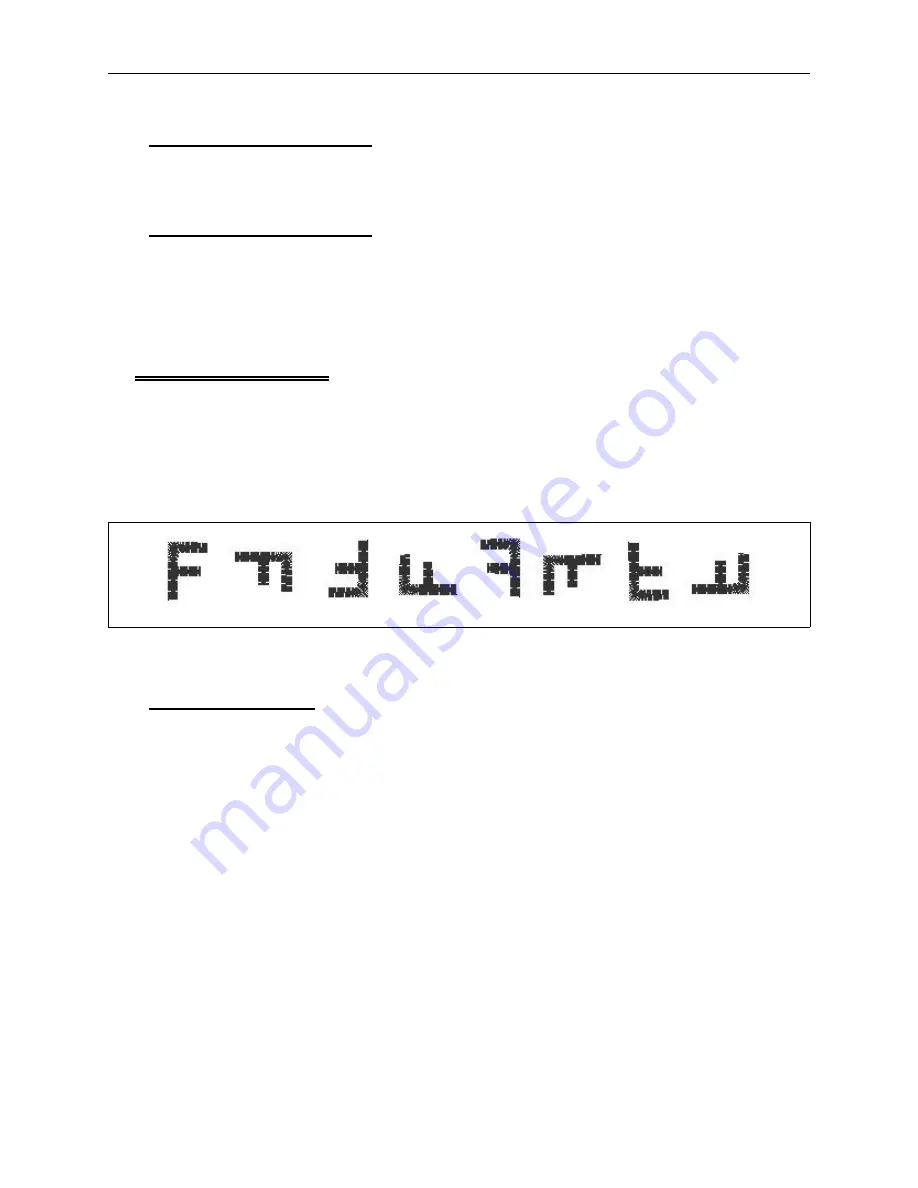
The Orientation Menu allows you to embroider a design in any of the positions shown in Figure
3-1. Because of the way a cap mounts into the cap hoop, you may want to embroider it like the
third example.
Setting Orientation
1. Press [MENU] until the LCD displays: ORIENTATION MENU.
2. Press [ENTER] and the display will show an
F
in the current orientation.
3. Press [
⇑
] or [
⇓
] to scan through the eight orientation choices.
4. When you reach the desired orientation, press [ENTER].
1 2 3 4 5 6 7 8
Figure 3-1
3 - 6
Orientation Menu
Advantage 18 Operation Manual
Melco Embroidery Systems
Содержание Advantage 18
Страница 6: ...Table of Contents Operation Manual iv Advantage 18 ...
Страница 14: ...1 8 Start Up Messages Advantage 18 Operation Manual Melco Embroidery Systems ...
Страница 92: ...C 2 Advantage 18 Operation Manual Melco Embroidery Systems ...
Страница 94: ...Advantage 18 Operation Manual Melco Embroidery Systems ...
Страница 96: ...Quick Reference Guide for Advantage 18 Part Number 110265 01 Rev A ...


