2. Press the thumb lever towards the rear of the carriage.
3. Push the hoop bracket up to the lever stub and release the lever, snapping the lever stub into
the right carriage notch.
Cap Frames
Because a cap is not flat it cannot be hooped in a flat hoop. To solve this problem, a special device
called a cap frame is used. The cap frame option consists of two parts: 1) The cap frame that holds
the cap and attaches to the cap frame drive; and 2) The cap frame drive that secures to the X
carriage and the front of the machine.
Installing the Cap Frame Drive
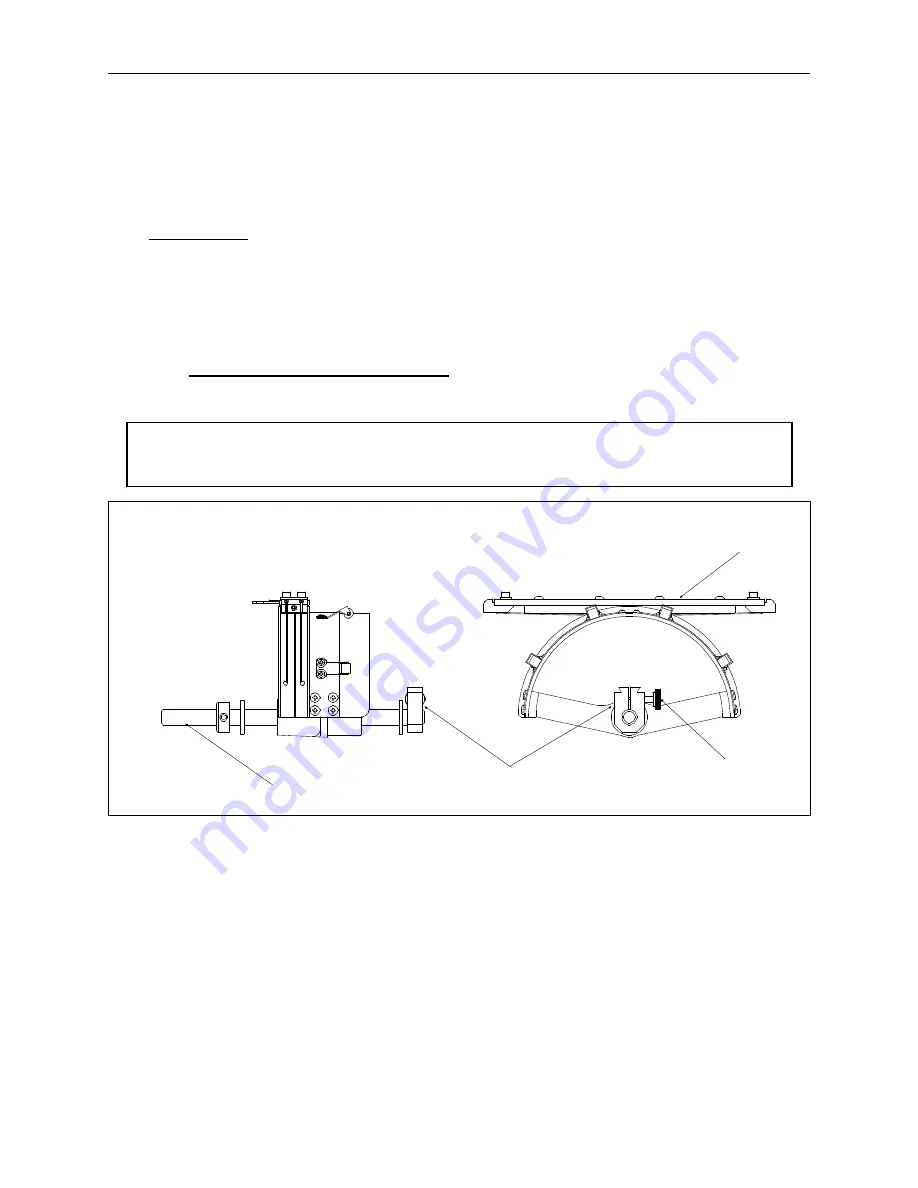
Attach the cap frame drive by following these steps and referring to Figure 2-11.
CAUTION! To avoid possible cap frame drive or other machine damage, Set
Home before installing the cap frame drive.
1. Remove the table top insert from the embroidery area. This allows access to the cap frame
mounting brackets under the bed of the embroidery head.
2. Center the pantograph in both X and Y directions using the arrow keys.
Dove-Tail Bracket
Thumb Screw
Cap Frame Drive
SIDE VIEW
FRONT VIEW
Cap Frame Drive Shaft
Hoop
Bracket
Figure 2-11
Cap Frames
2 - 9
110265-01, Rev. A
2. Operating the Advantage 18
Содержание Advantage 18
Страница 6: ...Table of Contents Operation Manual iv Advantage 18 ...
Страница 14: ...1 8 Start Up Messages Advantage 18 Operation Manual Melco Embroidery Systems ...
Страница 92: ...C 2 Advantage 18 Operation Manual Melco Embroidery Systems ...
Страница 94: ...Advantage 18 Operation Manual Melco Embroidery Systems ...
Страница 96: ...Quick Reference Guide for Advantage 18 Part Number 110265 01 Rev A ...


