27
●
All share folder will be listed in “Existing Shares.”
●
To add new share folder(s), click “Clear Form,” input the new share name then click “Save” when
done.
●
Click “Windows, FTP Access” to set windows and FTP access permission including “Read Only” and
“Writable” for the chosen share folder.
●
Click “NFS Access” to set NFS Access permission for the range of IP and Subnet to the chosen share
folder.
●
Click “Save” to store the new settings of “Window, FTP Access” and “NFS Access”.
●
To delete the share folder, select share folder then click “Delete Share”.
Printer Server
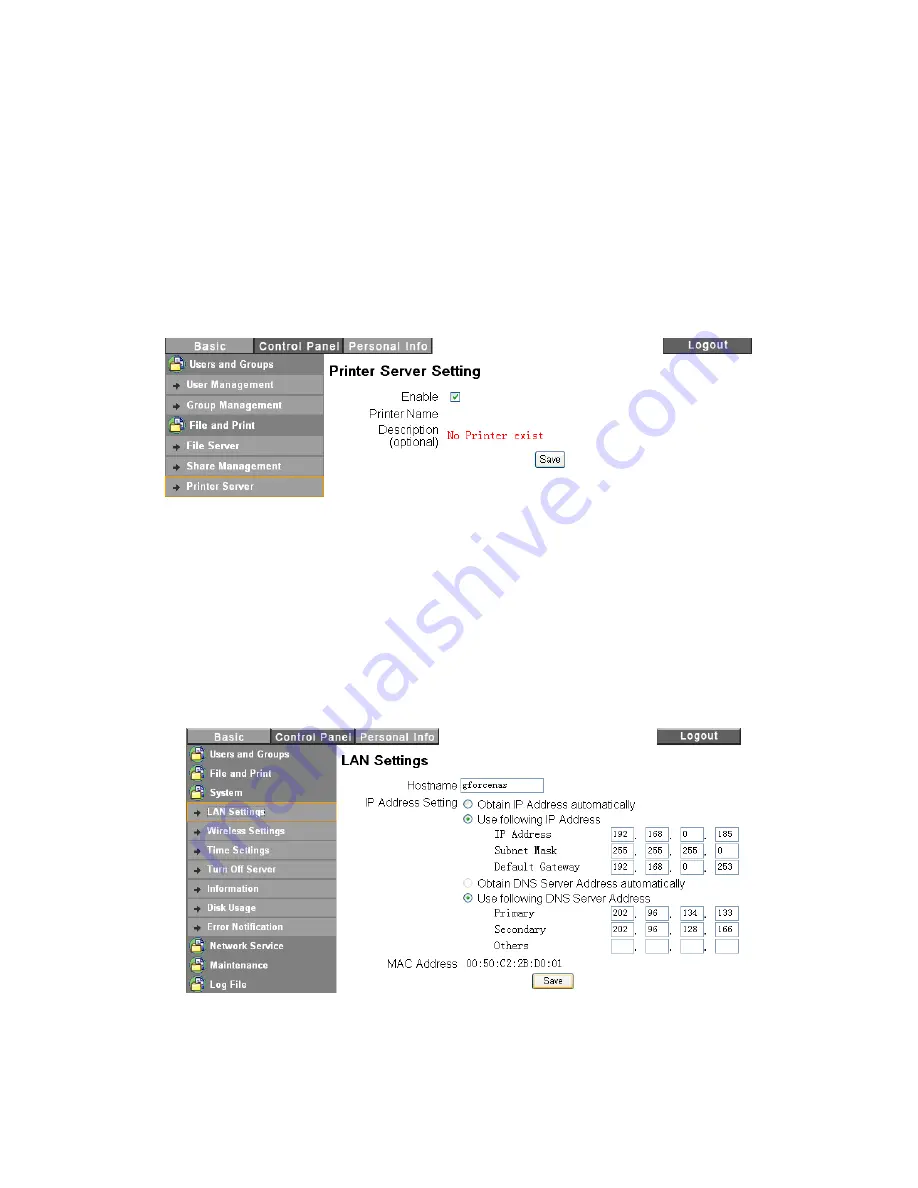
Check “Enable” box to enable Print Server function. When a USB printer is connected to the NAS’s
USB port and powered on, it will appear in the Printer Name Description and becomes ready to use.
System
There are six submenus in “System Setting.” The submenus are “LAN Settings”, “Time Settings”, “Turn
Off Server”, “Information”, “Disk Usage” and “Error Notification”. They are described in detail below.
LAN Setting
●
Hostname: a unique name, such as default gbnas and gbnas2, must be assigned to distinguish the
NAS within local area network. It is especially true if you install two or more identical model of the NAS
in your LAN. The hostname will appear in “My network places” in your computer.
●
IP address setting:
— Obtain IP Address automatically.
Содержание G-S350UN
Страница 1: ...1 Network Attached Storage And USB2 0 Enclosure for 3 5 Serial ATA Hard Drive G S350UN User s Manual...
Страница 14: ...14 Please enter admin as Username and Password...
Страница 37: ...37 FTP Log DHCP Server Log System Log Administration Log...
Страница 48: ...48 Step1 click on Set Up Printers button Step 2 click on Add button...
Страница 51: ...51 Step2 Select IP Printer then click on More Printers button Step 3 Select Windows Printing...
Страница 54: ...54 Step 8 Example printing choose lp as printer Step 9 Print job is executed For MacOS 10 5...
Страница 55: ...55 Step 1 Click on button Step2 Select Windows then click on workgroup...
Страница 56: ...56 Step 3 Find gbnas in the list and click on it Step 4 Enter password for admin click on Connect button...
Страница 59: ...59 Step 9 Example printing select lp as the printer Step 10 The print job is executed successfully...


