AT
EACH
NEW
SEASON
CHECKLIST
BEFORE
EACH
USE
(FOR
YOUR
SAFETY)
HOW
TO
LIGHT
YOUR
GRILL
PRE
‐
GRILL
CHECKLIST...
con nued
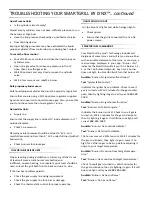
SmartGrill will automatically shutdown when calibration is
complete. It will say "Calibration complete" or send you the
same message on your app. If the calibration fails, SmartGrill
will say "Calibration failed" or send you the same message on
your app.
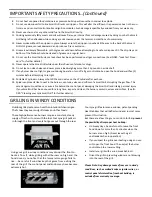
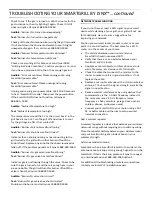
At the start of each new grilling season you should remove
the grilling racks and check the burners, venturis, orifices,
and valves for obstructions.
Spiders and insects often nest in these areas of the grill
and can disrupt airflow, causing damage to the grill and
personal injury.
Also, check all hoses, wires, and fitting for damage,
abrasion, wear and tear.
Do you smell gas? If yes, shut everything off and call the
gas company or a qualifi plumber to check for leaks. If not,
please continue.
Is your cooking area free and clear of any combustibles
besides your food that might ignite? If not, please clear the
area before starting the lighting process. If yes, please
continue.
If you are using a portable propane cylinder, is it connected
and leak tested? If not, check the connection before
continuing. If yes, please continue.
Are all burners properly seated in the grill with the venturi
of the burner over the orifice and the center crossbar
in the bracket? If not, seat the burners properly before con-
tinuing. If yes, please continue.
Is the wind blowing just lightly and not blowing on the back
of the grill? If not, wait until the wind subsides or turn your
free standing grill so the wind goes into the front of the
grill. If yes, please continue with the lighting process.
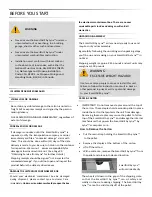
Before each use, complete the checklist above
Remove the grill cover.
Make sure all burners are in the OFF position.
Press the ON/OFF button. The blue LED lights that
surround the knobs will indicate that the grill is energized.
After 5-20 seconds SmartGrill will say “SmartGrill at your
service.”
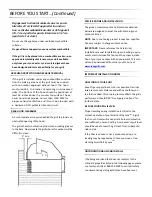
Select which mode of operation you would like to use
from below;
Manual Cook
: Turn the knob that corresponds to
the burner you wish to light by turning the knob
clockwise 2 full revolutions. SmartGrill will say,
"SmartGrill in manual cook mode."
Timed Cook
: Select an amount of time to cook,
and a temperature.
To select an amount of time to cook, use the
voice command: “SmartGrill, Use <N> burner”
where N is 1, 2, or 3 – the number of the burner
you wish to use. When you receive confirmation
from the SmartGrill by Lynx™, use the voice
command: “SmartGrill, Add <X>
minutes” where X is the number of minutes you
wish to cook. You can also use the app to select
the time and temperature for your timed cook.
Recipe Cook
: Select the recipe you wish to use in
the app and send it to the grill. The SmartGrill
by Lynx™’s MyChef technology will handle the
lighting and all temperature controls based on
the recipe. See SmartGrill Recipe Mode on
page 23 for details.
Meal Mode
: Meal mode is a revolutionary and
completely intuitive method of setting up your
entire meal from grilled appetizers to desserts.
Simply use the SmartGrill app to set your
courses, recipes per each course, and the
SmartGrill will ensure each meal item is
completed at the same time.
Party Mode
: Party mode allows you to
continually cook foods on all your SmartGrill
burners, perfect for when you are hosting a
party and need a constant stream of goodies
coming off your grill!
Содержание SMART30
Страница 1: ...SMARTGRILL USER MANUAL...
Страница 2: ...SmartGrill by LynxTM...
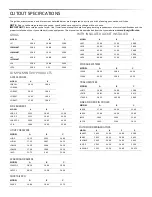
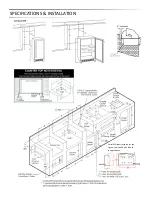
Страница 14: ...SPECIFICATIONS INSTALLATION SmartGrill requires space for the cpu unit below the grill in built in applica ons...
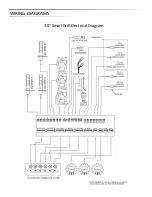
Страница 35: ...WIRING DIAGRAMS 30 SmartGrill Electrical Diagram...
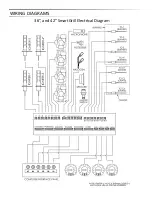
Страница 36: ...WIRING DIAGRAMS 36 and 42 SmartGrill Electrical Diagram...
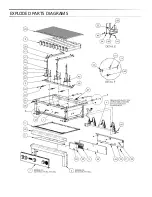
Страница 37: ...EXPLODED PARTS DIAGRAMS...
Страница 38: ...EXPLODED PARTS DIAGRAMS...
Страница 39: ...EXPLODED PARTS LIST...
Страница 40: ...EXPLODED PARTS LIST AND DIAGRAMS...
Страница 41: ...EXPLODED PARTS LIST AND DIAGRAMS...
Страница 42: ...EXPLODED PARTS LIST AND DIAGRAMS...
Страница 47: ......

