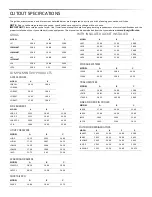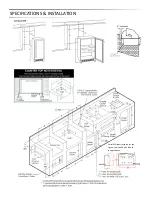
The
guides,
measurements
and
dimensions
detailed
below
are
designed
to
assist
you
with
planning
your
outdoor
kitchen.
NOTE:
Due
to
con nuing
product
innova on,
speci
fi
ca
‐
ons
are
subject
to
change
without
no ce.
IMPORTANT:
Please
reference
the
Care
&
Use/
Installa on
manual
for
details
on
gas
plumbing
require
‐
ments,
electrical
speci
fi
ca ons
and
the
proper
installa
‐
on
of
your
Lynx
outdoor
kitchen
equipment.
This
man
‐
ual
can
be
downloaded
from
the
Lynx
Web
site
at
www.lynxgrills.com
.
HOW
LONG
IS
YOUR
RUN?
Keep
all
gas
supply
lines
as
short
as
possible.
Gas
lines
lose
pressure
over
distance
and
with
each
elbow
and
tee
that
is
added.
This
drop
in
pressure
a
ff
ects
the
grills
performance.
(See
INDEX:
“Gas
Supply
Line
Runs”
for
further
details.
BE
SURE
YOUR
GRILL
IS
LEVEL
Proper
levelling
during
installa on
is
cri cal
to
the
smooth
opera on
of
your
SmartGrill
by
Lynx
TM
.
A
grill
that
is
out
of
level
will
cause
erra c
burner
combus on
and
ine
ffi
cient,
uneven
hea ng.
A
carpenter’s
spirit
level
should
be
used
to
level
the
grill
both
front
‐
to
‐
back
and
side
‐
to
‐
side.
If
the
fl
oor
is
uneven
or
has
a
pronounced
slope,
re
‐
leveling
may
be
required
each
me
you
move
a
free
‐
standing
SmartGrill
by
Lynx
TM
.
Do
not
use
this
appliance
under
overhead
combus ble
surfaces
Ne
pas
u lier
cet
appareil
sous
une
surface
combus ble
If
the
grill
is
to
be
placed
into
a
combus ble
enclosure,
an
approved
insulated
jacket
is
necessary
and
is
available
only
from
your
Lynx
dealer.
Lynx
insulated
jackets
have
been
designed
and
tested
speci
fi
cally
for
your
grill.
BEFORE
YOU
START…
(Con nued)
Dégagement horizontal minimal entre les parois
latérales et l’arrière de l’appareil et la construc-
tion verticale combustible au-dessus de l’appareil
(45.7 cm à partir des parois latérales et 45.7 cm
à partir de l’arrière).
3”
min
A
3
‐
inch
clearance
is
required
behind
the
grill
to
provide
un
‐
obstructed
opening
of
the
hood.
The
grill
exhausts
combus on
products
and
cooking
greases
to
the
back.
Never
locate
the
grill
where
this
exhaust
will
be
di
ffi
cult
to
clean.
If
the
grill
is
installed
under
any
combus ble
construc
‐
on
the
cooking
area
over
the
grill
must
be
covered
with
an
outdoor
approved
exhaust
hood.
The
hood
must
provide
3
to
6
inches
of
overhang
on
all
exposed
sides.
The
bo om
of
the
hood
should
be
posi oned
at
least
36
inches
above
the
counter
top
surface.
The
ex
‐
haust
hood
shall
provide
no
less
than
1200
CFM
for
proper
exhaust
ven la on
and
it
must
be
provided
with
a
dedicated
GFCI
protected
branch
circuit.
OVERHEAD
PROTECTION
AND
EXHAUST
REMOVAL
REAR
HOOD
CLEARANCE
SPECIFICATIONS
AND
INSTALLATION
IMPORTANT
INSTALLATION
NOTES
UNCONVENTIONAL
ISLAND
INSTALLS
If
building
and
island
that
does
not
conform
to
the
standard
proper es
listed
in
the
following
pages,
please
contact
Lynx
Grills
at
888
‐
259
‐
5969
to
verify
all
safety
requirements
regarding
installa on
have
been
met.
Содержание SMART30
Страница 1: ...SMARTGRILL USER MANUAL...
Страница 2: ...SmartGrill by LynxTM...
Страница 14: ...SPECIFICATIONS INSTALLATION SmartGrill requires space for the cpu unit below the grill in built in applica ons...
Страница 35: ...WIRING DIAGRAMS 30 SmartGrill Electrical Diagram...
Страница 36: ...WIRING DIAGRAMS 36 and 42 SmartGrill Electrical Diagram...
Страница 37: ...EXPLODED PARTS DIAGRAMS...
Страница 38: ...EXPLODED PARTS DIAGRAMS...
Страница 39: ...EXPLODED PARTS LIST...
Страница 40: ...EXPLODED PARTS LIST AND DIAGRAMS...
Страница 41: ...EXPLODED PARTS LIST AND DIAGRAMS...
Страница 42: ...EXPLODED PARTS LIST AND DIAGRAMS...
Страница 47: ......

