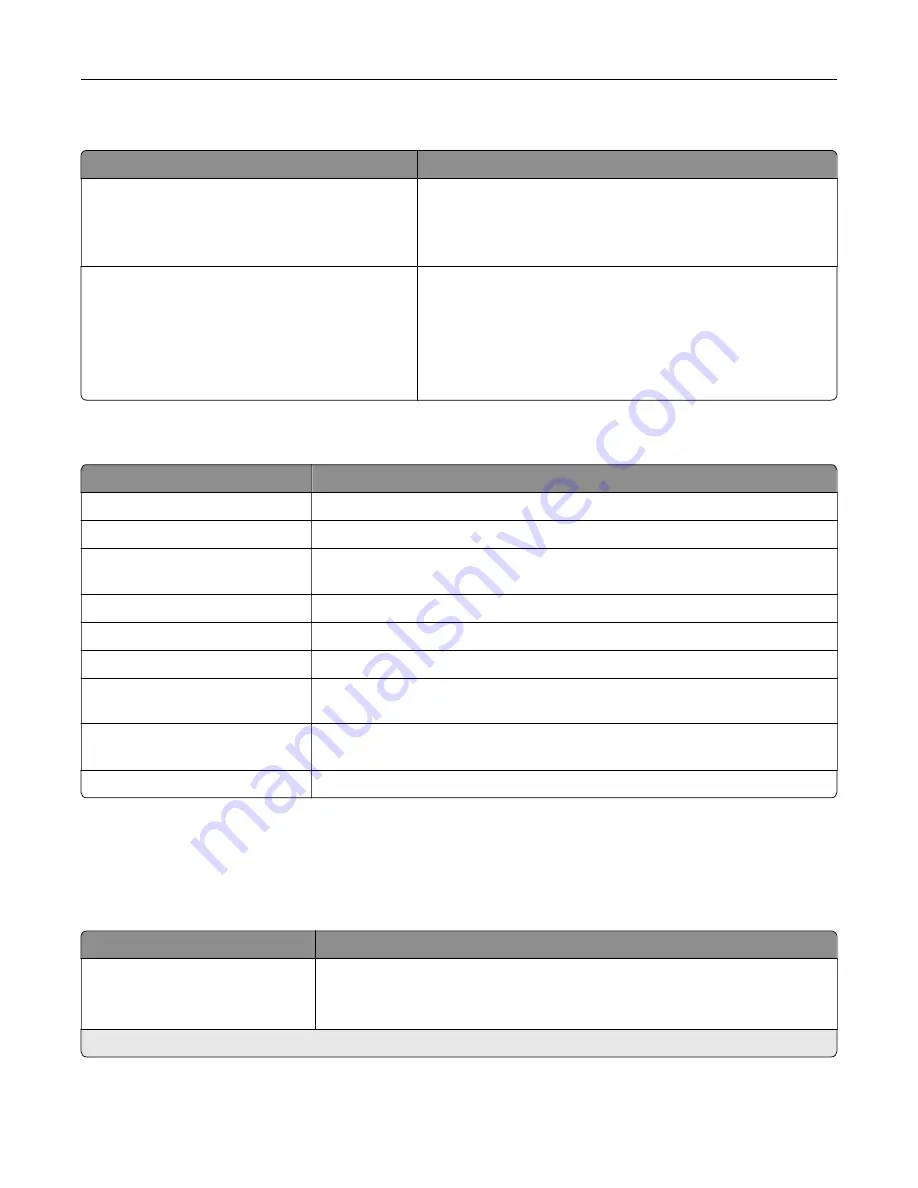
Out of Service Erase
Menu item
Description
Out of Service Erase
Memory Last Sanitized
ISD last erased
Show a read
‑
only information on when the printer memory or
storage drive was last erased.
Note:
ISD last erased appears only when an intelligent
storage drive is installed.
Out of Service Erase
Sanitize all information on nonvolatile memory
Erase all printer and network settings
Erase all apps and app settings
Erase all shortcuts and shortcut settings
Erase Intelligent Storage Drive
Clear all information on nonvolatile memory and on the storage
drive.
Note:
Erase Intelligent Storage Drive appears only when an
ISD is installed.
About this Printer
Menu item
Description
Asset Tag
Specify the identity of the printer. The maximum length is 32 characters.
Printer’s Location
Specify the printer location. The maximum length is 63 characters.
Contact
Specify the contact information for the printer. The maximum length is 63
characters.
Firmware Version
Show the firmware version installed on the printer.
Engine
Show the engine number of the printer.
Serial Number
Show the serial number of the printer.
Export Configuration File to
USB
Export the configuration file to a flash drive.
Export Compressed Logs to
USB
Export the compressed log files to a flash drive.
Send Logs
Send printer log information to Lexmark.
Layout
Menu item
Description
Sides
1
‑
Sided*
2
‑
Sided
Specify whether to print on one side or both sides of the paper.
Note:
An asterisk (*) next to a value indicates the factory default setting.
Use printer menus
94
Содержание XM3142
Страница 1: ...MX432 XM3142 MFPs User s Guide October 2022 www lexmark com Machine type 7019 Models 6w6 6w9...
Страница 54: ...4 Locate the ISD connector 5 Insert the card to the ISD connector Set up install and con gure 54...
Страница 154: ...Printing the Menu Settings Page From the home screen touch Settings Reports Menu Settings Page Use printer menus 154...
Страница 161: ...2 Remove the used imaging unit Maintain the printer 161...
Страница 164: ...3 Open the front door 4 Remove the imaging unit 5 Close the front door 6 Remove the tray Maintain the printer 164...
Страница 169: ...4 Insert the new separator pad until it clicks into place 5 Close the door Maintain the printer 169...
Страница 173: ...3 Open the front door 4 Remove the imaging unit 5 Close the front door 6 Remove the tray Maintain the printer 173...
Страница 219: ...9 Open the multipurpose feeder 10 Flex fan and align the paper edges before loading Troubleshoot a problem 219...


