


209
Installing Memory Options
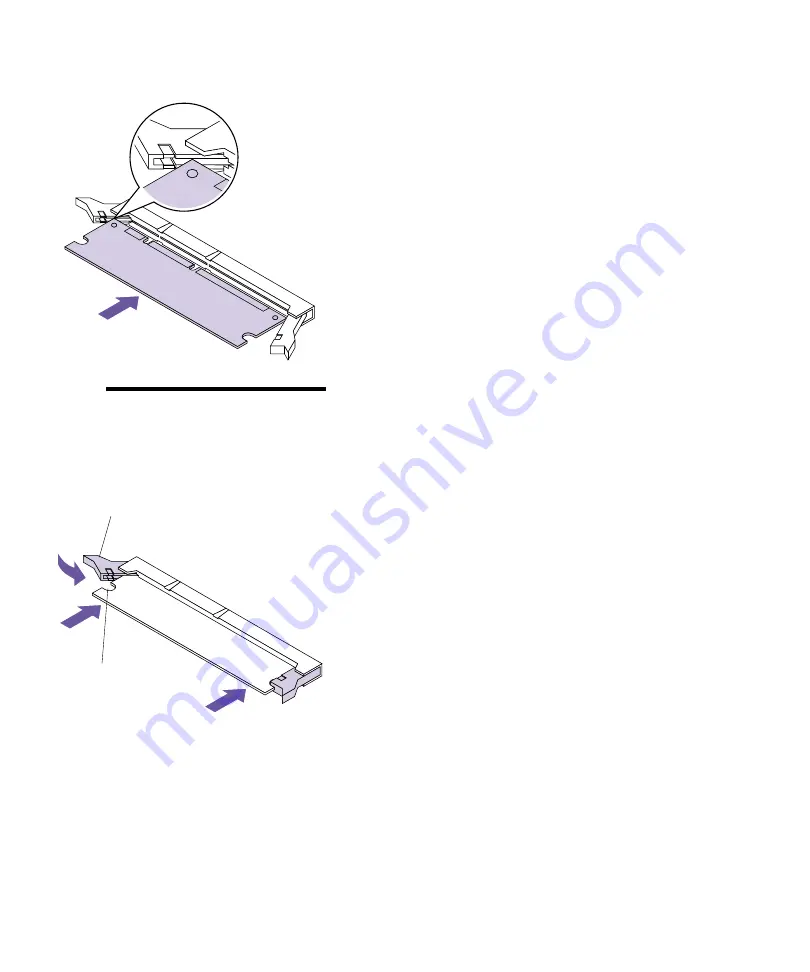
6
Insert the option card straight into the connector
as shown.
Make sure the edges of the card fit into the slots
located on each of the connector latches.
Note:
This illustration is for the
Optra M410. The connector for
the Optra M412 is inverted.
Invert the option card to insert it.
7
Push in on one side of the card and push in one of
the latches until it snaps into place. Repeat for the
other side of the card.
Make sure each latch fits over the notch located on
either side of the option card.
8
Repeat steps 4 through 7 to install another mem-
ory option card in one of the memory connectors.
Otherwise, go to step 9.
9
Continue with “Installing an Option Card” on
page 216 if you have other option cards to install.
Otherwise, go to “Closing the Printer System
Board” on page 220.
Notch
Latch
Содержание Optra M410
Страница 1: ...M410 M412 ...
Страница 44: ...32 Chapter 2 MarkVision ...
Страница 150: ...138 Chapter 4 Using Print Materials ...
Страница 208: ...196 Chapter 9 Maintaining Your Printer ...
Страница 234: ...222 Chapter 11 Memory and Option Cards ...
Страница 238: ...226 Chapter 12 Optional 500 Sheet Drawer ...
Страница 264: ...252 Appendix B Notices ...
Страница 272: ...260 Appendix C Safety Information ...
Страница 273: ...261 Appendix C Safety Information ...
Страница 274: ...262 Appendix C Safety Information ...
Страница 275: ...263 Appendix C Safety Information ...
Страница 276: ...264 Appendix C Safety Information ...
Страница 280: ...268 Appendix D Warranty ...
Страница 296: ...284 Glossary W watermark See overlay weight The thickness of the typeface line or the thickness of print material ...
Страница 312: ...300 Index ...