3
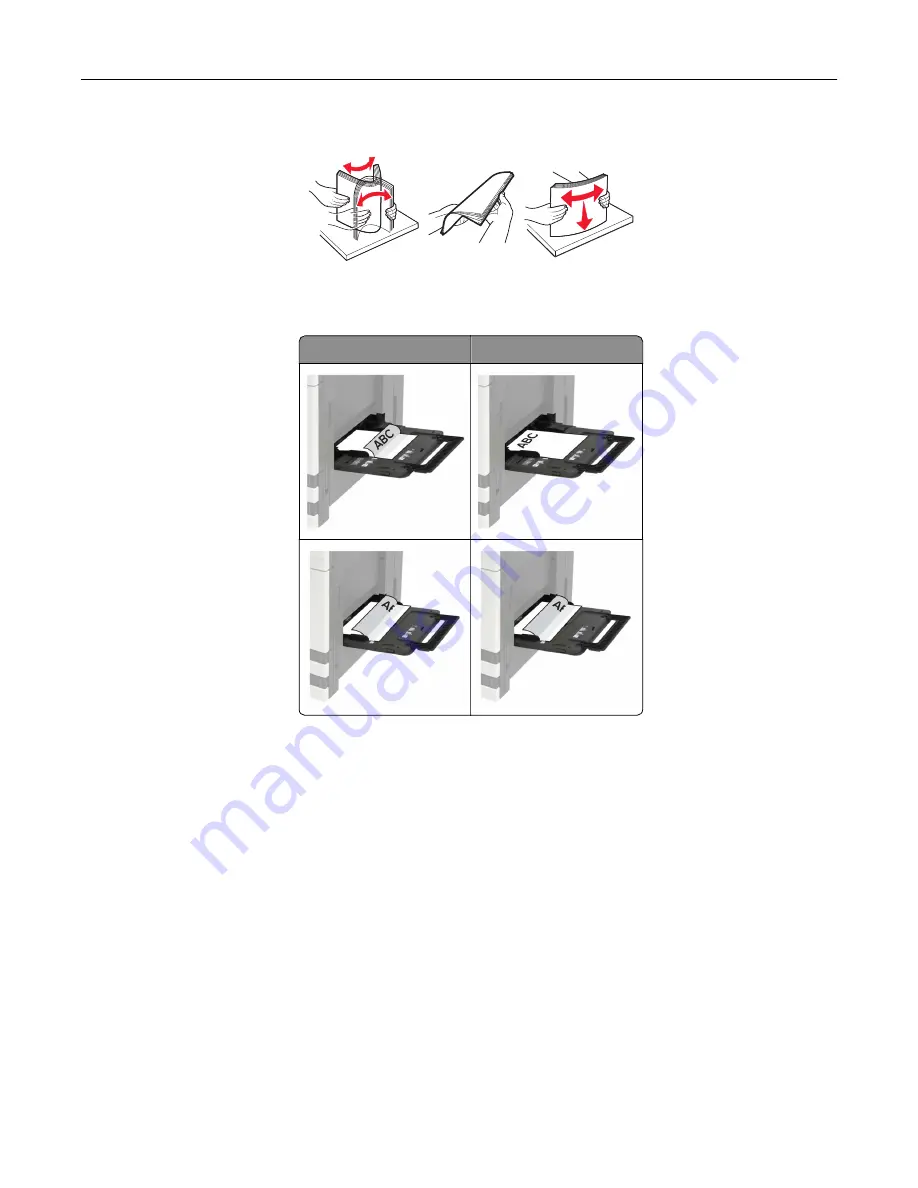
Flex, fan, and align the paper edges before loading.
4
Load the paper or specialty media.
When using letterhead, do either of the following:
One
‑
sided printing
Two
‑
sided printing
Warning—Potential Damage:
When using envelopes, do not use envelopes with stamps, clasps, snaps,
windows, coated linings, or self
‑
stick adhesives.
5
From the control panel, set the paper size and paper type to match the paper loaded.
Linking trays
1
From the home screen, touch
Settings
>
Paper
>
Tray Configuration
> select a paper source.
2
Set the same paper size and paper type for the trays that you are linking.
3
From the home screen, touch
Settings
>
Device
>
Maintenance
>
Config Menu
>
Tray Configuration
>
Tray Linking
.
4
Touch
Automatic
.
To unlink trays, make sure that no trays have the same paper size and paper type settings.
Warning—Potential Damage:
The temperature of the fuser varies according to the specified paper type. To
avoid printing issues, match the paper type setting in the printer with the paper loaded in the tray.
Loading paper and specialty media
34
Содержание C9235
Страница 1: ...C9235 Printer User s Guide May 2020 www lexmark com Machine type s 5059 Model s 190...
Страница 102: ...2 Remove and then empty the hole punch box 3 Insert the hole punch box 4 Close the door Maintaining the printer 102...
Страница 106: ...4 Shake the toner cartridge three times 5 Insert the new toner cartridge Maintaining the printer 106...
Страница 108: ...9 Insert the waste toner bottle and then close the door Maintaining the printer 108...
Страница 112: ...8 Insert the waste toner bottle and then close the door Maintaining the printer 112...
Страница 135: ...Below the fuser area Duplex area Clearing jams 135...
Страница 140: ...2 Open door J 3 Open door H Clearing jams 140...
Страница 145: ...Staple jam in the staple nisher 1 Slide the staple nisher 2 Remove the staple cartridge holder Clearing jams 145...
Страница 147: ...Staple jam in the staple hole punch nisher 1 Open door H 2 Remove the staple cartridge holder Clearing jams 147...
Страница 188: ...6 Remove the controller board shield Upgrading and migrating 188...
Страница 191: ...6 Remove the controller board shield 7 Unpack the printer hard disk Upgrading and migrating 191...
Страница 197: ...4 Remove the controller board shield Upgrading and migrating 197...
Страница 199: ...8 Attach the thumbscrews 9 Connect the wireless print server to the controller board Upgrading and migrating 199...
Страница 203: ...7 Connect the tray connector to the printer 8 Open trays 2 and 3 Upgrading and migrating 203...
Страница 208: ...9 Remove the stabilizing feet from the tray Upgrading and migrating 208...
Страница 212: ...17 Secure the tray cable with the clamp Upgrading and migrating 212...
Страница 213: ...18 Connect the tray cable to the printer 19 Attach the tray cable cover Upgrading and migrating 213...
Страница 214: ...20 Slide the tray until it clicks into place 21 Attach the stabilizing feet to the printer Upgrading and migrating 214...
Страница 219: ...7 Remove the paper guides 8 Attach the sensor cover Upgrading and migrating 219...
Страница 225: ...8 Attach the nisher to the printer Upgrading and migrating 225...


