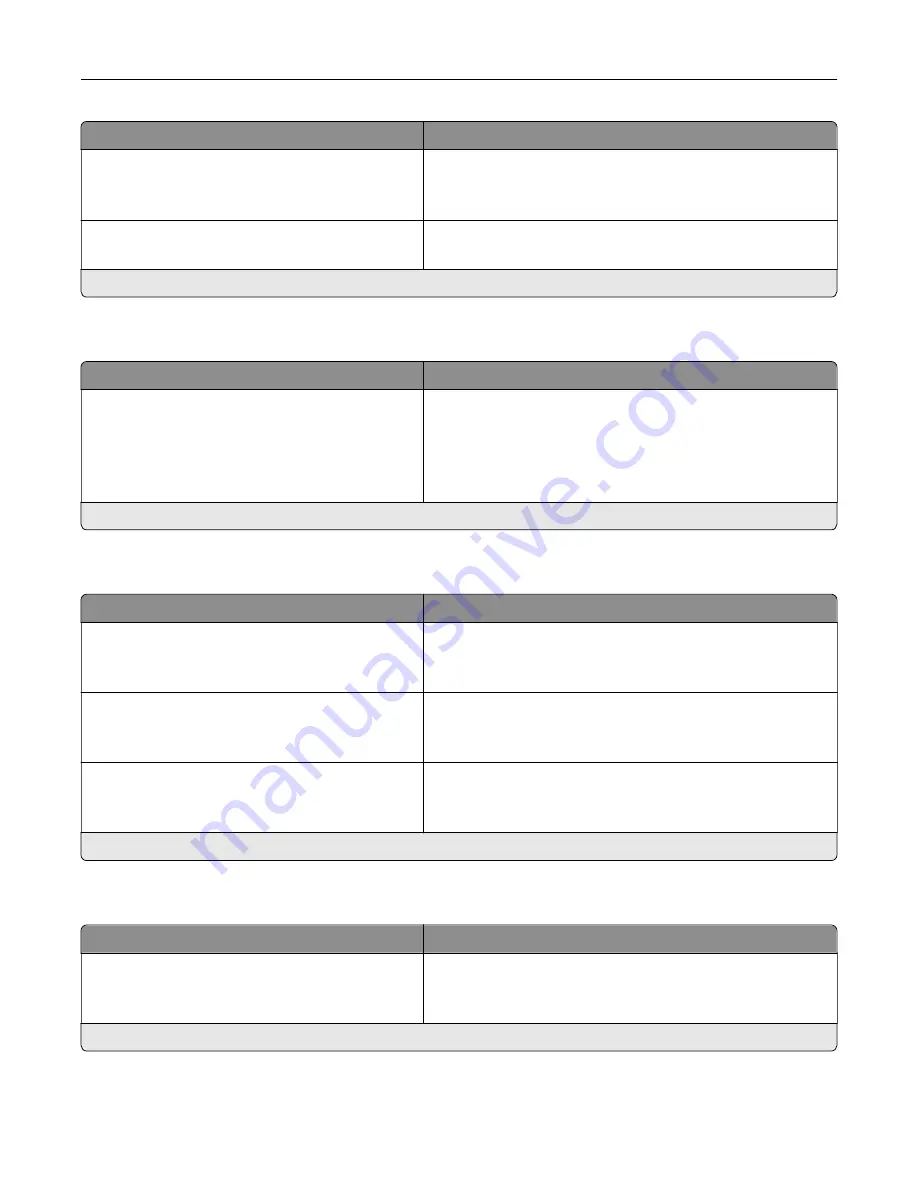
Menu item
Description
Audio Feedback
Button Feedback (On*)
Volume (5*)
•
Enable audio feedback for button presses, panel
interactions, paper loaded prompts, and error notifications.
•
Adjust the feedback volume.
Screen Timeout
5–300 seconds (60*)
Set the idle time before the display shows the home screen or
before the printer logs out a user account automatically.
Note:
An asterisk (*) next to a value indicates the factory default setting.
Eco-Mode
Menu item
Description
Sides (1
‑
Sided*)
Pages per Side (Off*)
Toner Darkness (4*)
Color Saver (Off*)
Configure the print settings of the printer.
Note:
An asterisk (*) next to a value indicates the factory default setting.
Remote Operator Panel
Menu item
Description
External VNC Connection
Don’t Allow*
Allow
Connect an external Virtual Network Computing (VNC) client
to the remote control panel.
Authentication Type
None*
Standard Authentication
Set the authentication type when accessing the VNC client
server.
VNC Password
Specify the password to connect to the VNC client server.
Note:
This menu item appears only if Authentication Type is
set to Standard Authentication.
Note:
An asterisk (*) next to a value indicates the factory default setting.
Notifications
Menu item
Description
Error Lighting
Off
On*
Set the indicator light to come on when a printer error occurs.
Note:
This menu item appears only in some printer models.
Note:
An asterisk (*) next to a value indicates the factory default setting.
Understanding the printer menus
49
Содержание C9235
Страница 1: ...C9235 Printer User s Guide May 2020 www lexmark com Machine type s 5059 Model s 190...
Страница 102: ...2 Remove and then empty the hole punch box 3 Insert the hole punch box 4 Close the door Maintaining the printer 102...
Страница 106: ...4 Shake the toner cartridge three times 5 Insert the new toner cartridge Maintaining the printer 106...
Страница 108: ...9 Insert the waste toner bottle and then close the door Maintaining the printer 108...
Страница 112: ...8 Insert the waste toner bottle and then close the door Maintaining the printer 112...
Страница 135: ...Below the fuser area Duplex area Clearing jams 135...
Страница 140: ...2 Open door J 3 Open door H Clearing jams 140...
Страница 145: ...Staple jam in the staple nisher 1 Slide the staple nisher 2 Remove the staple cartridge holder Clearing jams 145...
Страница 147: ...Staple jam in the staple hole punch nisher 1 Open door H 2 Remove the staple cartridge holder Clearing jams 147...
Страница 188: ...6 Remove the controller board shield Upgrading and migrating 188...
Страница 191: ...6 Remove the controller board shield 7 Unpack the printer hard disk Upgrading and migrating 191...
Страница 197: ...4 Remove the controller board shield Upgrading and migrating 197...
Страница 199: ...8 Attach the thumbscrews 9 Connect the wireless print server to the controller board Upgrading and migrating 199...
Страница 203: ...7 Connect the tray connector to the printer 8 Open trays 2 and 3 Upgrading and migrating 203...
Страница 208: ...9 Remove the stabilizing feet from the tray Upgrading and migrating 208...
Страница 212: ...17 Secure the tray cable with the clamp Upgrading and migrating 212...
Страница 213: ...18 Connect the tray cable to the printer 19 Attach the tray cable cover Upgrading and migrating 213...
Страница 214: ...20 Slide the tray until it clicks into place 21 Attach the stabilizing feet to the printer Upgrading and migrating 214...
Страница 219: ...7 Remove the paper guides 8 Attach the sensor cover Upgrading and migrating 219...
Страница 225: ...8 Attach the nisher to the printer Upgrading and migrating 225...


