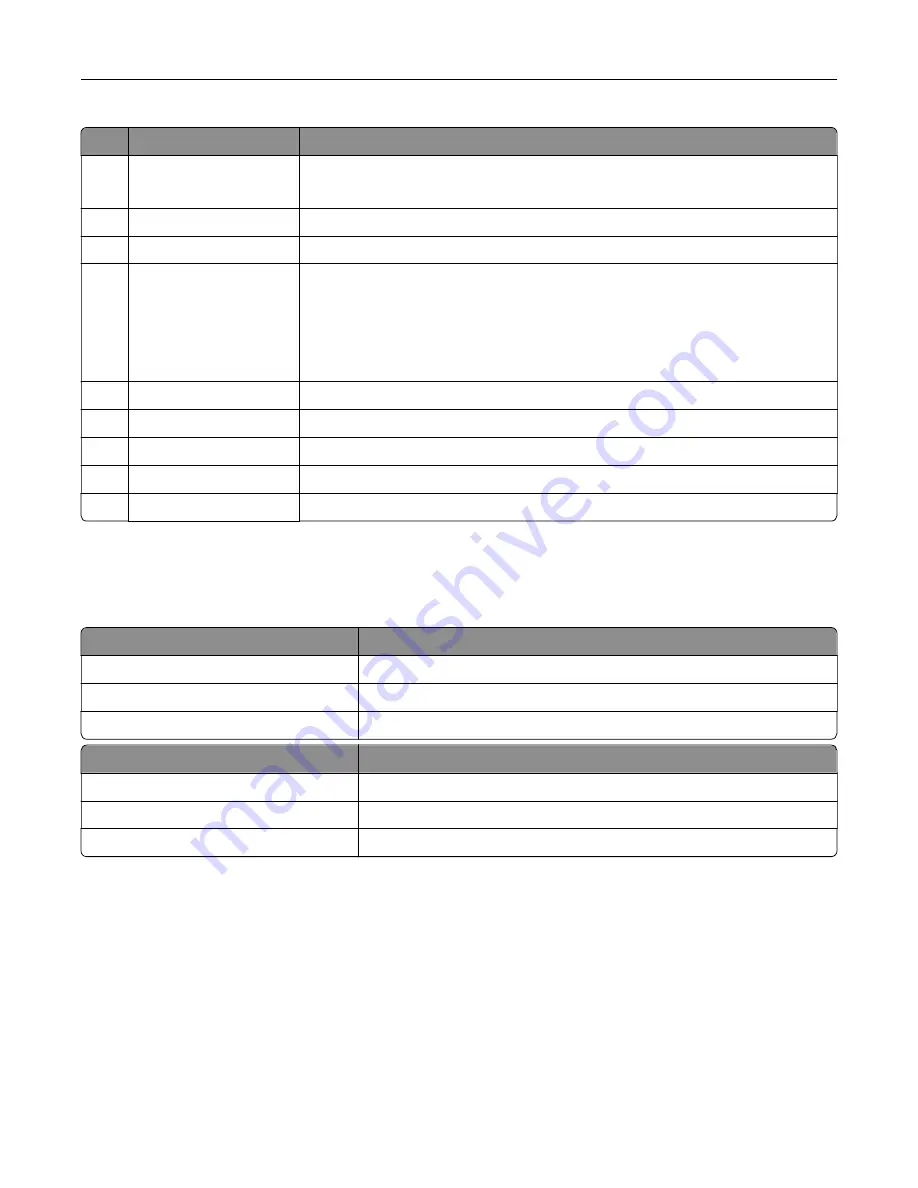
Use the
To
1
Display
•
View the printer messages and supply status.
•
Set up and operate the printer.
2
Home button
Go to the home screen.
3
Keypad
Enter numbers or symbols in an input field.
4
Power button
•
Turn on or turn off the printer.
Note:
To turn off the printer, press and hold the power button for five
seconds.
•
Set the printer to Sleep or Hibernate mode.
•
Wake the printer from Sleep or Hibernate mode.
5
Stop or Cancel button
Stop the current job.
6
Indicator light
Check the status of the printer.
7
Volume buttons
Adjust the volume of the headset or speaker.
8
Headset or speaker port Attach a headset or speaker.
9
Backspace button
Move the cursor backward and delete a character in an input field.
Understanding the status of the power button and
indicator light
Indicator light
Printer status
Off
The printer is off or in Hibernate mode.
Blue
The printer is ready or processing data.
Red
The printer requires user intervention.
Power button light
Printer status
Off
The printer is off, ready, or processing data.
Solid amber
The printer is in Sleep mode.
Blinking amber
The printer is in Hibernate mode.
Using the home screen
Note:
Your home screen may vary depending on your home screen customization settings, administrative
setup, and active embedded solutions.
Learning about the printer
16
Содержание C9235
Страница 1: ...C9235 Printer User s Guide May 2020 www lexmark com Machine type s 5059 Model s 190...
Страница 102: ...2 Remove and then empty the hole punch box 3 Insert the hole punch box 4 Close the door Maintaining the printer 102...
Страница 106: ...4 Shake the toner cartridge three times 5 Insert the new toner cartridge Maintaining the printer 106...
Страница 108: ...9 Insert the waste toner bottle and then close the door Maintaining the printer 108...
Страница 112: ...8 Insert the waste toner bottle and then close the door Maintaining the printer 112...
Страница 135: ...Below the fuser area Duplex area Clearing jams 135...
Страница 140: ...2 Open door J 3 Open door H Clearing jams 140...
Страница 145: ...Staple jam in the staple nisher 1 Slide the staple nisher 2 Remove the staple cartridge holder Clearing jams 145...
Страница 147: ...Staple jam in the staple hole punch nisher 1 Open door H 2 Remove the staple cartridge holder Clearing jams 147...
Страница 188: ...6 Remove the controller board shield Upgrading and migrating 188...
Страница 191: ...6 Remove the controller board shield 7 Unpack the printer hard disk Upgrading and migrating 191...
Страница 197: ...4 Remove the controller board shield Upgrading and migrating 197...
Страница 199: ...8 Attach the thumbscrews 9 Connect the wireless print server to the controller board Upgrading and migrating 199...
Страница 203: ...7 Connect the tray connector to the printer 8 Open trays 2 and 3 Upgrading and migrating 203...
Страница 208: ...9 Remove the stabilizing feet from the tray Upgrading and migrating 208...
Страница 212: ...17 Secure the tray cable with the clamp Upgrading and migrating 212...
Страница 213: ...18 Connect the tray cable to the printer 19 Attach the tray cable cover Upgrading and migrating 213...
Страница 214: ...20 Slide the tray until it clicks into place 21 Attach the stabilizing feet to the printer Upgrading and migrating 214...
Страница 219: ...7 Remove the paper guides 8 Attach the sensor cover Upgrading and migrating 219...
Страница 225: ...8 Attach the nisher to the printer Upgrading and migrating 225...


