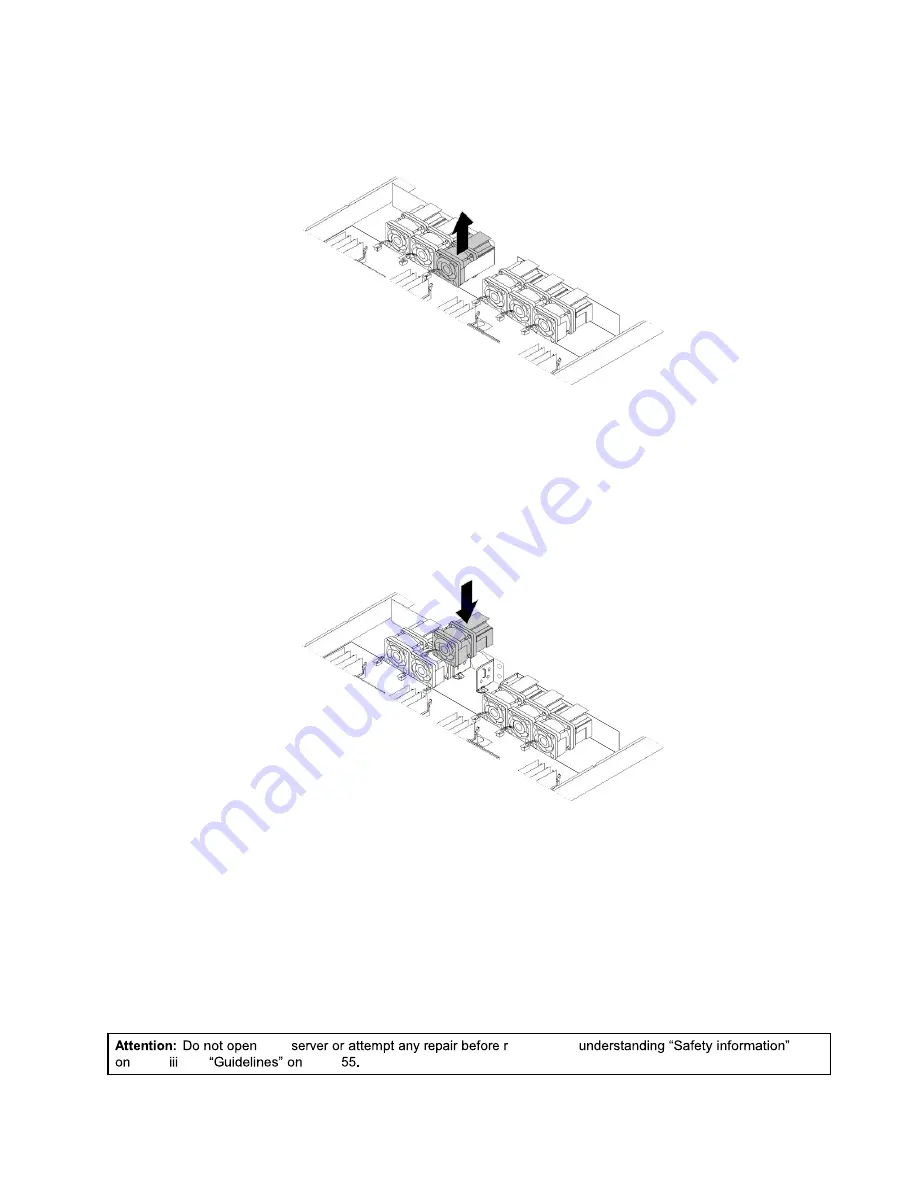
6. Disconnect the cable of the system fan from the system fan connector on the system board. Grasp the
top of the system fan with your index finger and thumb and then lift the system fan out of the server.
Figure 104. Removing the system fan
7. Touch the static-protective package that contains the new system fan to any unpainted surface on the
outside of the server. Then, remove the new system fan from the package.
8. Note the orientation of the new system fan and then insert the new system fan into the chassis until
it is secured into place. Connect the cable of the new system fan to the system fan connector on
the system board.
Figure 105. Installing the system fan
9. If you are instructed to return the old system fan, follow all packaging instructions and use any
packaging materials that are supplied to you for shipping.
What to do next:
• To work with another piece of hardware, go to the appropriate section.
• To complete the replacement, go to “Completing the parts replacement” on page 142.
Replacing the front panel board
129
your
eading and
Содержание ThinkServer RD350G
Страница 14: ...xii ThinkServer RD350G User Guide and Hardware Maintenance Manual ...
Страница 18: ...4 ThinkServer RD350G User Guide and Hardware Maintenance Manual ...
Страница 20: ...6 ThinkServer RD350G User Guide and Hardware Maintenance Manual ...
Страница 54: ...40 ThinkServer RD350G User Guide and Hardware Maintenance Manual ...
Страница 68: ...54 ThinkServer RD350G User Guide and Hardware Maintenance Manual ...
Страница 168: ...154 ThinkServer RD350G User Guide and Hardware Maintenance Manual ...
Страница 180: ...166 ThinkServer RD350G User Guide and Hardware Maintenance Manual ...
Страница 185: ......
Страница 186: ...Lenovo ...


