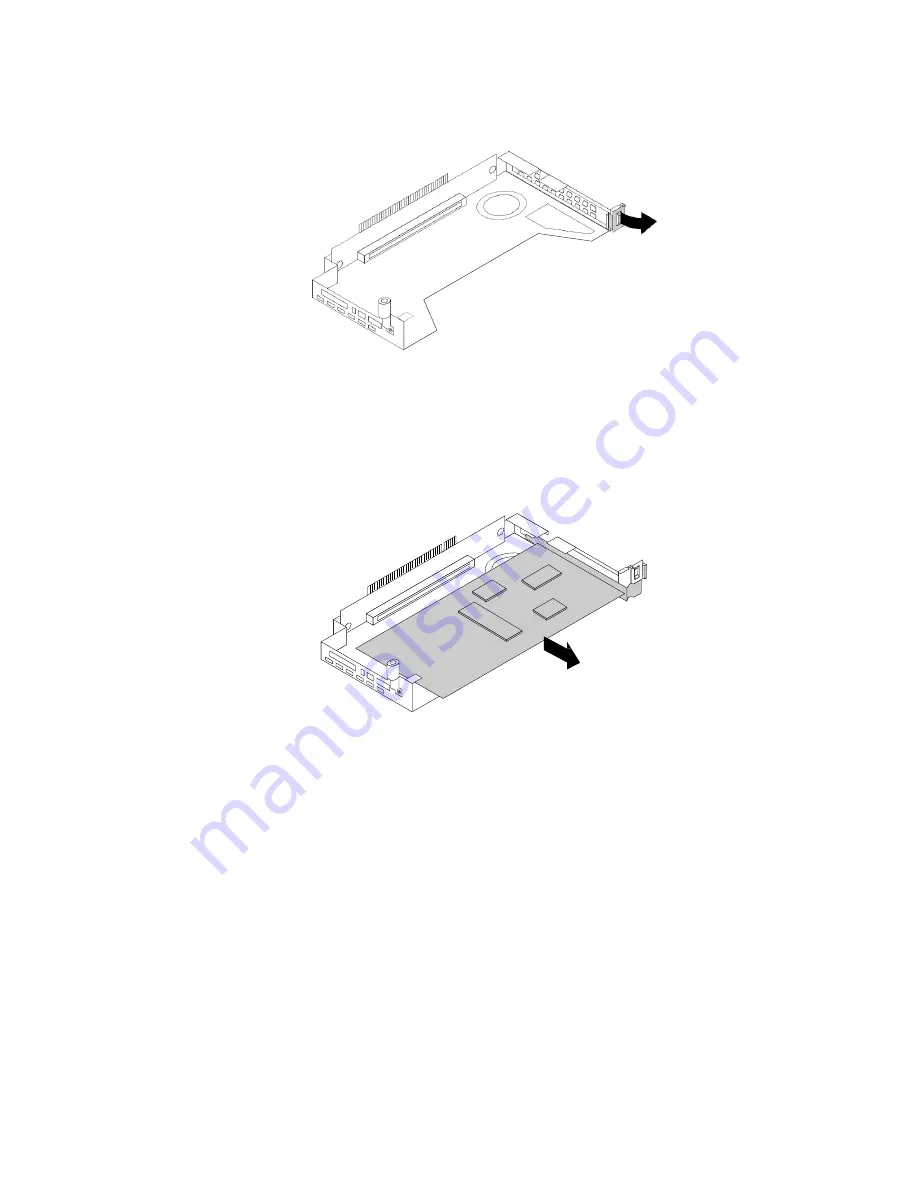
5. Pivot the card latch to the open position.
Figure 50. Pivoting the card latch to the open position
6. Grasp the PCIe card by its edges and carefully pull it out of the PCIe slot on the riser card assembly.
Note:
The PCIe card might fit tightly into the PCIe slot. If necessary, alternate moving each side of the
PCIe card a small and equal amount until it is completely removed from the slot.
Figure 51. Removing the PCIe card
7. Install a new PCIe card to replace the old one or install a PCIe card slot bracket to cover the place. See
“Installing a PCIe card” on page 85.
8. Reinstall the riser card assembly. See
“Replacing the riser card assembly” on page 133.
9. If you are instructed to return the old PCIe card, follow all packaging instructions and use any packaging
materials that are supplied to you for shipping.
What to do next:
• To work with another piece of hardware, go to the appropriate section.
• To complete the removal procedure, go to “Completing the parts replacement” on page 142.
Installing or removing the optical module
The optical module enables you to connect two network devices with optical fiber cables. The optical
module is needed only on some PCIe cards.
89
Содержание ThinkServer RD350G
Страница 14: ...xii ThinkServer RD350G User Guide and Hardware Maintenance Manual ...
Страница 18: ...4 ThinkServer RD350G User Guide and Hardware Maintenance Manual ...
Страница 20: ...6 ThinkServer RD350G User Guide and Hardware Maintenance Manual ...
Страница 54: ...40 ThinkServer RD350G User Guide and Hardware Maintenance Manual ...
Страница 68: ...54 ThinkServer RD350G User Guide and Hardware Maintenance Manual ...
Страница 168: ...154 ThinkServer RD350G User Guide and Hardware Maintenance Manual ...
Страница 180: ...166 ThinkServer RD350G User Guide and Hardware Maintenance Manual ...
Страница 185: ......
Страница 186: ...Lenovo ...


