Group 7
Data/Programming
Page 134
Release R1.03e
LEIBINGER JET3
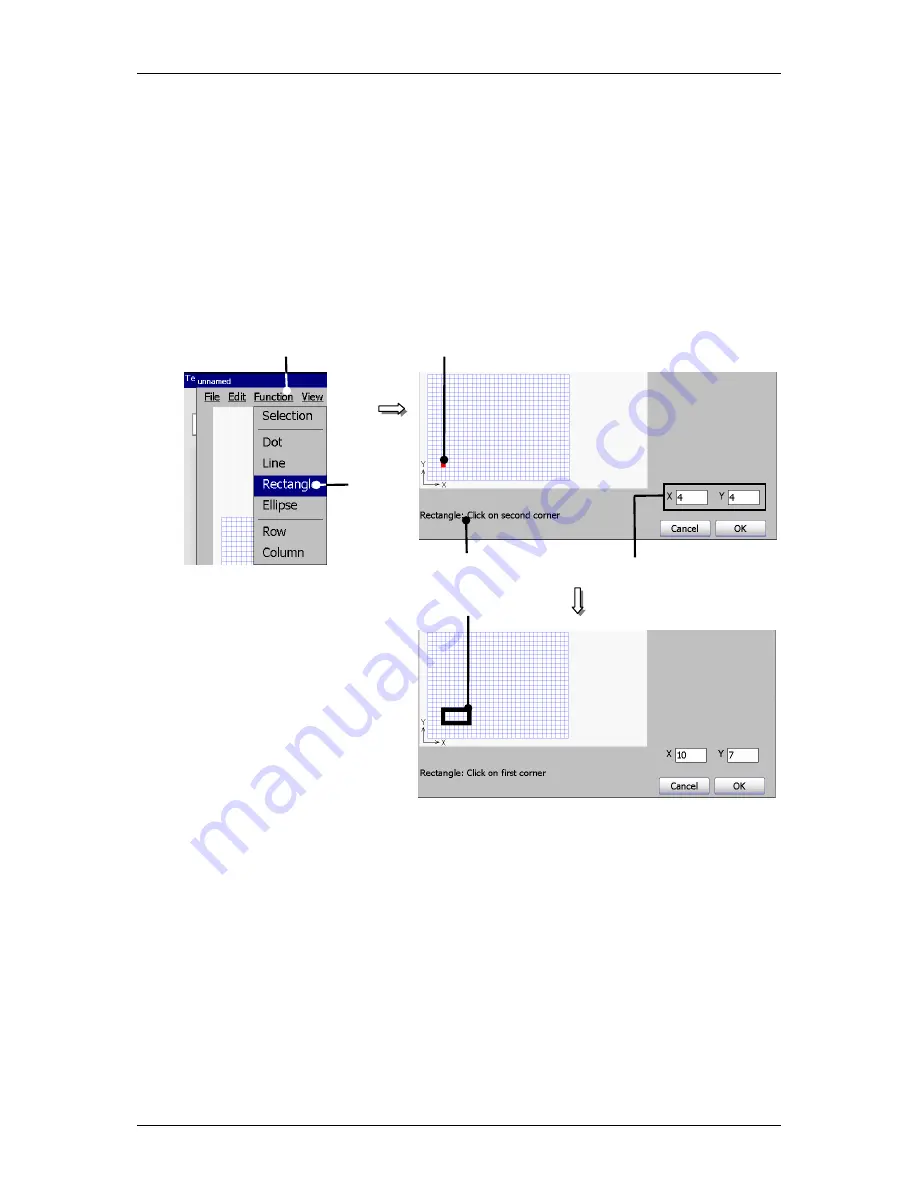
Click in the grid of the input field on the requested start point (3).
The requested start point is placed and is marked red. At the same time on
the display
<Coordinates>
(4) the coordinates of the start points are shown
and on the display <
Activities to carry out
> (5) you can see the next
required or possible activity.
Now click in the grid on the requested position of the end point (6). The
rectangle is now created.
Figure 75
Graphic editor (Create graphic)
1 – Button <Function>
4 – Display <Coordinates>
2 – Drawing tool <Rectangle>
5 – Display <Activities to carry out>
3 – Start point
6 – End point (Rectangle)
2. Deletion of a graphic element or graphic segment:
(Example: A rectangle should be interrupted and a line should be deleted)
Proceeding:
Press the button
<Function>
(1) and afterwards on the drawing tool
<Selection>
(2).
1
6
3
5
2
4
Содержание JET3
Страница 16: ...Group 2 Safety instructions Page 16 Release R1 03e LEIBINGER JET3 2 4 Safety sticker Figure 1 Safety sticker ...
Страница 217: ...Group 12 Appendix Page 217 Release R1 03e LEIBINGER JET3 Interface X3 Outputs ...
Страница 223: ...Group 12 Appendix Page 223 Release R1 03e LEIBINGER JET3 12 3 2 Cabinet LJ3 Cabinet cpl LJ3 ...


