background image

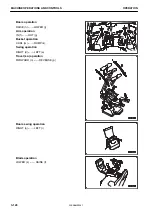
METHOD FOR OPERATING WORKING MODE

1.

Press function switch “F5” on the standard screen of ma-
chine monitor.
The screen changes to “Working Mode” screen.

2.

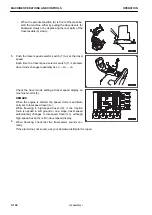
On  “Working  Mode”  screen,  press  function  switches  “F1”,
“F2”, and “F5” to select the appropriate working mode.

3.

After  selecting  the  working  mode,  press  function  switch
“F4”.
Change  the  setting  of  selected  working  mode,  and  then
the screen returns to the standard screen.
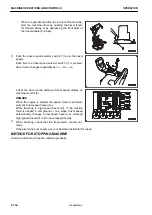
When function switch  “F3” is pressed, the change is can-
celed and the screen returns to the standard screen.
If  a  working  mode  is  selected,  and  nothing  is  done  for  5
seconds,  the  selected  working  mode  is  automatically  ac-
cepted and the screen returns to the standard screen.

PROHIBITED OPERATIONS

k

k

 WARNING

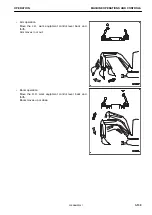
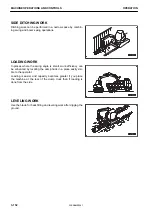
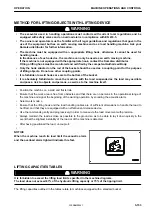
Do not operate the work equipment control lever when the machine is traveling.
 

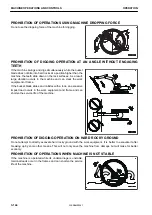
PROHIBITION OF OPERATIONS USING SWING FORCE

Do not use the swing force to compact soil or break objects. It
drastically reduces the life of the machine, and is also danger-
ous.

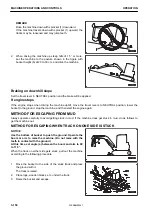
PROHIBITION OF OPERATIONS USING TRAVEL FORCE

Do  not  use  the  travel  force  to  perform  excavation  by  digging
the bucket into the ground. This damages the machine or work
equipment.

MACHINE OPERATIONS AND CONTROLS

OPERATION

3-142

WENAM00241

Содержание PC80MR-5E0

Страница 1: ...Unsafe use of this machine may cause serious injury or death Operators and maintenance personnel must read this manual before operating or maintaining this machine This manual should bekeptinsidethec...

Страница 2: ......

Страница 3: ...new Komatsu or Ko matsu approved rebuilt parts or assemblies or others parts of equivalent quality and that the engine be serviced by an authorized Komatsu distribu tor Failure to follow these recomme...

Страница 4: ...at If this manual is lost or damaged contact Komatsu or your Ko matsu distributor and tell them about the machine model name and the serial No immediately to arrange for its replacement For details re...

Страница 5: ...e processing of your personal data i e storage collection transfer etc of all information that relates to you as operator to the party with whom you have most direct relationship In principle this mea...

Страница 6: ...4 above For the purposes a to l as indicated in section 4 above as well as for the purpose of informing a third party in the context of a possible merger acquisition or demerger the processing of your...

Страница 7: ...b the processing is illegitimate or c the data are no longer needed for the pur poses which are outlined above but you need them to defend yourself in judicial proceedings You have the right to oppos...

Страница 8: ...y mes sage This signal word indicates an imminently hazardous situation which if not avoided will result in death or serious injury This signal word indicates a potentially hazardous situation which i...

Страница 9: ...zardous condition is shown inside a circle Komatsu cannot predict every circumstance that might involve a potential hazard in operation and maintenance Therefore the safety messages in this manual and...

Страница 10: ...standard deviation of the meas ured time averaged A weighted emission sound pressure level at the operator s position is 2 5 dB in accordance with ISO 11201 Sound power level emitted by the machine m...

Страница 11: ...ages 3 Keep the terrain where the machine is working and travelling in good condition Remove any large rocks or obstacles Fill any ditches and holes Site manager should provide machine operators with...

Страница 12: ...Do not repeatedly handle and lift loads VIBRATION LEVELS FOREWORD 1 10 WENAM00241...

Страница 13: ...up transport and distribute component parts of buildings or civil engineering structures This machine is not prepared for use in Demolition Using this machine in demolition work gives an in creased r...

Страница 14: ...visibility of a height of 1 2 m at a point 1 m away from the outside surface of the machine and a visibility for a radius of 12 m KS001602 k k CAUTION During operation the movement of the work equipme...

Страница 15: ...ibility map RKA67870 PROTECTIVE STRUCTURES This machine is equipped with a structure to protect the operator conforming to ISO12117 2 2008 ROPS and ISO10262 1998 OPG FOREWORD INTRODUCTION 1 13 WENAM00...

Страница 16: ...n use or maintenance of the emissions control system in accordance with the rectification measures indicated by the warnings referred to take ap propriate actions by following the message displayed on...

Страница 17: ...ms LOCATION OF PRODUCT IDENTIFICATION NUMBER PIN MACHINE SERI AL NO PLATE It is located on the front right of swing bracket The design of the nameplate varies according to the district RKA67890 LOCATI...

Страница 18: ...TRIBUTOR Machine serial No Engine serial No Product identification number PIN Manufacturer s name Address Komatsu Italia Manufacturing S p A Via Bergoncino 28 36025 Noventa Vicentina VI Italy Distribu...

Страница 19: ...ON NUMBER G ENGINE POWER D MANUFACTURER Serial plate Road homologation D E F G H 22E 98 31290 TOTAL MAX WEIGHT HOMOLOGATION No A SERIAL NUMBER E MANUFACTURER B WEIGHT F MODEL C PRODUCT IDENTIFICATION...

Страница 20: ...Declares that this machine PC80MR 5E0 Fulfils all the relevant provisions of following EC Directives Machine Directive 2006 42 EC Electro Magnetic Compatibility Directive 2014 30 EU Outdoor Noise Dir...

Страница 21: ...D MAINTENANCE 2 15 PRECAUTIONS BEFORE STARTING OPERATION 2 15 PREPARATIONS FOR SAFE OPERATION 2 15 PRECAUTIONS TO PREVENT FIRE 2 16 PRECAUTIONS WHEN GETTING ON OR OFF MACHINE 2 18 DO NOT GET CAUGHT IN...

Страница 22: ...G AIR CONDITIONER 3 168 HANDLE RADIO 3 170 HANDLE RUBBER AND ROAD LINERS SHOES 3 171 RECOMMENDED USE OF RUBBER AND ROAD LINERS SHOES 3 171 COMPARISON OF RUBBER ROAD LINERS SHOES AND STEEL SHOES 3 171...

Страница 23: ...LE TABLE 4 11 MAINTENANCE INTERVAL FOR HYDRAULIC BREAKER 4 12 MAINTENANCE PROCEDURE 4 13 WHEN REQUIRED 4 13 CHECKS BEFORE STARTING 4 43 EVERY 100 HOURS MAINTENANCE 4 43 EVERY 250 HOURS MAINTENANCE 4 4...

Страница 24: ...LANATION OF COMPONENTS ON MACHINES WITH ATTACHMENT 3rd LINE 6 32 METHOD FOR CONNECTING HYDRAULIC CIRCUIT AND OPERATING ATTACHMENT 3rd LINE 6 33 ARM PIN INFORMATION 6 38 ATTACHMENTS AND OPTIONS 6 39 IN...

Страница 25: ...d and make sure that you fully understand the precautions descri bed in this manual and the safety labels on the machine When operating or servicing the machine always follow these precautions strictl...

Страница 26: ...en cleaning the safety labels do not use organic solvents or gasoline These may cause the labels to peel off If the safety labels are damaged lost or cannot be read properly replace them with new ones...

Страница 27: ...LOCATION OF SAFETY LABELS RKA83870 1 Caution for work equipment 2 Danger do not enter within swing range SAFETY SAFETY LABELS 2 3 WENAM00241...

Страница 28: ...am 19 Caution when standing in operator s cab 20 Caution when stowing front window 21 Emergency escape 22 Attachment connection with hydraulic quick cou pler 23 Warning always fasten safety belt 24 Ca...

Страница 29: ...lic tank oil filler cap when cooling water or hydraulic oil is at high tempera ture 4 Caution for adjusting track tension 09657 A0881 Sign indicates a hazard of flying plug from track adjuster that co...

Страница 30: ...le the accumulator make holes in it weld it cut it roll it or bring it near a flame 9 Caution for wiper blade correct position 22B 00 32710 Read manual regarding closing the front window Check that th...

Страница 31: ...seat Lower the work equipment to the ground and move safety lock lever located near seat to lock position to avoid hit ting unlocked operation levers Sudden and unwanted machine movement can cause se...

Страница 32: ...avel path if it can be done safe ly Use spotter if view is obstructed k k WARNING To open or close the front or ceiling window never stand up from the operator s seat before throwing the safety lock l...

Страница 33: ...rd boom 22E 98 31160 2 piece boom 22E 98 31180 3rd line attachment 22E 98 31270 18 Control levers operational function diagram 22E 98 31240 19 Caution when standing in operator cab 09839 A0481 Take ca...

Страница 34: ...ock lever securely to the LOCK position L then stop the engine If you accidentally touch the con trol levers pedals when they are not locked there is a hazard that the machine may suddenly move and ca...

Страница 35: ...ick coupler manufacturer manual considering the operations following as a guide not as instructions For details see ATTACHMENTS AND OPTIONS QUICK COUPLER SYSTEM 23 Warning always fasten safety belt 09...

Страница 36: ...ar the batteries no sparks b Always wear safety glasses when working with batteries c Keep children away from batteries ROPS for H E OPG TOP GUARD CERTIFICATION This protective structure complies with...

Страница 37: ...rking with batteries f Caution explosive gases 27 Lock lever automatic lock cancel and pump secondary drive switches 22N 98 53730 For details see OPERATION SWITCHES 28 Caution for high pressure fuel 6...

Страница 38: ...29 Warning for quick coupler system 22N 98 53830 There is a danger of an exposed person being killed by falling attachment Read the manual for safe operation SAFETY LABELS SAFETY 2 14 WENAM00241...

Страница 39: ...charge of safety for explanation PREPARATIONS FOR SAFE OPERATION PRECAUTIONS FOR SAFETY RELATED EQUIPMENT Be sure that all guards and covers are in their proper position Repair them immediately if the...

Страница 40: ...struct operation and cause the machine to move unexpectedly resulting in serious personal injury or death Do not stick suction pads to the window glass Suction pads act as a lens and may cause fire Do...

Страница 41: ...asoline There is danger that they may catch fire Do not weld or use a cutting torch to cut any pipes or tubes that contain combustible liquids Determine the well ventilated areas for storing oil and f...

Страница 42: ...two hands and one foot or two feet and one hand Always wipe out the oil or mud from the handrail and track in order to prevent your hand and feet from slipping off when getting on and off the machine...

Страница 43: ...p the engine In addition lock all places and always take the key with you and keep it in the specified location EMERGENCY EXIT FROM OPERATOR S CAB If it should be impossible to open the door of the ca...

Страница 44: ...ur Komatsu distributor Even if the protective structure is installed always fasten your seat belt properly when operating the ma chine If you do not fasten your seatbelt properly it cannot display its...

Страница 45: ...ile operating the machine Always ensure the operator s safety when working with unfamiliar work equipment When installing and using optional attachments always read the instruction manual for the atta...

Страница 46: ...UTIONS WHEN WORKING ON LOOSE GROUND Avoid driving or operating the machine near the edge of cliffs road edges and deep ditches The ground may be weak in such areas If the ground should collapse under...

Страница 47: ...d give signals When working in dark places turn on the working lamp and head lamps installed to the machine and set up additional lighting in the work area if necessary Stop operations if the visibili...

Страница 48: ...ork to ensure that there is no problem with the operation of the machine If these checks are not performed properly problems may occur with the operation of the machine and there is a danger which may...

Страница 49: ...engine with a different power source There is a hazard that this will ignite the battery and cause the battery to explode Before charging or starting the engine with a different power source melt the...

Страница 50: ...ine or abnormalities of instruments Also check that there is no leakage of oil or fuel If any problem is found repair it immediately PRECAUTIONS WHEN TRAVELING IN FORWARD OR REVERSE AND SWINGING When...

Страница 51: ...with them When driving the machine on a level ground keep the work equipment at height a of 40 to 50 cm above the ground If that height is not maintained between the work equipment and the ground the...

Страница 52: ...lower the work equip ment to the ground immediately to help stopping the ma chine When driving the machine up slopes set the operator s cab facing uphill when driving downhill set the operator s cab f...

Страница 53: ...ce and turn over when per forming swing or work equipment operations This may lead to serious personal injury or death Always pro vide a stable place when performing these operations and operate caref...

Страница 54: ...bal ance and tip over When operating the machine on the flat ground as well as on slopes observe the follow ing Do not suddenly lower swing or stop the work equipment Do not suddenly extend or retract...

Страница 55: ...the machine is transported on a trailer serious personal injury or death may result because of the acci dent during transportation Always observe the following Always check the machine dimensions car...

Страница 56: ...the work equipment retract it and per form the operation slowly For machines equipped with a cab always lock the door after loading the machine To prevent the door from opening during transportation...

Страница 57: ...ped with safety valves and an overload alarm in compliance with EN 474 5 PRECAUTIONS FOR LIFTING OPERATIONS Falling of a lifted load or tipping over of the machine can cause serious personal injury or...

Страница 58: ...re Always be sure to lift within the relevant lifting limits and not exceed ing RLL Do not use the work equipment or swing to pull the load in any direction There is a danger that the lifting eye may...

Страница 59: ...is to be lifted at a height where this is not possi ble the sling or chain must only be guided by the back wall of the bucket and not any other part of the machine SAFETY PRECAUTIONS FOR OPERATION 2 3...

Страница 60: ...e tidy to enable you to perform operations safely If the work place is not kept clean and tidy there is the danger that you will trip slip or fall over and injure your self SELECT SUITABLE PLACE FOR I...

Страница 61: ...AINTENANCE WHEN ENGINE IS RUNNING To prevent accident do not perform maintenance with the engine running When it is necessary to perform the maintenance with the engine running always observe the foll...

Страница 62: ...ys observe the followings Avoid spilling of oil and grease Do not litter the tools Watch your step when walking around on the ma chine Remove mud and greases stuck to the shoe sole Never jump down fro...

Страница 63: ...starting switch to OFF position and check that the system operating lamp is off Then set the battery disconnect switch to OFF position and remove the switch key If you check and handle battery without...

Страница 64: ...may be generated and they can cause a fire Always observe the following Do not let tools or other metal objects make any contact between the battery cables Do not leave tools lying around near the ba...

Страница 65: ...r plug slowly to release the internal pressure and remove the cap or plug PRECAUTIONS FOR HIGH TEMPERATURE PARTS To prevent burns from touching high temperature parts when checking or performing maint...

Страница 66: ...or oil or fuel is found to be leaking from the mount stop operations and tighten to the specified torque If any damaged or deformed hoses or piping are found consult your Komatsu distributor Replace...

Страница 67: ...ring that acts to reduce the impact on the idler If it is disassembled by mistake the spring may shoot out and cause serious personal injury or death If it is necessary to disassemble it ask your Koma...

Страница 68: ...mful objects such as oil fuel coolant solvent filters and batteries Avoid exposure to burning rubber or plastics which produce a toxic gas that is harmful to people When disposing of parts made of rub...

Страница 69: ...OPERATION Please read and make sure that you understand the SAFETY section before reading this section 3 1 WENAM00241...

Страница 70: ...GENERAL VIEW MACHINE EQUIPMENT NAME RKA67920 GENERAL VIEW OPERATION 3 2 WENAM00241...

Страница 71: ...ocket 13 Battery disconnect switch cover 14 Cabin door 15 Revolving lamp if equipped 16 Working lamp 17 Working lamp on arm if equipped 18 Working lamp on arm 19 Dirt cover 20 Engine rear cover 21 Dis...

Страница 72: ...witch 5 Travel pedal 6 Travel lever 7 Swing lock cover 8 Boom swing control pedal 9 Machine monitor 10 R H work equipment control lever 11 Travel speed selector switch 12 Blade control lever 13 Temper...

Страница 73: ...p switch 28 Pump secondary drive switch 29 Lock lever automatic lock cancel switch 30 Engine shutdown secondary switch 31 Battery disconnect switch 32 System operating lamp 33 FRESH RECIRC air selecto...

Страница 74: ...mp 15 Aftertreatment devices regeneration disable pilot lamp 16 Preheating pilot lamp 17 Lock lever automatic lock cancel pilot lamp 18 Lock lever pilot lamp 19 Seat belt caution lamp REMARK The above...

Страница 75: ...70 1 Front window 2 Ceiling window 3 Door 4 Door lock release lever 5 Power supply outlet 6 Fuse 7 Emergency escape hammer 8 Small slide window 9 Fire extinguisher if equipped 10 Cup holder OPERATION...

Страница 76: ...11 Fusible link 12 Ashtray if equipped 13 Tool boxes GENERAL VIEW OPERATION 3 8 WENAM00241...

Страница 77: ...EQUIPMENT AA Standard screen BB Warning or Error screen 1 Gauge display 2 Pilot display 3 Warning display 4 Guidance icon display 5 Function switches F1 to F8 BASIC OPERATION OF MACHINE MONITOR BASIC...

Страница 78: ...the starting switch is turned to ON position the screen shown in the figure is displayed and engine does not start If the engine shutdown secondary switch is turned to OFF nor mal position b the mach...

Страница 79: ...TOR WHEN STARTING ENGINE IN AB NORMAL SITUATION If there is maintenance time warning when starting the engine If there is any maintenance time warning when starting the engine opening screen CC change...

Страница 80: ...ing screen BB After opening screen CC is displayed for 2 seconds the screen changes to warning screen BB After warning screen BB 1 and 3 are displayed for 2 seconds the screen automatically changes to...

Страница 81: ...MACHINE MONITOR WHEN TROUBLE OCCURS WHILE OPERATING MACHINE If any abnormality occurs during operation standard screen AA changes to warning screen BB After warning screen BB 1 and 3 are displayed fo...

Страница 82: ...f action level displays and required actions The caution lamp that lights up in red when an action level is displayed warns operator to stop the ma chine urgently stop or pause the current operation I...

Страница 83: ...plays and required actions Degree of ur gency Action lev el Buzzer Caution lamp Required action High Low L04 Sounds contin uously Lights up in red Stop the machine immediately and ask your Komatsu dis...

Страница 84: ...aintenance of the emissions control system in accordance with the rectification measures indicated by the warning referred It is mandatory to take appropriate actions by following the message displaye...

Страница 85: ...system caution lamp Abnormal L04 L03 Abnormal L01 Overload caution lamp Overload Seat belt caution lamp Seat belt is not fastened For the meaning of each caution lamp and the action to take for it see...

Страница 86: ...overheat prevention system is auto matically actuated and the engine speed drops Stop the machine operations and run the engine at low idle un til the caution lamp changes to the normal display color...

Страница 87: ...abnormality in the hydraulic system When action level L04 is displayed The caution lamp lights up in red and the alarm buzzer sounds continuously Stop the machine immediately and ask your Komatsu dist...

Страница 88: ...e to a safe place immediately and perform the manual stationary regeneration The manual stationary regeneration may start automatically to protect KDPF system When soot is accumulated The caution lamp...

Страница 89: ...may be restricted for use but the machine can operate When you finish the operation always have the inspection and maintenance performed Ask your Komatsu distributor for the inspection and maintenanc...

Страница 90: ...in red The maintenance time is over If no action is taken the machine performance will become worse and the machine life will be shortened Perform necessary maintenance as soon as possible When givin...

Страница 91: ...chine immediately and ask your Komatsu distribu tor for inspection REMARK This indicator comes on with a red light also when the quick coupler locking unlocking operations are carried out In this case...

Страница 92: ...l consumption gauge 14 ECO gauge PILOT DISPLAY The pilot display consists of the pilot lamps to check the actuation of each function When the starting switch is in ON position the pilot lamps light up...

Страница 93: ...pilot lamp lights up Auto deceleration is turned on Auto deceleration pilot lamp goes out Auto deceleration is turned off WORKING MODE DISPLAY The working mode display shows the setting of the workin...

Страница 94: ...ines ready for installation of attachment ATT E ATT E mode For operations emphasizing fuel consumption out of those of 2 way attachments like crusher For machines ready for installation of attachment...

Страница 95: ...made OFF There is no message AFTERTREATMENT DEVICES REGENERATION PILOT LAMP k k CAUTION Exhaust gas temperature may increase higher than the previous models during the aftertreatment devices regenera...

Страница 96: ...d when the manual stationary regeneration is necessary KDPF soot accumulation caution lamp lights up If KDPF soot accu mulation caution lamp lights up cancel the regeneration disa ble setting and perf...

Страница 97: ...MARK The overheat prevention system is actuated when the graduation of gauge goes in red range A The engine runs at low idle Engine coolant temperature caution lamp D lights up in red The alarm buzzer...

Страница 98: ...unning the service meter advances even if the machine is not moving The service meter advances 0 1 every 6 operation minutes regardless of the engine speed Service meter display Clock display 12 hour...

Страница 99: ...ergy saving operations within the green range Decrease the frequency of travel It also helps energy saving operations Consider the best way of operation for energy saving MONITOR SWITCHES 1 Function s...

Страница 100: ...ay is user menu screen The types of guidance icons and functions of function switches differ with the contents of the displayed screen but representa tive guidance icons frequently used and their func...

Страница 101: ...lever is operated with the engine at idle speed engine speed will return to the previous operating speed and you can perform the operation 1 When function switch F1 is pressed and the auto decel erati...

Страница 102: ...u want to have the automatic setting of P E L B ATT P or ATT E modes optional default setting when starting the engine How to use the working mode selecting function Select the working mode after star...

Страница 103: ...s of the following kinds The right and left menu screens can be changed by pressing the function switches F6 and F7 A Working Record B Machine Setting C Aftertreatment Devices Regeneration D NOx Contr...

Страница 104: ...egeneration Disable Operation of Manual Stationary Regeneration D NOx Control System Info NOx system control information E Maintenance Check and reset of various maintenance times F Monitor Setting Sc...

Страница 105: ...Displays the setting screen for the selected item Function switch F6 Moves to the left menu When on the left end menu it moves to the right end menu Function switch F7 Moves to the right menu When on...

Страница 106: ...irst line Function switch F2 Moves to the previous item 1 line above When on the first line it moves to the last line Function switch F3 Returns the screen to Working Record menu screen CHECK FUEL CON...

Страница 107: ...pn Record screen if you press function switch F1 graph display changes between hourly average fuel consumption during the last 12 hours and daily fuel con sumption during the last 1 week Last 12 hours...

Страница 108: ...ing of ECO Gauge Display Fuel Target Value Operations on Configurations menu screen On Configurations screen you can perform the following op erations with function switches F1 to F4 Function switch F...

Страница 109: ...split measurement period Select Split Time to start the automatic measurement of fuel consumption OFF Does not display the fuel consumption gauge On Ave Fuel Consumption Display screen you can perform...

Страница 110: ...o be displayed or not to be displayed after starting the engine It is possible to change the setting of Display Non display of the ECO gauge 1 Select ECO Gauge Display on Configurations menu screen an...

Страница 111: ...g urations menu screen and then press function switch F4 2 ECO Gauge Display Fuel Target Value screen is dis played On ECO Gauge Display Fuel Target Value screen you can perform the following operatio...

Страница 112: ...2 Breaker Setting screen is displayed Select the setting corresponding to the operation on Breaker Setting screen and then press function switch F4 Setting of B mode is changed On Breaker Setting scre...

Страница 113: ...Moves to the previous alphabet numeral or symbol Function switch F2 Moves to the next alphabet numeral or symbol Function switch F3 Returns the screen to Breaker Setting screen without changing the n...

Страница 114: ...l Function switch F7 Increases the flow rate by 1 level ATTACHMENT SETTING For the machine s ready for installation of attachment you can select the setting of ATT P and ATT E modes from 5 patterns on...

Страница 115: ...Function switch F4 Allocates the selected setting to that of ATT P and ATT E mode or set it to the No Attachment Function switch F6 Changes the flow rate of the selected attachment setting Function s...

Страница 116: ...er it moves to the first letter Function switch F8 If some input letter is left CLEAR is displayed Clears all the letters If all the letters are cleared DEFAULT is displayed Displays the initial name...

Страница 117: ...The engine coolant temperature is within the standard value between 60 to 110 C The engine is not in warm up operation On Auto Idle Stop Timer Set screen you can select the time to operate the auto id...

Страница 118: ...ompletion screen is displayed If you press the function switch F4 on Auto Idle Stop Timer Set completion screen the screen returns to Ma chine Setting menu screen When the elapsed time of idling reach...

Страница 119: ...wipers and radio keep their states before the engine is stopped 7 Turn the starting switch to OFF position This prevents battery discharging 8 When restarting the engine turn the starting switch as us...

Страница 120: ...nce Due Time Reset screen If no switch is operated for 30 seconds on Maintenance menu screen the screen automatically returns to the standard screen When the maintenance time caution lamp is lit on th...

Страница 121: ...intenance screen REMARK When canceling the reset press function switch F3 The screen returns to Maintenance screen On Maintenance Due Time Reset screen if no switch is operated for more than 30 second...

Страница 122: ...en night mode If the lamp switch is at DAY position and the screen is adjusted it is possible to adjust the brightness of the monitor screen day mode CLOCK ADJUSTMENT Clock Adjustment menu screen is u...

Страница 123: ...k Adjustment menu screen and then press function switch F4 2 GPS Synchronization screen is displayed ON Date and time on the machine monitor are automatically adjusted in accordance with the clock of...

Страница 124: ...cording to the following op eration You can change the numeral displayed in yellow Function switch F1 Puts back the numeral by 1 Function switch F2 Advances the numeral by 1 Function switch F3 Cancels...

Страница 125: ...nge and returns the screen to Clock Adjustment menu screen Function switch F6 Moves to the blue display Function switch F7 Moves to the blue display SWITCH 12H 24H DISPLAY MODE Perform the setting of...

Страница 126: ...ch F4 2 The Daylight Saving Time screen is displayed ON The clock is displayed in daylight saving time summer time The clock display becomes 1 hour forward OFF The clock is displayed in normal time Ch...

Страница 127: ...isplayed Select the language to be displayed and then press the function switch F4 The language to be displayed on the machine monitor is changed On Language screen you can perform the following op er...

Страница 128: ...tor on the mail check menu screen by pressing function switch F4 Message is distinguished as follows according to the lighting states of the message display Lights up in green There is unread message...

Страница 129: ...out of date or when a new message arrives CHECK MESSAGE 1 When the message pilot lamp lights up on the standard screen press function switch F4 The screen changes to the mail confirmation menu screen...

Страница 130: ...the input value by 1 Function switch F3 Cancels the input value and returns the screen to the mail confirmation menu screen Function switch F4 Validates the input value and the screen changes to the m...

Страница 131: ...Quick coupler switch if equipped 12 2nd 3rd line attachment proportional switch if equipped 13 2nd line activation switch if equipped 14 Horn switch 15 1st line attachment proportional switch 16 Brea...

Страница 132: ...C START position This is the position to start the engine Keep the key at START position C during cranking Release your hand off the key immediately after the engine has been started The key in start...

Страница 133: ...tivate the 2nd line For handling of this switch see ATTACHMENTS AND OP TIONS 2ND 3RD LINE ATTACHMENT PROPORTIONAL SWITCH The 2nd 3rd line attachment proportional switch is used to op erate the attachm...

Страница 134: ...SELECTOR SWITCH k k WARNING When loading to or unloading onto from a trailer always drive the machine at low speed set it to Lo and never operate the travel speed selector switch during travel If the...

Страница 135: ...ecting washer fluid Do not press it at the position of injecting washer fluid when the washer tank is empty Wiper switch actuates the wiper at the front window glass a Stop position The wiper stops b...

Страница 136: ...he hydraul ic system errors DXA8KB and DXA8KA If There is the hydraulic system error repair the error as soon as possible Check that the pump secondary drive switch is in NORMAL position b If not retu...

Страница 137: ...normal switch is set to lower position When the lock lever automatic lock cancel switch is set to CANCEL position a the lock lever automatic lock cancel pilot lamp lights up After moving the machine...

Страница 138: ...turned to ON position while the engine shutdown secondary switch is in EN GINE STOP position a Engine Shutdown Secon dary SW in Operation is displayed on the machine monitor If this screen is displaye...

Страница 139: ...re touched by mistake it may lead to serious personal injury or death Always check that the lock lever is in LOCK position When pulling up or pushing down the lock lever be careful not to touch the wo...

Страница 140: ...a problem Before setting the lock lever to FREE position make sure that all control levers and control pedals are set to NEUTRAL position If any of them is out of NEUTRAL position the work equipment...

Страница 141: ...erations and do not put your foot on the pedal when it is not necessary When the track frame is facing the rear the direction of operation of the steering lever is the opposite to the direction of mov...

Страница 142: ...lever is used to operate the blade a Blade LOWER The blade control lever is pushed forward b Blade RAISE The blade control lever is pulled back N NEUTRAL Blade is held at current position SWING LOCK...

Страница 143: ...ORK EQUIPMENT CONTROL LEVER The L H work equipment control lever is used to operate the arm and upper structure Swing operation a Swing RIGHT b Swing LEFT Arm operation c Arm IN d Arm OUT N NEUTRAL Th...

Страница 144: ...nds and lift it up Do not release your hands until the window is fixed When closing the front window the window may move quicker under its own weight Hold the han dles securely with both hands when cl...

Страница 145: ...t the handle locks 2 are securely fixed When pushing the handles 1 upward check that the han dle locks 2 move toward FREE position F once and then return to LOCK position L If they are not fixed repea...

Страница 146: ...top of lower window push the right and left handles 1 forward and push them against the right and left stoppers 3 to fix them securely 7 Check that the handle locks 2 are securely fixed When pushing t...

Страница 147: ...operator s cab use hammer to break the glass and escape through the window CAB DOOR k k CAUTION Cab door must be checked to be locked either at the open position or closed position Always place the m...

Страница 148: ...N LOCK FOR CAB DOOR Use this to fix the cab door in position after opening it or when getting in and out the machine 1 Push the cab door against the catch part 1 to lock it in position Fix the cab doo...

Страница 149: ...er outlet as a power supply for the lighting equip ment etc FUSE NOTICE When replacing the fuse make sure to turn the starting switch to OFF position and set the battery dis connect switch to OFF posi...

Страница 150: ...nitor controller service connector 14 20 A Engine unit 15 20 A EGR valve Fuses 16 for replacement are provided in the fuse holder Af ter using the fuses 16 for replacement replenish them imme diately...

Страница 151: ...tags in the tool boxes They are located Inside the dirt cover Inside of the cover on the left side of the machine GREASE PUMP HOLDER It is located inside the dirt cover of the machine Keep the grease...

Страница 152: ...gerous NOTICE Keep battery disconnect switch in ON position except the following cases When the machine is stored for a long time more than a month When repairing the electrical system When performing...

Страница 153: ...battery flows into the circuit Before starting the machine be sure to set the switch to this position SYSTEM OPERATING LAMP System operating lamp indicates that the controller mounted on the machine...

Страница 154: ...of paper near the job site set the system to the regeneration disable to prevent fire hazards due to highly heated exhaust gas during the after treatment devices regeneration Do not leave the operato...

Страница 155: ...articular if engine is kept running with no load the regeneration frequency may increase but this is not a failure Even just after the regeneration is completed the soot accumulation level may not be...

Страница 156: ...to Aftertreatment Devices Regeneration screen C after 3 seconds only the first time If the manual sta tionary regeneration is not performed the screen returns to standard screen B after 30 seconds The...

Страница 157: ...nual stationary regeneration is performed If the KDPF soot accumulation caution lamp 2 lights up in red immediately stop the machine in a safe place and per form the manual stationary regeneration REM...

Страница 158: ...y regeneration can be performed while KDPF soot accumulation caution lamp 2 is lit and the warm up operation has completed 1 Move the machine to a safe place and stop it while the en gine is running 2...

Страница 159: ...screen shown in the figure may be displayed This indicates that the procedure from step 1 to 4 is not performed correctly or there is trouble other than KDPF soot accumulation abnormality Check that t...

Страница 160: ...e indicates correct tem perature If it indicates low temperature lights up in white per form the warm up operation and repeat the procedure from step 1 If the manual stationary regeneration still cann...

Страница 161: ...tion disable 8 When the manual stationary regeneration is completed the engine speed gradually decreases to low speed and the screen automatically returns to the standard screen PROCEDURE FOR AFTERTRE...

Страница 162: ...and the screen returns to Aftertreatment Devices Re generation screen 5 The screen returns to Aftertreatment Devices Regenera tion screen and regeneration is disabled REMARK When the regeneration is d...

Страница 163: ...Regeneration Disable confirmation screen is displayed 3 On Regeneration Disable confirmation screen press function switch F4 REMARK If you press function switch F3 regeneration is not disa bled and th...

Страница 164: ...F6 and F7 to display Aftertreatment Devices Regener ation screen 2 On Aftertreatment Devices Regeneration screen select Cancel of Regeneration Disable and then press function switch F4 Cancel of Regen...

Страница 165: ...pwise engine power deration that advances to speed limitation to low Engine power deration starts with Action Level L03 Mild In ducement and advances to further deration when L04 Se vere Inducement is...

Страница 166: ...ur The remain ing time Minutes to Severe Inducement is displayed in the column 6 of the NOx Control System Info screen In Severe Inducement engine power will be derated fur ther Severe Inducement The...

Страница 167: ...switch to OFF position and turn the battery dis connect switch key to OFF position Then remove the key When the battery disconnect switch is turned to OFF position it is possible to prevent power con...

Страница 168: ...rules neither Komatsu nor your Komatsu distributor shall be held liable for any resulting impacts or damages NOTICE For more information on KOMTRAX and the Radio Equipment Directive 2014 53 EU please...

Страница 169: ...he engine battery and radiator Check for dirt accumulated around the engine and radiator Also check for combustible material dry leaves twigs etc around the battery engine muffler or other high temper...

Страница 170: ...f equipped for damage Check the hook guide and hook mount for damage If any problem is found ask your Komatsu distributor for repair METHOD FOR CHECKING BEFORE STARTING Always check the items in this...

Страница 171: ...it with fuel prefilter 3 It is possible to judge the water level and amount of sedi ment by looking through transparent cup 4 If there is water or sediment accumulated drain it accord ing to steps 4 t...

Страница 172: ...k When removing the oil filler cap the oil may spout out Turn it slowly to release the internal pres sure then remove it 1 Set the machine posture to state A or B State A When setting the machine post...

Страница 173: ...r structure until drain plug P beneath the hydraulic tank comes between the right and left tracks and stop the engine Wait for the oil to cool down suffi ciently then drain the excess oil through drai...

Страница 174: ...cap slowly to release the pressure then re move the cap with care 1 Open engine hood 1 2 Lock securely with hood support lever 2 3 Check reservoir tank 3 If the coolant level is within the range betw...

Страница 175: ...ake it level before checking 1 Open engine hood 1 2 Securely lock the hood with hood support lever 2 3 Pull out dipstick G and wipe the oil off with a cloth 4 Fully insert dipstick G into the dipstick...

Страница 176: ...ry starting motor and alternator with extreme care Perform inspection to confirm that the fuses have no defect and their capacity is proper Perform inspection to confirm that there is no disconnection...

Страница 177: ...il filler port F securely NOTICE If breather hole 5 in the cap is clogged the pres sure inside the tank drops and this may cause the fuel to stop flowing To prevent this clean the breather hole 5 from...

Страница 178: ...the end of the pipe is clean In case of malfunction of the refilling automatic stop system consult the Komatsu local Distributor and do not use the system until the problem is solved When the machine...

Страница 179: ...e fuel reach es the maximum level of the tank When the floating switch reaches its maximum level the pump stops automatically When the fuel reaches the maximum level the lamps 7 lights up in yellow Ex...

Страница 180: ...butor for repair 3 After checking turn the starting switch back to OFF posi tion METHOD FOR ADJUSTING METHOD FOR ADJUSTING OPERATOR S SEAT k k WARNING When adjusting the position of the operator s sea...

Страница 181: ...es Height adjustment 37 mm 23 mm REMARK The backrest can be tilted to a greater degree by pushing the seat forward The possible degree of inclination of the backrest is reduced if the seat is moved ba...

Страница 182: ...ction for heavier weight When traveling on rough road surfaces make the seat harder in advance Method for adjustment height of armrest Change the height of armrest 5 by removing bolts 6 and in stallin...

Страница 183: ...A and in the lateral front right hand side with the mirror A1 1 If the mirror is removed install it to the position shown in the figure D approx 55 mm G approx 65 Distance from ground of mirror A 2210...

Страница 184: ...you to see the people in the rear left hand side with the mirror C Distance from ground of mirror 2276 mm PROCEDURE FOR ADJUSTING MACHINE RIGHT SIDE MIRROR k k CAUTION The following conditions must be...

Страница 185: ...elt mounting bracket or belt If it is worn or damaged replace it Even if no problem can be seen in the belt replace the seat belt every 3 years from starting usage or 5 years after manufacture whichev...

Страница 186: ...d at the top left of the machine monitor If provided the seat belt connection is signalled by an additional green lamp located on the cab roof METHOD FOR UNFASTENING SEAT BELT 1 Hold grip 2 and press...

Страница 187: ...t start 2 Check that each lever is in NEUTRAL position 3 Insert the key into the starting switch 2 and turn it to ON position B 4 Check the machine monitor Check the machine monitor according to the f...

Страница 188: ...ir 6 Press the horn switch 4 and check that the horn sounds METHOD FOR STARTING ENGINE k k WARNING Start the engine only while sitting on the operator s seat Do not attempt to start the engine by shor...

Страница 189: ...osition 3 Turn the key in starting switch 3 to ON position B REMARK If the ambient temperature is low the preheating pilot lamp lights up and automatic preheating is performed Keep starting switch 3 k...

Страница 190: ...immediately Check the oil level oil leakage etc and take proper meas ures REMARK White smoke may be discharged for a short time immedi ately after the engine is started or during the aftertreatment de...

Страница 191: ...y and as a result lead to an unexpected accident In that case ask your Komatsu distributor to check the engine as soon as possible When stopping the machine during the normal traveling operation check...

Страница 192: ...on turn the fuel control dial 1 to the midpoint c between Low idle MIN position a and High idle MAX position b Run the engine at medium speed with no load for approxi mately 5 minutes REMARK If the am...

Страница 193: ...blade control lever Boom does not swing by operating boom swing con trol pedal Warm up operation of the engine is completed Then perform the warm up operation for the hydraulic components METHOD FOR H...

Страница 194: ...levers 3 and 4 for 5 minutes NOTICE When the work equipment is operated take care that it does not interfere with the machine or ground 1 Operate the R H work equipment control lever 4 slowly to set...

Страница 195: ...ent by performing the warm up operation for hydraulic system in cold weather ambient temperature is less than 0 C even when the display shows the correct tem perature Perform the warm up operation for...

Страница 196: ...f OUT g Bucket operation CURL m DUMP k Swing operation RIGHT d LEFT e Travel Lo operation FORWARD n REVERSE p Boom swing operation RIGHT q LEFT r Blade operation LOWER s RAISE t RKA64020 MACHINE OPER...

Страница 197: ...devi ces regeneration the components may be damaged While the aftertreatment devices regeneration is being performed stop the aftertreatment devices regenera tion first according to PROCEDURE FOR AFTE...

Страница 198: ...the track frame is facing the rear if the sprocket is at the front the machine moves in the oppo site direction to the direction of the operation of the travel levers or travel pedals front and rear...

Страница 199: ...control lever 4 to raise the blade 3 Check the sprocket position A 4 After checking the sprocket position A perform the oper ation in conformity with the sprocket position Operate the travel levers 5...

Страница 200: ...avel mode setting at travel speed display on machine monitor 8 REMARK When the engine is started the speed mode is automati cally set to low speed travel Lo While traveling in high speed travel Hi if...

Страница 201: ...l lever 4 to raise the blade 3 Check the sprocket position A 4 After checking the sprocket position A perform the oper ation in conformity with the sprocket position Operate the travel levers 5 or the...

Страница 202: ...lay on machine monitor 8 REMARK When the engine is started the speed mode is automati cally set to low speed travel Lo While traveling in high speed travel Hi if the traction force is needed in soft g...

Страница 203: ...of the machine REMARK When turning while traveling at high speed if the load is large the automatic travel mode change function ac tuates and the travel mode automatically turns to Lo and travel speed...

Страница 204: ...e the left travel lever CHANGE DIRECTION OF MACHINE When turning left A Forward left turn Return the left travel lever from FORWARD to NEUTRAL posi tion The machine turns left in forward B Reverse lef...

Страница 205: ...ight METHOD FOR SWINGING MACHINE k k WARNING The tail of the machine extends outside the tracks Visually check safety around the machine before swinging When performing swing operation on a slope the...

Страница 206: ...ow idle and operate the work equipment control lever finely In particular avoid the abrupt operation when bucket is loaded When bucket is loaded the swing parking brake is released and upper structure...

Страница 207: ...e L H work equipment control lever back and forth Arm moves in or out Boom operation Move the R H work equipment control lever back and forth Boom moves up or down OPERATION MACHINE OPERATIONS AND CON...

Страница 208: ...pment control lever to the right and left Bucket moves in or out Boom swing operation Depress either right or left of the Boom swing control ped al Boom swings either right or left MACHINE OPERATIONS...

Страница 209: ...Select the working mode that matches the operating conditions or purpose This will make it possible to perform operations efficiently When the starting switch is turned to ON position the working mod...

Страница 210: ...dard screen If a working mode is selected and nothing is done for 5 seconds the selected working mode is automatically ac cepted and the screen returns to the standard screen PROHIBITED OPERATIONS k k...

Страница 211: ...f the machine for digging nor use the dropping force of the bucket as a mattock breaker or pile driver This will drastically reduce the life of the machine PROHIBITION OF OPERATIONS USING BUCKET AS LE...

Страница 212: ...s and collides with a rock an excessive impact load occurs in the work equipment and frame and can shorten the service life of the machine PROHIBITION OF DIGGING OPERATION ON HARD ROCKY GROUND Do not...

Страница 213: ...es soil and sand DO NOT PERFORM LIFTING OPERATIONS Although lifting operation with this machine is prohibited it is permitted only when the special lifting hook is installed PROHIBITION OF SUDDEN LEVE...

Страница 214: ...speed for 1 5 hours or more the temperature of lubricating oil inside the track roll ers and final drive will rise up and oil seal may be damaged to cause oil leakage Stop driving for 30 minutes every...

Страница 215: ...drive the machine so that the center of the track passes over the obstacle PRECAUTIONS FOR HIGH SPEED TRAVEL On uneven roadbeds such as rock beds or uneven roads with large rocks drive the machine wi...

Страница 216: ...th cover unlocked it may open and hit surrounding object to lead accident PERMISSIBLE DEPTH OF WATER SOIL AND DIRT NOTICE When traveling the machine out of water if the angle of the machine exceeds 15...

Страница 217: ...alert while driving and operating the machine in order to stop it safely when the machine slips or be comes unstable When the machine is traveling uphill if the shoes slip or it is impossible to trave...

Страница 218: ...start the engine again METHOD FOR ESCAPING FROM MUD Always operate carefully to avoid getting stuck in mud If the machine does get stuck in mud do as follows to get the machine out METHOD FOR ESCAPIN...

Страница 219: ...gle a between bucket cylinder and link and angle b between arm cylinder and arm is 90 the maximum exca vation force is obtained from the pushing force of each cylinder When excavating you can optimize...

Страница 220: ...iency can be enhanced by locating the dump truck in a place easily visi ble to the operator Loading is easier and capacity becomes greater if you place the machine at the rear of the dump truck than i...

Страница 221: ...oscillate and pose a risk to objects and persons as well as to the machine itself Position the machine on a solid and flat terrain Ensure that the work area is free from obstacles and that there are n...

Страница 222: ...Standard arm 22E 98 31160 2 piece boom 22E 98 31180 3rd line attachment MACHINE OPERATIONS AND CONTROLS OPERATION 3 154 WENAM00241...

Страница 223: ...sand does not get on them Dust seals are fitted at both ends of the bushings be careful not to damage them When replacing the bucket replace the dust seal with a new one if it is damaged If a damaged...

Страница 224: ...bucket and the arm or link 4 Align arm 2 with hole 4 of the replacement bucket 5 Align link 3 with hole 5 of the replacement bucket 6 Apply grease to pins A and B and insert them together with the shi...

Страница 225: ...jury or death Always set the lock lever se curely to LOCK position before leaving the operator s seat Lower the blade to the ground on the downhill side 1 Set the R H and L H travel levers 1 in NEUTRA...

Страница 226: ...the engine 1 Walk around the machine and check the work equipment machine exterior and undercarriage also check for any leakage of oil or coolant If any problems are found repair them 2 Fill the fuel...

Страница 227: ...ine hood open by using the engine hood support lever When opening the engine hood do not release the handle until the hood support lever is set in the lock position securely When closing the engine ho...

Страница 228: ...pen hood 2 4 Set hood support lever 3 to the hood fixing position METHOD FOR LOCKING ENGINE HOOD 1 Hold the grip of hood 2 and remove hood support lever 3 from the hood fixing position 2 Securely fix...

Страница 229: ...cing the inside of the cover be sure to fix the cover open by using the cov er support lever When driving the machine always keep the cover closed unless you are inspecting NOTICE Always keep the cove...

Страница 230: ...counterclockwise A and remove it Position A OPEN Position B LOCK 3 While pushing dirt cover release knob 1 hold the cover grip and open cover 2 4 Set cover support lever 3 to the cover fixing positio...

Страница 231: ...R OPENING AND CLOSING OPERATOR CAB DOOR k k WARNING Before releasing the door lock always place the machine on a level ground Do not release the door lock when the machine is on a slope The cab door m...

Страница 232: ...and then remove the starting switch key Position A OPEN Position B LOCK 3 Hold the cab door handle 2 to open the cab door 4 Hold the handle inside cab door and push the cab door to the door lock 3 an...

Страница 233: ...e the cab door and pull the cab door and hold the cab door handle 2 to close the cab door 3 Insert the starting switch key into the key slot 1 4 Turn the starting switch key to LOCK position B and the...

Страница 234: ...oke when the air conditioner is on the smoke may hurt your eyes In such case open the window and turn the lever to FRESH for a while for ventilation and cooling to discharge the smoke Temperature cont...

Страница 235: ...Air flow rate is low 0 OFF position Air flow stops AIR VENT Blow direction can be adjusted by turning the louver of each vent FRESH RECIRC AIR CHANGEOVER LEVER Use FRESH RECIRC air selector lever to...

Страница 236: ...ide the air conditioner switch lights up METHOD FOR OPERATING AIR CONDITIONER METHOD FOR STARTING AIR CONDITIONER 1 Turn the air flow selector switch and adjust the air flow 2 Press the air conditione...

Страница 237: ...C air selector lever to select ei ther FRESH a or RECIRC b METHOD FOR STOPPING AIR CONDITIONER 1 Press the air conditioner switch and turn it off The lamp inside the switch goes out 2 Turn the air flo...

Страница 238: ...ected failure so be careful not to get water on the equipment Do not wipe the display or buttons with solvent such as benzene or thinner Wipe with a dry soft cloth When the battery disconnect switch i...

Страница 239: ...ch as operation on the corners of a steel plate a U bend trap a concrete block reinforcing bars scrap steel etc which can cut the road liner and precautions PROHIBITED OPERATIONS WHEN USING RUBBER AND...

Страница 240: ...d liners are used to handle salt sugar wheat soybeans etc if they have a deep cut rubber chips may be mixed in the handled material To prevent this repair any cut before using Do not rub the rubber sh...

Страница 241: ...k on the level ground Travel with both tracks on the same level to protect the rubber shoes and road liners from being damaged 4 Avoid steering in the posture shown in the figure Mechanism that rubber...

Страница 242: ...eway because of a material to ride over or anoth er thing When the idler or track rollers deviate from the core metal because of misalignment of the rubber shoes A Frame side B Rubber shoe side When t...

Страница 243: ...ng the machine choose the transportation method in reference to the weight and dimensions shown in SPECIFICATIONS Note that the weight and dimension shown in SPECIFICATIONS may differ in accordance wi...

Страница 244: ...he trailer and correct the direction On the ramps operate only the travel lever Do not op erate any other lever It is dangerous to use the work equipment for loading and unloading operations Always us...

Страница 245: ...acks or ramp surface PROCEDURES FOR LOADING MACHINE 1 Park a trailer on a flat and firm place Maintain a safe distance from the road shoulder 2 Apply the trailer brakes securely then put the chocks 1...

Страница 246: ...chine onto the ramps check that the machine is positioned in a straight line with the ramps and that the centerline of the machine matches that of the trail er 9 Pull the travel levers backward and dr...

Страница 247: ...Push the blade control lever forward to lower the blade to the ground 2 Operate the work equipment control levers to extend bucket cylinder and arm cylinder to their stroke end and then lower the boom...

Страница 248: ...ailer 4 Set the right and left ramps 2 parallel to each other and equally spaced to the right and left of the center 3 of the trailer Make the installation angle A at 15 or less If the ramps bend larg...

Страница 249: ...nge the travel speed to Lo 8 Turn the fuel control dial to Low idle MIN position a 9 Set the lock lever to FREE position F 10 Raise the work equipment curl the arm under the boom then move the machine...

Страница 250: ...ting keep the machine horizontal When performing lifting operations do as follows to prevent the machine from moving unexpected ly Operate the work equipment lock lever to LOCK position Set the swing...

Страница 251: ...ose the cab door and front window securely 8 Pass wire ropes between the 1st and 2nd track rollers from the front and between the 1st and 2nd track rollers from the rear Place pieces of wood between t...

Страница 252: ...water so it is not flammable For the density of Non Amine Engine Coolant AF NAC see METHOD FOR USING FUEL COOLANT AND LUBRICANTS ACCORDING TO AMBIENT TEMPERATURE BATTERY k k WARNING Battery generates...

Страница 253: ...oards prevent the tracks from freezing to the ground and allow the machine to move the next morn ing Open the drain valve and drain any water collected in the fuel system to prevent it from freezing F...

Страница 254: ...AINTENANCE DURING LONG TERM STORAGE k k WARNING If it is necessary to perform the rust prevention operation while the machine is indoors open the doors and windows to improve ventilation and prevent g...

Страница 255: ...he battery disconnect switch OFF the time information of the clock and radio if equipped tuning information may be lost In that case set them again by referring to CLOCK ADJUSTMENT and HANDLE RADIO Wh...

Страница 256: ...the fuel tank with fuel 4 Turn the handle 3 of water separator 4 to OPEN posi tion O 5 Loosen the air bleeding bolt 5 of the water separator 4 by 2 to 3 turns When the fuel including no air bubbles c...

Страница 257: ...drawbar or the method of towing a disabled machine and being towed may lead to serious personal injury or death Always confirm that the wire rope or drawbar used for towing has ample strength for the...

Страница 258: ...for a distance of only a few meters to a place that is suitable for performing repairs This method is applied only in emergencies PRECAUTIONS FOR SEVERE JOB CONDITION When performing digging operatio...

Страница 259: ...sult a doctor for medical treatment When handling batteries always wear protective eye glasses and rubber gloves When removing the battery first disconnect the cable from the ground normally the negat...

Страница 260: ...above the battery so that it envelops the battery and it is not flipped Replace the rubber cover immediately if the rubber cover is damaged If chloride is accumulated on the top surface of battery and...

Страница 261: ...ive charger clip of the battery charger to the positive terminal of the battery then connect the negative charger clip of the battery charger to the negative terminal of the battery Be sure to attach...

Страница 262: ...e lock lever is in LOCK position Control levers must be in NEUTRAL position To prevent damage of the electric devices of the failed machine turn the starting switch of the failed machine to OFF positi...

Страница 263: ...pairs Problem Main causes Remedy Lamp does not glow brightly even when the engine runs at high speeds Defective wiring Check and repair loose terminals open circuit Loose fan belt Adjust fan belt tens...

Страница 264: ...lic oil temper ature Lack of hydraulic oil Set oil to specified level See CHECKS BEFORE STARTING Loose fan belt Adjust fan belt tension See EVERY 500 HOURS MAINTENANCE Clogged radiator fins and oil co...

Страница 265: ...radiator fins or damaged fin Clean or repair See EVERY 500 HOURS MAINTENANCE Defective thermostat Replace thermostat Loose radiator filler cap in high alti tude operation Tighten cap or replace packin...

Страница 266: ...d remedy Take the actions according to the message shown on the ma chine monitor and check the failure code and then ask your Komatsu distributor for repair as necessary When DXA8KA or DXA8KB is on Cu...

Страница 267: ...MAINTENANCE Please read and make sure that you understand the SAFETY section before reading this section 4 1 WENAM00241...

Страница 268: ...ing welding turn the starting switch to OFF position check that the system operating lamp is not lit Turn the battery disconnect switch to OFF position and remove the key Do not apply a voltage higher...

Страница 269: ...rvice life will be extremely shortened and they may be damaged CHECKS AFTER INSPECTION AND MAINTENANCE If you forget to perform the inspection and maintenance unexpected problems may occur and this ma...

Страница 270: ...ority of failures with the machine are caused by the entry of such impurities Take particular care not to let any impurities get in when storing or adding oil Never mix oils of different grades or bra...

Страница 271: ...here freezing is not an issue the use of coolant is essential Komatsu machines are supplied with Non Amine Engine Coolant AF NAC Non Amine Engine Coolant AF NAC has excellent anti corrosion antifreeze...

Страница 272: ...m or more en abling early detection of failures Others Measurements are made of items such as the ratio of water coolant and fuel in the oil and dynamic viscosity if necessary to enable a highly preci...

Страница 273: ...ater drop away from inside of the connectors Checking and maintenance items are checking fan belt tension checking damage of the fan belt and checking battery fluid level Komatsu recommends installing...

Страница 274: ...ssure hoses have been removed check that there is no damage to O rings If any damage is found replace O ring When the hydraulic oil filter element or strainer is replaced or cleaned or when a hydrauli...

Страница 275: ...hread diameter of bolt a mm Width across flats b mm Tightening torque Target value Allowable range Nm kgm Nm kgm 6 8 10 12 14 10 13 17 19 22 13 2 31 66 113 172 1 35 3 2 6 7 11 5 17 5 11 8 14 7 27 34 5...

Страница 276: ...Nm kgm 9 16 18UNF 19 44 4 5 35 to 54 3 5 to 5 5 11 16 16UN 22 74 7 5 54 to 93 5 5 to 9 5 13 16 16UN 27 103 10 5 84 to 132 8 5 to 13 5 1 14UNS 32 157 16 0 128 to 186 13 0 to 19 0 1 3 16 12UN 36 216 22...

Страница 277: ...S SPRING 4 40 METHOD FOR BLEEDING AIR FROM HYDRAULIC CIRCUIT 4 41 CHECKS BEFORE STARTING 4 43 EVERY 100 HOURS MAINTENANCE 4 43 METHOD FOR LUBRICATING WORK EQUIPMENT 4 43 METHOD FOR CHECKING OIL LEVEL...

Страница 278: ...NANCE 4 74 REPLACE DEFINED LIFE PARTS 4 74 METHOD FOR REPLACING ACCUMULATOR FOR CONTROL CIRCUIT 4 75 EVERY 6000 HOURS MAINTENANCE 4 76 METHOD FOR CLEANING KDPF 4 76 MAINTENANCE INTERVAL FOR HYDRAULIC...

Страница 279: ...throughout a year Replace the inner element as well at the same time METHOD FOR CHECKING AIR CLEANER The air cleaner clogging caution lamp informs when the air cleaner element should be checked Do no...

Страница 280: ...om entering 7 Clean the dust sticking inside the air cleaner body 7 and on the cover 5 by using a clean cloth or brush 8 If any dust is attached to the vacuator valve 8 installed to the cover 5 remove...

Страница 281: ...tion Install so that the bottoms a and b of the air cleaner element face where no hole is dril led come to the cover 5 end If it is installed in wrong direction it may cause break age of the air clean...

Страница 282: ...hood support lever 3 3 Release the hooks 4 and remove the cover 5 4 Hold the outer element 6 rock it lightly up and down and to the right and left and pull it out while turning it clockwise and count...

Страница 283: ...the rubber at the tip is swollen or the outer element is not pushed in straight and cover 5 is installed by force with hook 4 there is a danger that hook 4 and air cleaner body may be damaged so be ca...

Страница 284: ...omes sooner The coolant has the important function of preventing corrosion as well as preventing freezing Even in the areas where freezing is not an issue the use of coolant is essential Komatsu machi...

Страница 285: ...uted with distilled water so it is not flammable Check the density with a coolant tester Prepare a container whose capacity is larger than the specified coolant volume to catch drained coolant Prepare...

Страница 286: ...lose drain plug 6 11 Tighten drain plug 7 and add city water Add water until it fills the radiator 12 Start the engine 13 To complete the warm up operation of the hydraulic equip ment more quickly set...

Страница 287: ...tion arm OUT position A Operate the lever to the end of its stroke and hold it in the position for 30 seconds Repeating the operations from step 1 to 4 moves the graduation of the engine coolant tempe...

Страница 288: ...s Battery electrolyte is dangerous object If it gets in your eyes or on your skin wash it off with a large amount of water and consult a doctor Do not use a dry wipe to clean the battery A wet wipe wi...

Страница 289: ...e of battery electrolyte remove the fluid by using a syringe to lower the level to UPPER LEVEL line Neutralize the removed replenishment water for a battery with baking soda sodium bicarbonate then fl...

Страница 290: ...dium bicarbonate then flush it away with a large amount of water or consult your Komatsu distributor or battery manufacturer 5 Install the battery For detail of battery installation see OPERATION METH...

Страница 291: ...to transparent cup 6 Replace the O ring with a new one if needed 13 Install the transparent cup 6 to top of fuel prefilter and tighten it clockwise Tightening torque 30 Nm 3 05 kgm 14 Turn the handle...

Страница 292: ...t with the link contact surface 3 After checking tighten a further 80 to 100 of tightening angle a METHOD FOR CHECKING LOOSENESS AND TIGHTENING ROAD LINER SHOE BOLTS NOTICE If the machine is used with...

Страница 293: ...ADLINERS TRACK TENSION 1 Run the engine at low idle then move the machine forward for a distance equal to the track length on ground and slowly stop the machine 2 Place wooden block 3 which reaches fr...

Страница 294: ...o grease drain plug 5 1 Loosen grease drain plug 5 gradually to release the grease If the grease does not come out smoothly move the machine forward and backward a short distance 2 Tighten grease drai...

Страница 295: ...shoes are exposed on continuous 2 or more links replace the track with a new one Cut of rubber shoe steel cords If more than a half of the steel cord layer is cut on either side replace the track with...

Страница 296: ...chine travels repeatedly If you adjust the track tension at short intervals until the initial loosening is finished coming off of the track caused by insufficient track ten sion is prevented Working w...

Страница 297: ...ward and backward a short distance 2 Tighten grease drain plug 5 3 To check if the tension is correct run the engine at low idle and move the machine slowly forward by an amount equal to the length of...

Страница 298: ...BER SHOES k k WARNING Grease is pumped into the track tension adjustment system under high pressure If the adjustment is performed with the procedure oth er than following grease drain plug 1 may fly...

Страница 299: ...2 between the rubber shoe track and track frame 4 Rotate the sprocket in reverse direction A again engage the rubber shoe track with the idler securely and then stop the rotation 5 Check that the rub...

Страница 300: ...ces may fly during the replacement work so always wear the personal protective items such as protective eyeglasses and gloves Items to be prepared Hammer Bar 1 To remove the tooth pin 1 place the lowe...

Страница 301: ...hammer and block the tooth on the bucket METHOD FOR ADJUSTING BUCKET AXIAL PLAY k k WARNING It is dangerous if the work equipment moves by mistake when adjusting the bucket axial play Lower the work e...

Страница 302: ...reduce the play within the permitted range 0 1 00 mm 4 If the measure play a is lower than 1 mm the play is within the correct range 5 Remove the double nuts 1 of stopper bolts 2 at arm pin 3 and lin...

Страница 303: ...son Mixing proportion Freezing temperature Normal Washer fluid 1 3 water 2 3 10 C Winter in cold district Washer fluid 1 2 water 1 2 20 C Winter in extremely cold district Pure washer fluid 30 C There...

Страница 304: ...E LEVEL OF REFRIGERANT FOR AIR CONDITIONER GAS k k WARNING Never touch the refrigerant Do not loosen any part of the refrigerant circuit If the refrigerant used in the air conditioner gets into your e...

Страница 305: ...let the machine monitor connector air conditioner and its filter inside the operator s cab get wet during the operation 1 Start the engine 2 Set the lock lever to FREE position F 3 Place the machine o...

Страница 306: ...t When disposing of it the gas must be released Ask your Komatsu distributor to perform this work Gas springs are installed inside the left console 1 place at the cab front window 1 place each on righ...

Страница 307: ...ment slowly for approximately 5 minutes and bleed air Bleed air from LS circuit Perform it only when a hose of the pump valve or LS circuit is replaced NOTICE If you do not bleed air from the LS circu...

Страница 308: ...ine at low idle and slowly swing at least 2 turns uniformly to the right and left Bleeding air from swing PPC circuit Perform it when any hydraulic component or oil is replaced 1 Run the engine at low...

Страница 309: ...ir bleeding operation stop the engine leave the machine for 5 minutes and then start the operation This discharges the air bubbles in the oil inside the hydraulic tank Check for oil leakage and wipe o...

Страница 310: ...After greasing wipe off any old grease that is pushed out METHOD FOR CHECKING OIL LEVEL IN SWING MACHINERY CASE ADDING OIL k k WARNING Immediately after the engine is stopped its parts and oil are sti...

Страница 311: ...evel or adding oil insert dipstick G into the hole 9 Remove cover support lever 2 and fix it to the lever lock securely 10 Close dirt cover 1 EVERY 250 HOURS MAINTENANCE METHOD FOR LUBRICATING WORK EQ...

Страница 312: ...m connection pin 1 place 7 Bucket cylinder foot pin 1 place 8 Arm Link connection pin 1 place 9 Link connection pin 2 places 10 Bucket cylinder rod end pin 1 place 11 Bucket and Link connection pin 2...

Страница 313: ...3 Swing the boom to the right and left several times 13 Boom swing cylinder rod end pin 1 place 14 Boom swing cylinder foot pin 1 place 15 Blade cylinder foot pin 1 place 16 Blade cylinder rod end 1...

Страница 314: ...Place the container to receive the oil under the plug G 3 Remove the plug G with the hexagonal wrench 4 Check the oil level Remove the plug G by using the hexagonal wrench When the oil level is withi...

Страница 315: ...lts for wear In particular check carefully that the V belt is not in contact with the V groove bottom If the V belt is stretched and has no allowance for ad justment or has slipping sound or squeak be...

Страница 316: ...support lever 2 7 Turn the engine oil filter cartridge 3 counterclockwise by using the filter wrench and remove it 8 Clean the mounting face of engine oil filter cartridge REMARK Check that the old pa...

Страница 317: ...stem when the engine is running When replacing the filter wait for at least 30 seconds after stopping the engine to let the internal pressure go down before replacing the filter Do not bring any open...

Страница 318: ...l not to lose the red ring in transparent cup 6 8 Remove the element 7 from top of the fuel prefilter and replace it with a new element 9 Clean the inside of transparent cup 6 and element 7 with diese...

Страница 319: ...conds after stopping the engine to let the internal pressure go down before replacing the filter Do not bring any open flame close NOTICE Komatsu genuine fuel filter cartridges use a special filter th...

Страница 320: ...s tightened too loose fuel will also leak from the packing so always tighten to the specified angle When tightening with a filter wrench be extremely careful not to dent or damage the filter 9 Turn th...

Страница 321: ...e 5 5 5 0 kg If the grease is milky white it needs to be replaced Ask your Komatsu distributor to replace it 5 Install grease filler port cover 4 with bolts 3 6 Remove cover support lever 2 and fix it...

Страница 322: ...ins 6 If there is any mud dirt leaves etc stuck to the fins blow it off with compressed air NOTICE Steam or water may be used instead of the com pressed air However when performing powerful steam clea...

Страница 323: ...n the knob 2 and remove the filter inspection cover 3 3 Remove the fresh air filter 4 4 Clean the recirculation air filter 1 and fresh air filter 4 with compressed air If the recirculation air filter...

Страница 324: ...ully and it will be secured by cover support lever 2 2 Remove the cap of oil filler port F gradually to release the internal pressure Release the internal pressure 3 Remove nut 6 of breather 5 and the...

Страница 325: ...ly 13 Close dirt cover 1 METHOD FOR CHECKING FAN BELT TENSION AND REPLACING FAN BELT k k WARNING Immediately after the engine is stopped its parts and oil are still very hot and may cause burn in jury...

Страница 326: ...operating for 1 hour 4 Remove cover support lever 2 and fix it to the lever lock securely 5 Close engine hood 1 EVERY 1000 HOURS MAINTENANCE Maintenance for every 100 250 and 500 hours should be perfo...

Страница 327: ...arts taken out then wash it in clean diesel fuel or flushing oil 6 Install the new element in the place where the old element 6 has been installed 7 Check the O ring 7 to be fit between the hydraulic...

Страница 328: ...ine stopped for at least 5 minutes and then start it This will remove the air bubbles in the oil inside the tank 20 Check that there is no leakage of oil and wipe off any oil that is spilled METHOD FO...

Страница 329: ...ck securely 8 Close dirt cover 1 METHOD FOR CHANGING OIL IN FINAL DRIVE CASE k k WARNING Immediately after the engine is stopped its parts and oil are still very hot and may cause burn in jury Accordi...

Страница 330: ...ING OIL LEAKAGE IN FLYWHEEL HOUSING k k WARNING Immediately after the engine is stopped its parts and oil are still very hot and may cause burn injury Accordingly wait until they have cooled down befo...

Страница 331: ...or inspection and maintenance so ask your Komatsu distributor to perform this work EVERY 2000 HOURS MAINTENANCE Maintenance for every 100 250 500 and 1000 hours should be performed at the same time ME...

Страница 332: ...quipment control lever slowly to the boom LOWER direction and lower the boom and make tooth contact to the ground 8 Set the lock lever to LOCK position L 9 Stop the engine 2 Open dirt cover 1 Open dir...

Страница 333: ...rainer 10 Install flange 8 with the strainer 9 check the gasket and the hose 6 are in good condition and fix them with the clamp 5 11 Fix the flange 8 with bolt 7 12 Install the undercover 4 with bolt...

Страница 334: ...lic tank se curely By doing so the hydraulic tank is pressurized NOTICE If the hydraulic tank is not pressurized air is sucked in the pump and it affects the components badly 21 Remove cover support l...

Страница 335: ...ogen gas charge pressure in the accumulator is low and operations are continued it becomes impossible to release the remaining pressure inside the hydraulic circuit if a failure occurs on the ma chine...

Страница 336: ...e the work equipment control lever and raise the work equipment to height a of 1 5 m and hold there 5 Set the lock lever to LOCK position L 6 Check nitrogen gas charge pressure in accumulator within 1...

Страница 337: ...rk equipment goes down under its own weight and the teeth contact the ground the accumulator is normal If the work equipment does not go down or stops at halfway ask your Komatsu distributor for inspe...

Страница 338: ...osition 3 Operate the work equipment control lever slowly to the boom LOWER direction and lower the boom and make tooth contact to the ground For the attachment such as crusher etc keep the attachment...

Страница 339: ...G AND REPLACING FUEL SYSTEM AND COOLING SYSTEM HOSES Regularly inspect the hoses used for fuel line coolant line or breather hoses If they are cracked or degraded replace them Replacement of the hoses...

Страница 340: ...HROTTLE VALVE The intake throttle valve can effect the exhaust gas treatment performance The exhaust gas property depends on the exhaust throttle valve Contact your Komatsu distributor for checking an...

Страница 341: ...hen handling always observe the following The pressure in the hydraulic circuit cannot be completely removed When removing the hydraulic equipment do not stand in the direction that the oil spurts out...

Страница 342: ...6000 HOURS MAINTENANCE Maintenance for every 100 250 500 1000 1500 2000 and 3000 hours should be performed at the same time METHOD FOR CLEANING KDPF Ask your Komatsu distributor for cleaning the insi...

Страница 343: ...SPECIFICATIONS 5 1 WENAM00241...

Страница 344: ...ditions a n parent en gine representative of the engine type engine family and shall not imply or express any guarantee of the per formance of a particular engine Road liner specification Item Unit 16...

Страница 345: ...ight mm 2712 2712 C Overall width mm 2229 2229 D Shoe width mm 450 450 E Tail swing radius mm 1395 1395 F Overall length of track mm 2834 2834 G Distance between tumbler centers mm 2234 5 2234 5 Min g...

Страница 346: ...blade lift above ground mm 495 495 I Max blade drop below ground mm 448 448 Steel shoes specification Working ranges mm Unit 1650 mm arm speci fication 2000 mm arm speci fication A Max digging reach...

Страница 347: ...ok height 1 Position of lifting point 2 Arm length 3 Boom length 4 Hydraulic pressure 5 Bucket length and weight OF Lifting capacity rating overfront OS Lifting capacity rating overside Working condit...

Страница 348: ...Loads do not exceed 87 of hydraulic capacity or 75 of tipping capacity load limited by hydraulic capacity rather than tipping RKA69210 EXPLANATION OF LIFT CAPACITY CHART SPECIFICATIONS 5 6 WENAM00241...

Страница 349: ...ATTACHMENTS AND OP TIONS Please read and make sure that you understand the SAFETY section before reading this section 6 1 WENAM00241...

Страница 350: ...nstructions Use a crane when handling heavy objects 25 kg or more The crane must be operated by a qualified operator Never go under a load raised by the crane Do not perform operations with the load k...

Страница 351: ...also becomes greater Do not stop the work equip ment in air Do not suddenly swing lower or stop the work equipment It is dangerous that the machine may tip over Do not suddenly extend or retract the...

Страница 352: ...clude a pilot operated check valve in the locking cylinder This is to ensure that there is no risk of the bucket or attachment coming loose in the case of loss of hydraulic pressure If in doubt consul...

Страница 353: ...uick coupler activation switch 2 Quick coupler switch 3 Adjustable pressure regulating valve 4a Hydraulic quick coupler connection Lock line 4b Hydraulic quick coupler connection Unlock line ATTACHMEN...

Страница 354: ...e bucket or attachment may drop due to loss of oil It may cause serious personal injury or death If the damage of piping or oil leakage is found repair it before starting the operation again TO RELEAS...

Страница 355: ...button 2 on the left hand lever to activate quick coupler NOTICE The switch has a safety lock mechanism to prevent ac cidental operation Slide the lock towards you then rock the switch The lamp on the...

Страница 356: ...b Boom extension N Neutral boom at rest METHOD FOR LUBRICATING 2 PIECE BOOM NOTICE Perform greasing every 500 hours If any unusual noise is generated from any greasing point perform greasing regardle...

Страница 357: ...k connection pin 1 place 2 Arm Link connection pin 1 place 3 Bucket cylinder foot pin 1 place 4 Boom and arm connection pin 1 place 5 Arm cylinder rod end pin 1 place 6 Arm cylinder foot pin 2 place 7...

Страница 358: ...mm arm specification 2000 mm arm specification A Overall length mm 6083 6301 B Overall height Road Liner mm 2734 2734 Overall height Iron shoes 2712 2712 RKA69290 2 PIECE BOOM ATTACHMENTS AND OPTIONS...

Страница 359: ...eight mm 7570 7900 D Max vertical wall digging depth mm 3155 3464 E Max dumping height mm 5586 5911 F Min swing radius of boom mm 3201 3356 G Max reach at ground level mm 7216 7569 H Max blade lift ab...

Страница 360: ...If object handling is performed with other tool installed the weight difference of the tool shall be deducted from value of this table RKA69300 Loads do not exceed 87 of hydraulic capacity or 75 of ti...

Страница 361: ...safe when performing the swing operation Depending on the posture of the work equipment there is a danger that the wire or load may slip off the hook Al ways be careful to maintain the correct hook a...

Страница 362: ...1st line attachment proportional switch 3 Breaker operation switch SELECTOR VALVE The selector valve switches the flow of the hydraulic oil Position A When using the breaker Position B When general at...

Страница 363: ...AKER OPERATION SWITCH The breaker operation switch is used to operate the breaker Press the breaker operation switch and the oil flows continu ously to the piping at the left side of arm operator s se...

Страница 364: ...the engine is stopped to release the internal pressure in the hydraulic circuit 5 Set the lock lever to LOCK position L 6 Turn the starting switch to OFF position A 7 Open dirt cover 1 Open dirt cove...

Страница 365: ...e correctly installed store the attach ment 10 Pull out the mounting pins 2 places remove the attach ment then install the bucket For the installation procedure of the bucket see OPERA TION METHOD FOR...

Страница 366: ...tch to ON position B 5 Set the lock lever to FREE position F 6 Operate each control lever work equipment travel and attachment control switch fully in each direction within 15 seconds after the engine...

Страница 367: ...il filler port F gradually to release the internal pressure Release the internal pressure 11 Check that the hydraulic oil temperature is low 12 Remove the plugs 2 places at the outlet and inlet Be car...

Страница 368: ...serve them If the engine is run at high speed or a cylinder is pushed up to its stroke end immediately after startup air taken inside the cylinder may cause damage to the piston packing 1 Start the en...

Страница 369: ...the normal operations so check the maintenance time by referring to MAINTENANCE INTERVAL FOR HYDRAULIC BREAKER When handling the breaker follow the instruction manual from the manufacturer and use the...

Страница 370: ...el can be changed For the adjustment method of breaker flow rate see BREAKER SETTING METHOD FOR OPERATING BREAKER k k WARNING If you do not perform breaker operation or 2 way attachment operation set...

Страница 371: ...general attachment such as crusher etc follow the instruction manual from the manu facturer and use the attachment correctly METHOD FOR OPERATING MACHINE WHEN WORKING MODE IS NOT IN ATT P OR ATT E FOR...

Страница 372: ...pproximately 5 min per level can be changed For the adjustment method for flow rate of general attachment such as crusher see ATTACHMENT SET TING METHOD FOR OPERATING GENERAL ATTACHMENT SUCH AS CRUSHE...

Страница 373: ...m 115 min Safety valve setting pressure 26 5 MPa 270 kg cm2 Hydraulic specifications attachment mode Max flow rate engine speed at 2200 rpm 125 min Safety valve setting pressure 26 5 MPa 270 kg cm2 AT...

Страница 374: ...switch SELECTOR VALVE The selector valve switches the flow of the hydraulic oil Position A When using the breaker Position B When general attachments such as crusher are used 2ND LINE ATTACHMENT PROP...

Страница 375: ...WARNING Wear the protective equipment such as protective eyeglasses and gloves When connecting the pipes always be careful to prevent any impurities from getting in The change of the equipment must b...

Страница 376: ...engine is stopped to release the internal pressure in the hydraulic circuit 6 Set the lock lever to LOCK position L 7 Turn the starting switch to OFF position A 8 Open dirt cover 1 Open dirt cover 1...

Страница 377: ...dirt or mud on the hose fitting If O ring is damaged replace it with a new one 14 Connect the attachment piping provided by the attachment manufacturer Joint screw size is as follows Right side of arm...

Страница 378: ...the engine leave the machine for 5 minutes and then start the operation The air bubbles in the oil inside the hydraulic tank are discharged 4 Check that there is no leakage of oil and wipe off any oi...

Страница 379: ...When handling the general attachment such as crusher etc follow the instruction manual from the manu facturer and use the attachment correctly 1 Check that the working mode is set to attachment mode A...

Страница 380: ...ivation switch 2 Attachment proportional switch 2nd 3rd line 3 3rd line 2ND LINE ACTIVATION SWITCH When the switch is pressed activates the 2nd hydraulic line Pressing the switch again the 2nd line is...

Страница 381: ...INE The 3rd line uses for its operation the same control hydraulic element of the 2nd line When starting the machine the 3rd line is active To activate the 2nd line you need to press the switch on the...

Страница 382: ...ual from the manufacturer and use the breaker cor rectly 1 Check that the working mode is set to attachment mode ATT P or ATT E on the machine monitor 2 Operate attachment proportional switch on the l...

Страница 383: ...ength 4 Hydraulic pressure 5 Bucket lenght and weight OF Lifting capacity rating overfront OS Lifting capacity rating overside Working conditions Bucket 600 mm Bucket and hydraulic quick coupler 341 k...

Страница 384: ...Lifting capacity diagram 2 piece boom Overload diagram 2 piece boom HANDLE MACHINE READY FOR INSTALLATION ATTACHMENT 3rd LINE ATTACHMENTS AND OPTIONS 6 36 WENAM00241...

Страница 385: ...Lifting capacity diagram standard boom Overload diagram standard boom ATTACHMENTS AND OPTIONS HANDLE MACHINE READY FOR INSTALLATION ATTACHMENT 3rd LINE 6 37 WENAM00241...

Страница 386: ...ARM PIN INFORMATION RKA82390 1 160 mm 0 0 50 3 160 mm 0 0 50 2 50 mm 0 050 0 089 4 50 mm 0 050 0 089 ARM PIN INFORMATION ATTACHMENTS AND OPTIONS 6 38 WENAM00241...

Страница 387: ...there is any danger of interference and operate it with care Table of the combination of attachments which can be installed to the short arm and long arm Can be used NOTICE When the long arm is equip...

Страница 388: ...rge obstacles such as bould ers or fallen trees Travel at high Hi speed only on a flat ground When it is obliged to drive the machine over an obstacle drive slowly at low Lo speed 2 Check Classificati...

Страница 389: ...chments or the models consult your Komatsu distributor HYDRAULIC BREAKER Applicable work Major works suitable to the hydraulic breaker are as follows Crushing rock Road construction This attachment ca...

Страница 390: ...e chisel gradually deviates from the direction of the breaker body Adjust the direction with the bucket cylinder so that it keeps the proper direction Always keep the chisel pressed against the impact...

Страница 391: ...work by using the swing force Do not move the chisel while performing breaking operation Do not perform breaker operation in horizontal or upward direc tion Do not work under water ATTACHMENTS AND OP...

Страница 392: ...y cylinder at the stroke end Posture of hydraulic breaker to be greased NOTICE If the breaker is greased in an improper posture it is filled with more grease than necessary As a result dirt will enter...

Страница 393: ...it in the right posture shown below Lower the chisel perpendicularly to the ground Insert the grease gun perpendicularly to the greasing point Wrong posture ATTACHMENTS AND OPTIONS RECOMMENDED ATTACH...

Страница 394: ...WENAM00241...

Страница 395: ...REPLACEMENT PARTS 7 1 WENAM00241...

Страница 396: ...e clamps at the same time as the hoses Also perform the following checks with hydraulic hoses which need not to be replaced periodically Tighten all loose hoses and replace defective hoses as required...

Страница 397: ...en ordering parts CONSUMABLE PARTS LIST The parts in parentheses are to be replaced at the same time Item Part No Part Name Q ty Replacement in terval Engine oil filter YM129150 35153 Cartridge Every...

Страница 398: ...ontrolled high pressure fuel injection device and emission gas control system KDPF Since the high pressure fuel injection device requires high precision parts and lubrication if low viscosity fuel wit...

Страница 399: ...ion and Maintenance Manual Supply grease Change engine oil Check oil level in engine oil pan Change hydraulic oil Check hydraulic oil level Change power train oil Check power train oil level Replace e...

Страница 400: ...on and Maintenance Manual Supply grease Change engine oil Check oil level in engine oil pan Change hydraulic oil Check hydraulic oil level Change power train oil Check power train oil level Replace en...

Страница 401: ...tandard Specified capacity Refill capacity Engine oil pan 9 0 9 0 Final drive case each of right and left 1 1 1 1 Swing machinery case 2 6 2 6 Hydraulic oil system 130 65 Cooling system 12 0 Fuel tank...

Страница 402: ...trongly recommended wherever available 2 The concentration of Non Amine Engine Coolant AF NAC is as shown in the following table Coolant density table Min atmospheric temperature C 10 or more 15 20 25...

Страница 403: ...Always use clean washer fluid 4 2 Ambient temperature range for operation and storage 3 122 Appoint leader when working with others 2 36 Arm Pin information 6 38 Ashtray 3 81 Attachment Install 6 17...

Страница 404: ...tarting condition and unusual noise 3 123 Engine Operate Check after starting 3 122 Engine Operate Check before starting 3 119 Engine Start 3 120 3 194 Engine Start with jumper cables 3 194 Engine Sto...

Страница 405: ...filter element Replace 4 60 Hydraulic quick coupler system caution lamp 3 23 Hydraulic system Warm up operation 3 125 Hydraulic system caution lamp 3 19 Hydraulic tank Change oil Clean strainer 4 65...

Страница 406: ...ker 4 12 Maintenance of air conditioner 2 44 Maintenance procedure 4 13 Maintenance schedule 4 11 Maintenance schedule table 4 11 Maintenance screen Set 3 52 Maintenance time caution lamp 3 22 Manual...

Страница 407: ...to attachments and options 2 21 Precautions related to cab glass 2 21 Precautions related to protective structure 2 20 Precautions to prevent fire 2 16 Precautions when installing hydraulic hoses 4 3...

Страница 408: ...Specifications 5 2 6 25 Specifications 2 piece boom 6 9 Standard tightening torque for bolts and nuts 4 9 Start engine 2 24 Start engine with jumper cables 2 25 Start the machine after long term stora...

Страница 409: ...gas spring 2 43 When operating on slopes 2 29 When required 4 13 Window washer fluid Check level Add 4 36 Window washer fluid select 2 44 Wiper switch 3 67 Work equipment Lubricate 4 43 Work equipment...

Страница 410: ...PC80MR 5E0 HYDRAULIC EXCAVATOR Form No WENAM00241 2019 KOMATSU ITALIA MANUFACTURING S p A All Rights Reserved Printed in Europe 09 2019 WENAM00241...

Страница 411: ......

Страница 412: ......

Отзывы: