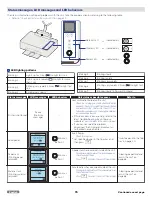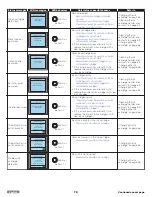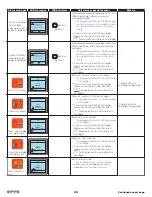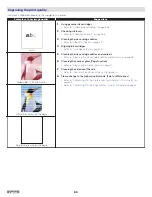
Hard Reset
» Refer to “Troubleshooting” on page 71.
If a problem occurs that cannot be corrected with the instructions
in “Troubleshooting”, follow the Steps given here.
1
Press and hold (Power/Standby) longer than 3 seconds
to turn the unit Off (Standby).
2
Unplug the AC plug from the AC outlet.
3
Wait at least 30 seconds, then reconnect the AC plug back
into the AC outlet.
4
Follow the instructions on the display and in the error report.
If the problem repeats, visit the following website at
www.kodakverite.com/support
Cleaning the printhead nozzles
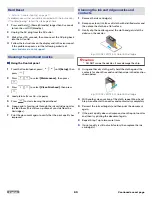
Using the Control panel
1
From the Control panel, press
until
[Setup]
, then
press
.
2
Press
to select
[Maintenance]
, then press
.
3
Press
to select
[Clean Printhead]
, then press
.
4
Load plain Letter or A4 -size paper.
5
Press
to start cleaning the printhead.
6
A page prints, forcing ink through the ink cartridge nozzles
to clean them (this will use up some of your Ink from the
Cartridges).
7
Print the document again to verify that the print quality has
improved.
Cleaning the ink cartridge nozzles and
contacts
1
Remove the ink cartridge(s).
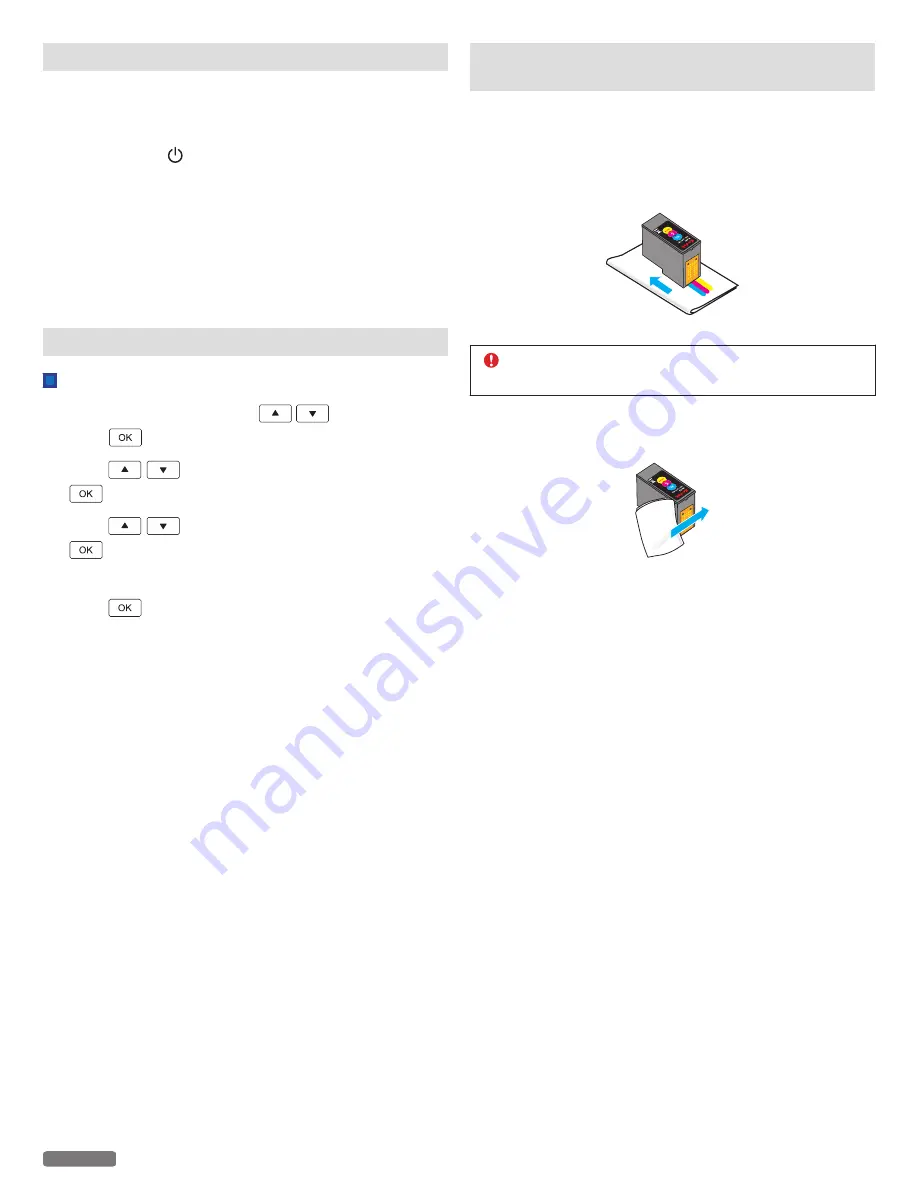
2
Dampen a clean, lint-free soft cloth with distilled water and
then place the cloth on a flat surface.
3
Gently dip the nozzles against the cloth and get rid of the
debris on the nozzles.
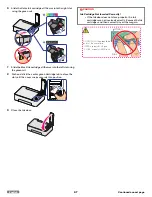
e.g.) KODAK VERITÉ 5 XL Color Ink Cartridge
CAUTION
●
DO NOT swipe the nozzles, it may damage the chip.
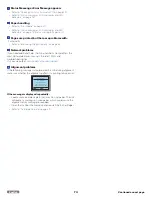
4
Using another dry cloth, gently hold the cloth against the
contacts for about 3 seconds and then wipe in the direction
shown below.
e.g.) KODAK VERITÉ 5 XL Color Ink Cartridge
5
With another clean section of the cloth, repeat Step 3 and
Step 4, and then let the nozzles and contacts dry completely.
6
Reinsert the ink cartridge(s) and then print the document
again.
7
If the print quality does not improve, clean the print nozzles
and then try printing the document again.
8
Repeat Step 7 up to two more times.
9
If print quality is still not satisfactory then replace the ink
cartridge(s).
69
English
Continued on next page.


