Scanner
You can use a variety of scanner functions from your tablet/
smartphone or PC. The “Scanning” application is available if your PC
has a Windows
®
platform.
The scanner function is also available by using an application called
“Image Capture” bundled as a default for OS X.
Or the mobile App for Android™ and iOS. For information on the
mobile App.
» Refer to “Print using your tablet/smartphone” on page 25.
Note(s)
●
You cannot use the scan function directly with this unit.
●
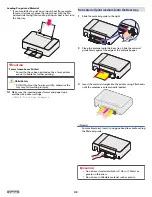
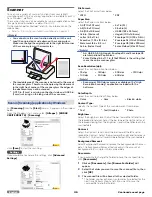
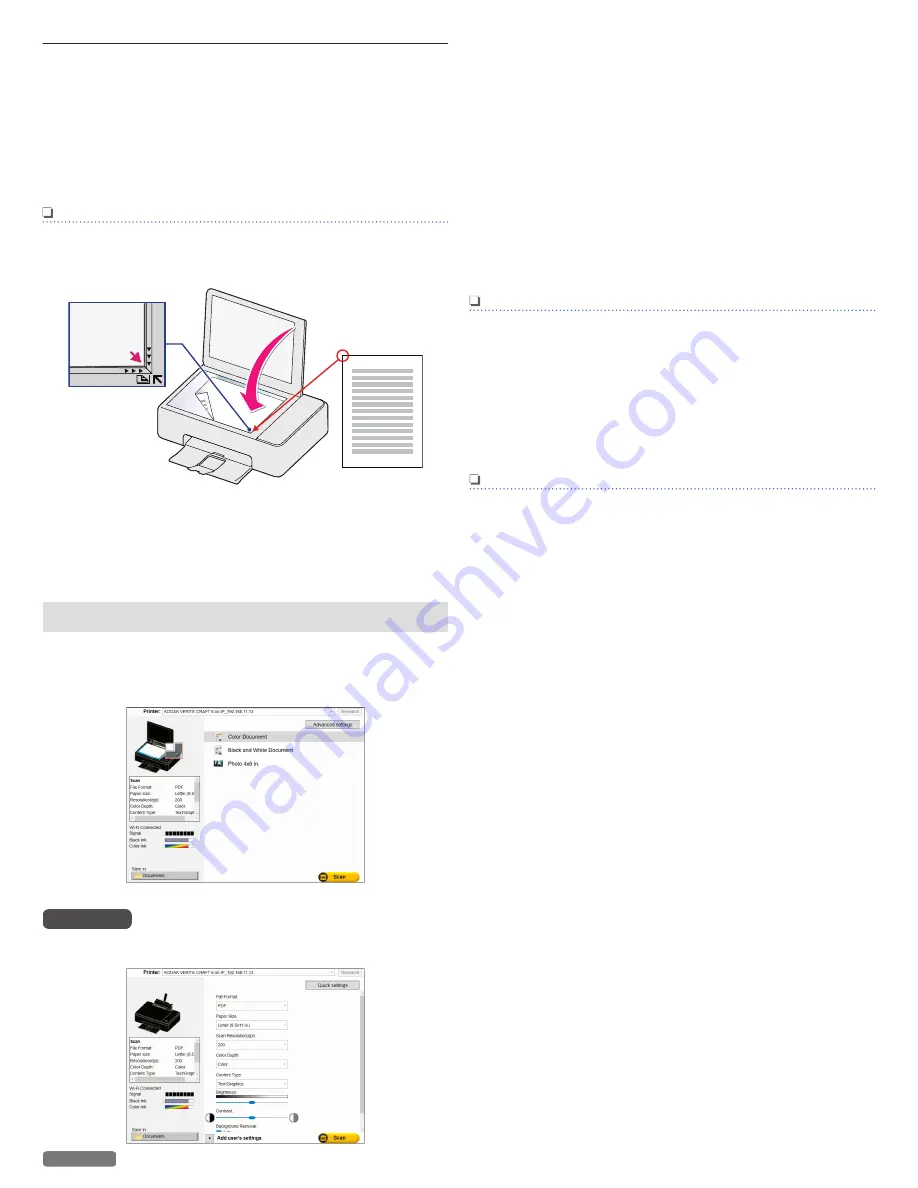
Load the original print side down on the scanner glass.
Make sure to align the original print to the right front corner
of the scanner glass with arrow marks.
●
The readable area of the scanner is not equal to the area of
the scanner glass. Therefore, when placing the document
in the right front corner of the scanner glass the edges of
the document may not be scanned.
●
0.079 in. (2 mm) is missing on the short side and 0.039 in.
(1 mm) is missing on the long side of the scan area.
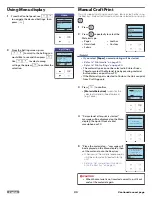
Scan in [Scanning] application by Windows
®
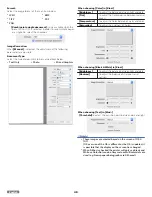
Run
[Scanning]
from the
[Start]
menu as it appears in the window
below.
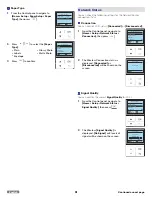
From the Windows
®
start menu, select
[All apps]
>
[KODAK
VERITE CRAFT 6]
>
[Scanning]
.
Click
[Scan]
to start the scanning.
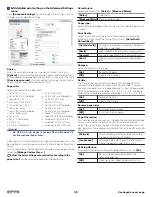
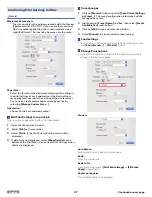
Settings
If you would like to change the settings, click
[Advanced
Settings]
.
File Format:
Select the File Format from below:
●
JPEG
●
Paper Size:
Select the Paper Size from below:
●
A4 (210 x 297 mm)
●
A5 (148 x 210 mm)
●
A6 (105 x 148 mm)
●
4x6 in. (Postcard)
●
Letter (8.5 x 11 in.)
●
Executive (7.25 x 10.5 in.)
●
Statement (5.5 x 8.5 in.)
●
3x5 in. (Index Card)
●
5x7 in.(2L)
●
3.5x5 in.(L)
●
JIS B5 (182 x 257 mm)
●
Hagaki (100 x 148 mm)
●
Envelope 10 (4.125 x 9.5 in.)
●
Envelope DL (110 x 220 mm)
●
Envelope C5 (162 x 229 mm)
●
Entire Flatbed (216 x 297 mm)
Note(s)
●
A4, JIS B5, A5, A6, Hagaki, Envelope DL and Envelope C5
are International Paper Sizes.
●
Entire Flatbed 8.5 x 11.7 in. (216x297mm) is the setting that
scans the entire scanner glass.
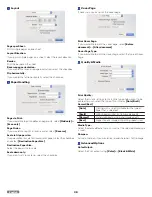
Scan Resolution (dpi):
Select the scan Resolution from below:
●
75 dpi
●
100 dpi
●
150 dpi
●
200 dpi
●
300 dpi
●
600 dpi
●
1200 dpi
Note(s)
●
Scanning at 2400 dpi or more is available on the “High
Resolution Scanning” application included with the
Software.
Color Depth:
Select the scan Color Depth from below:
●
Color
●
Gray
●
Black & white
Content Type:
Specify the Content Type of the scan document from below:
●
Text
●
Text/Graphics
●
Photo
Brightness:
Select the Brightness level. Adjust the bar toward the left end to set
the reproduction darker. Adjust the bar toward the right end to set
the reproduction lighter. The Brightness level will be reflected in the
scanned data.
Contrast:
Select the Contrast level. Adjust the bar toward the left end to
reduce the Contrast. Adjust the bar toward the right end to increase
the Contrast. The Contrast level will be reflected in the scanned data.
Background Removal:
Select Background Removal to remove the background on the scan
data. The Background Removal feature adjusts the amount of
background that is visible in the scanned data.
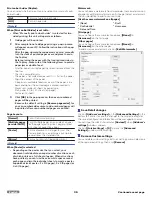
Documents:
If you would like to change the Folder to Save the scanned file to,
click
[Documents]
.
1
Click on
[Documents]
, then
[Browse For Folder]
will
appear.
2
Select the Folder you want to save the scanned file to, then
click
[OK]
.
3
The scanned file will be Saved to the selected Folder.
●
The Folder you have chosen is automatically selected for the
next time. Perform Step 1 and 2 if you want to save the
scanned file to another Folder.
46
English
Continued on next page.

