5
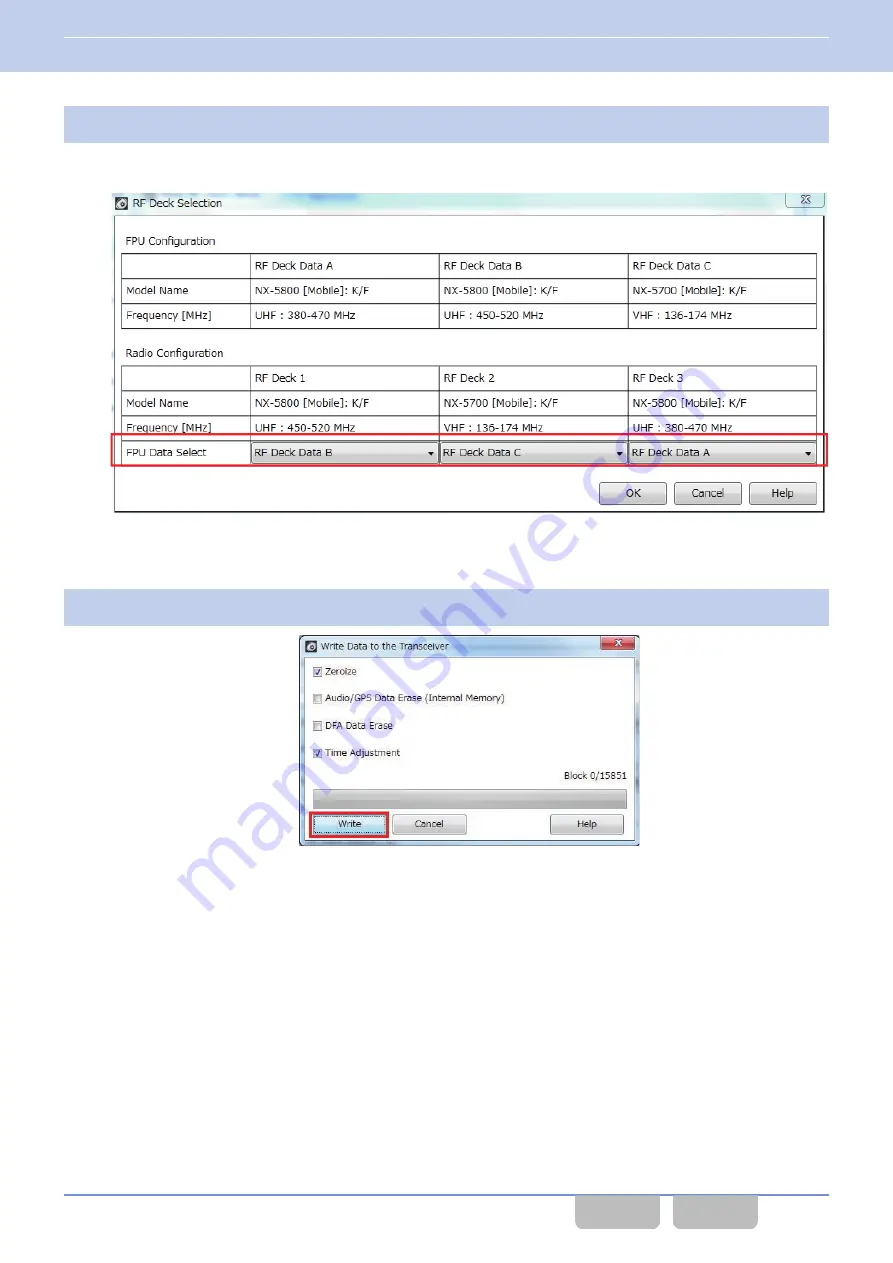
Configure
FPU Data Select
and click the “OK” button.
From
RF Deck Data A
to
RF Deck Data C
configured in step 3, the configuration data of which RF Deck is to be
written is configured for each RF Deck.
Figure 17-67 RF Deck Selection
Clicking the “OK” button displays
Write Data to the Transceiver
.
6
Click the “Write” button.
Figure 17-68 Write Data to the Transceiver
The writing of configuration data starts.
When the writing of configuration data completes, the transceiver starts up in user mode.
If continuously changing the configuration data of RF Deck 3
To continuously change the configuration data of RF Deck 3, click the “Close” button of Multi RF Deck Setup to close
Multi
RF Deck Setup
.
Then, edit the configuration data of RF Deck 3, and write the configuration data by step 3 to step 6 above.
17 STRUCTURING A MULTI RF DECK/ MULTI CONTROL HEAD
17.8 Changing Configuration Data of 1 RF Deck While a System in a Multi RF Deck/ Multi Control Head Structure Is Operating
Common FUNC (K, F)/Ver 2.20
374


