background image

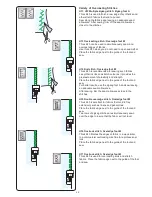
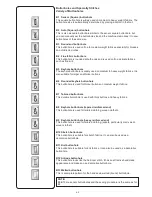
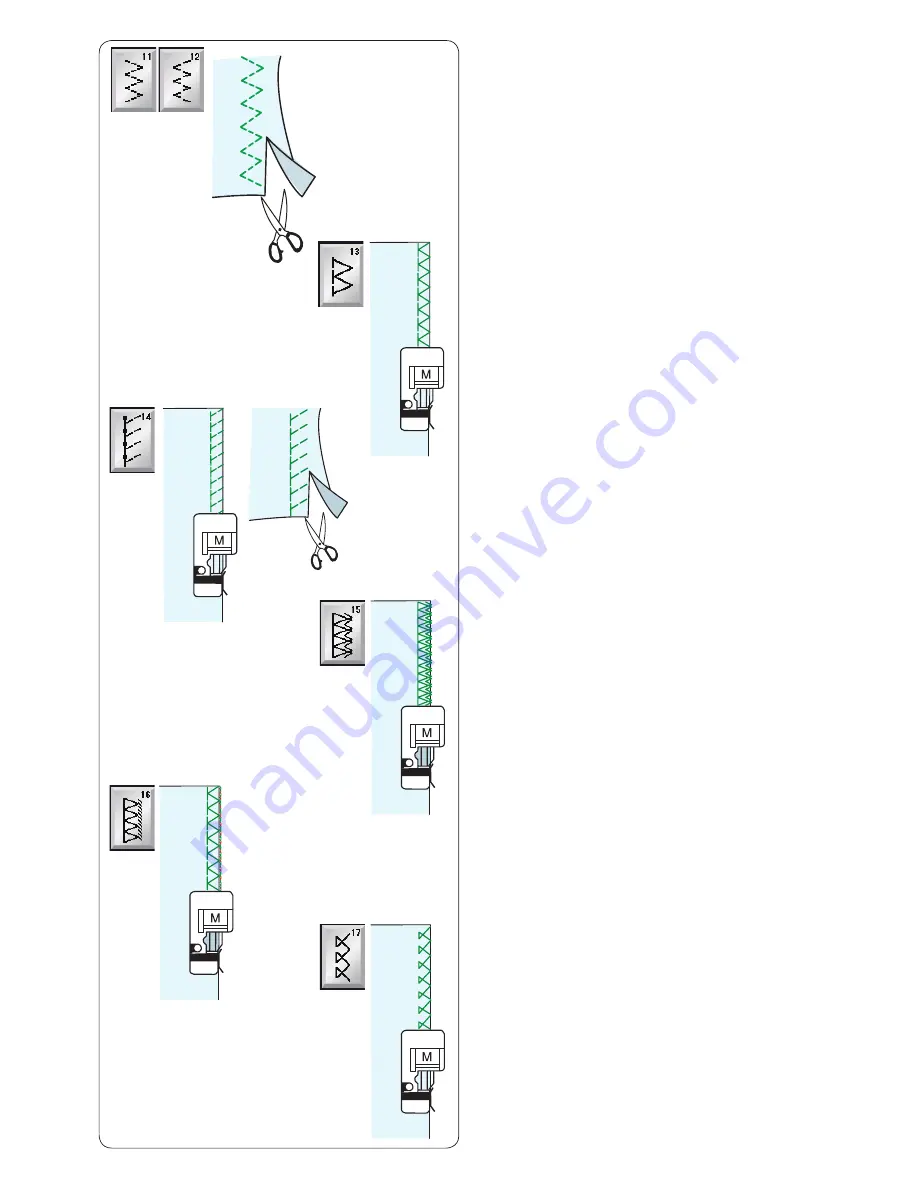
Variety of Overcasting Stitches

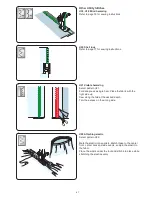
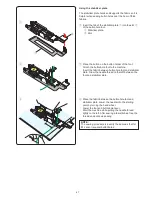
U11, U12 Multiple zigzag stitch: Zigzag foot A
This stitch is used to finish a raw edge of synthetics and 
other stretch fabrics that tend to pucker.
Sew along the fabric edge leaving an adequate seam 
allowance. After sewing, trim off the seam allowance 
closer to the stitches.

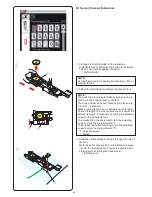
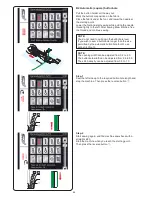
U13 Overcasting stitch: Overedge foot M
This stitch can be used to simultaneously seam and 
overcast edges of fabrics.
Use this stitch when you do not need to open seams flat.
Place the fabric edge next to the guide of the foot and 
sew.

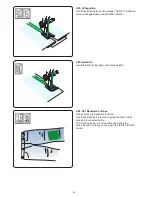
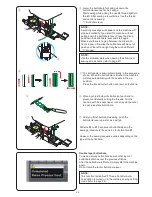
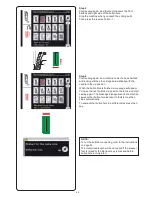
U14 Knit stitch: Overedge foot M
This stitch is recommended for sewing such fabrics 
as synthetic knits and stretch velour as it provides the 
greatest amount of elasticity and strength.
Place the fabric edge next to the guide of the foot and 
sew.
For better results, use the zigzag foot A and sew leaving 
an adequate seam allowance.
After sewing, trim the seam allowance close to the 
stitches.

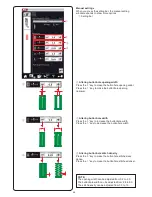
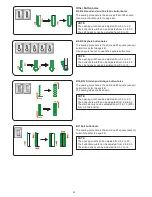
U15 Double overedge stitch: Overedge foot M
This stitch is excellent for fabrics that tend to fray 
extensively such as linens and gabardines.
Place the fabric edge next to the guide of the foot and 
sew.
Two rows of zigzag stitches are simultaneously sewn 
over the edge to insure that the fabric will not ravel.

U16 Overlock stitch: Overedge foot M
This stitch finishes the edges of fabric in a way similar 
to a commercial overlocking machine for a professional 
look.
Place the fabric edge next to the guide of the foot and 
sew.

U17 Overlock stitch: Overedge foot M
This stitch is used for overcasting knits and stretch 
fabrics. Place the fabric edge next to the guide of the foot 
and sew.

35

Содержание Horizon Memory Craft 15000

Страница 1: ...Memory Craft 15000 Instruction Manual ...

Страница 2: ...grasp the plug not the cord 10 Keep fingers away from all moving parts Special care is required around the sewing machine needle and or cutting blade 11 Always use the proper needle plate The wrong plate can cause the needle to break 12 Do not use bent needles 13 Do not pull or push fabric while stitching It may deflect the needle causing it to break 14 Switch this sewing machine off O when making...

Страница 3: ...installed and used in accordance with the instructions may cause harmful interference to radio communications However there is no guarantee that interference will not occur in a particular installation If this equipment does cause harmful interference to radio or television reception which can be determined by turning the equipment off and on the user is encouraged to try to correct the interferen...

Страница 4: ... needle drop position straight stitches 36 Altering stitch width 36 Altering stitch length 36 Adjusting thread tension 37 Adjusting foot pressure control 37 Foot up for pivoting 37 Favorite Stitch Adjustment 38 39 Cloth Guide 40 Other Utility Stitches 41 42 Buttonholes and Specialty Stitches 43 55 Variety of Buttonholes 43 B1 Sensor Square Buttonhole 44 47 Manual settings 46 Using the stabilizer p...

Страница 5: ...ique Designs 127 128 Frame Designs 129 Lace Designs 130 Quilting Designs 130 Editing Mode 131 140 Selecting a hoop size 131 Opening the embroidery designs 131 Editing tool bar information 132 Selecting a pattern 132 Moving a pattern 132 Selecting a pattern with pattern selection keys 133 Resizing a pattern 133 Duplicating a pattern 133 Deleting a pattern 134 Rotating a pattern 134 Flipping a patte...

Страница 6: ...reen Buttonhole lever Automatic needle threader Lever Thumbscrew Presser foot holder Presser foot Needle plate Hook cover plate Lower thread guide Needle clamp screw Needle Hook cover release button Needle threader button Thread cutter button Presser foot lifter button Needle up down button Auto lock button Reverse button Start stop button Speed control slider Bobbin winding button q w e r t y u i...

Страница 7: ...control jack Cover Dual feed drive Presser foot lifter Carrying handle Embroidery unit socket Embroidery unit Carriage arm Carriage arm release lever Semi hard fabric cover Embroidery unit case Accessory case Extra wide table q w e r t y u i o 0 1 2 3 4 5 q w e r q 1 0 3 2 4 5 i q w r e w r t u y o e 2 ...

Страница 8: ...Dual feed foot AD twin Dual feed foot VD single Dual feed quilt piecing foot OD twin Dual feed zipper foot ED single AcuFeed open toe foot UD twin Embroidery foot P Straight stitch needle plate Bobbin x 5 1 set on the machine Needle set Additional spool pin Felt Screwdriver Lint brush Seam ripper buttonhole opener Quilting guide bar Spool holder large set on the machine Spool holder small Net Spoo...

Страница 9: ...nd GR Magnetic clamps for ASQ22 Bobbin holder for embroidery Felt Stabilizers Bobbin thread for embroidery Foot control with thread cutter switch Knee lifter Optic magnifier 20 40 60 Power cable USB cable Instruction book Key icon reference chart Instructional video DVD Horizon Link Suite CD ROM with installation guide q w e r t y u i o 0 1 2 3 4 5 6 7 8 9 0 q w 7 e t y i o 0 1 2 3 4 9 0 6 8 5 r u...

Страница 10: ...ad cutter switch to the left The thread cutter switch position can be adjusted for your convenience If you wish to attach the thread cutter switch to the left side of the foot control follow the procedure below NOTE Phillips head screwdriver is not included with this machine z Remove the setscrews A e B r and washers t with a Phillips head screwdriver e Setscrew A r Setscrew B t Washer t r t e e q...

Страница 11: ...ch the switch to the desired position and fix it with the setscrews and washers Tighten the setscrews securely using a Phillips head screwdriver z Remove the cable tie q from the cable q e w x If you wish to use the thread cutter switch you need to connect it with the foot control Insert the pin connector w into the jack e on the foot control c Turn the foot control upside down Open the cover of t...

Страница 12: ...ory Storage The accessories can be conveniently stored in the accessory case the compartment in the extension table and the compartment under the top cover To store the accessories in the compartment of the extension table push up the lid towards you to open the accessory storage Free arm sewing The free arm is used for stitching sleeves waistbands pant legs or any other tubular garments It is als...

Страница 13: ...all outlet t and turn the power switch q on q Power switch w Machine plug e Power inlet r Power supply plug t Wall outlet NOTE Make sure to use the power cable that came with the machine If you turn off the power switch wait for 5 seconds before turning it on again WARNING While in operation always keep your eyes on the sewing area and do not touch any moving parts such as the thread take up lever...

Страница 14: ...speed in both the ordinary sewing mode and embroidery mode with the speed control slider according to your sewing needs To increase the sewing speed move the slider to the right To decrease the sewing speed move the slider to the left The sewing speed can be changed while stitching Extra Wide Table Peel off the backing paper from the rubber soles and attach them to the bottom of the legs q Rubber ...

Страница 15: ...oot control is not connected the machine will start sewing in reverse as long as the reverse button is pressed If you press the reverse button when sewing any other patterns the machine will immediately sew locking stitches and automatically stop Machine Operating Buttons e Auto lock button When sewing stitch pattern U1 U4 U9 12 Q1 3 or BR1 10 the machine will immediately sew locking stitches and ...

Страница 16: ...machine settings for common settings ordinary sewing embroidery wireless LAN and language selection are available in this mode t Help movie key Press this key to view the on screen movie about the essential operations y Lockout key Press this key to lockout the machine when threading the machine replacing the accessories etc To reduce the risk of injury all the buttons and keys except for the pres...

Страница 17: ... to the right and remove the hook cover plate w q Hook cover release button w Hook cover plate x Remove the bobbin from the bobbin holder NOTE Use the plastic bobbins for horizontal hook marked with a J Using other bobbins such as pre wound paper bobbins may cause stitching problems and or damage to the bobbin holder x z r w q e Additional spool pin Use the additional spool pin when you need to wi...

Страница 18: ... stopper returns to its original position automatically Remove the bobbin Cut the thread with bobbin thread cutter B 0 0 Bobbin thread cutter B NOTE For safety purposes the machine will automatically stop 1 5 minutes after starting bobbin winding q z r x c b m w e q w e Winding the bobbin z Pull the thread from the spool Hold the thread with both hands and pass the thread into the guide slot q q G...

Страница 19: ...h marked 1 Make sure that the thread comes out from the side notch of the bobbin holder u Guide path 1 i Side notch NOTE If the thread does not come out from the side notch rethread from step z v Continue to draw the thread along the guide path marked 2 and pull the thread to the right through the slit The thread will be cut to a proper length and held in place o Guide path 2 0 Slit Thread cutter ...

Страница 20: ...ight channel until the thread snaps e Corner of the guide r Right channel c Draw the thread down along the right channel and around the bottom of the thread guide plate Pull the thread up along the left channel r Right channel t Thread guide plate y Left channel v While holding the thread at the spool firmly draw the thread up and to the back of the take up lever Draw the thread forward to draw it...

Страница 21: ...reader NOTE The needle threader can be used with a 11 to 16 needle Thread size 50 to 90 is recommended Do not use thread size 30 or thicker Make sure the machine is locked out z Draw the thread through the slit q of the needle threader The thread should pass under the hook w q Slit w Hook z x c v q x Pull the thread up and slip it between the thread cutter and face plate from behind Pull the threa...

Страница 22: ...rethread the bobbin holder according to the instructions on page 14 but leave a 10 cm 4 tail of bobbin thread as shown q Bobbin thread NOTE Do not cut the bobbin thread with the thread cutter w Thread cutter x Raise the presser foot Hold the needle thread lightly with your left hand e Needle thread c Press the needle up down button twice to lower and raise the needle and pick up the bobbin thread ...

Страница 23: ...k 50 Cotton 50 80 Synthetic 50 80 Red needle Purple needle Universal needle 11 75 14 90 Silk 30 50 Cotton 40 50 Synthetic 40 50 Red needle Purple needle Universal needle 14 90 16 100 Fabric Thread and Needle Chart For general sewing use red needle Fine threads and needles should be used for sewing fine fabrics In general use the same thread for both needle and bobbin Use a blue needle for sewing f...

Страница 24: ... out the machine y e w r t Raise the needle by pressing the needle up down button Press the lockout key q Lockout key Raise the presser foot lifter w Presser foot lifter q Place the desired foot under the foot holder so that the pin of the foot lies just under the groove of the foot holder Lower the presser foot lifter to lock the foot in place r Pin t Groove Each foot is marked with an identifica...

Страница 25: ...ockout key w Presser foot lifter Loosen the thumbscrew and remove the presser foot holder e Thumbscrew NOTE Use the foot holders included in the standard accessories only w q e w e w Attaching the dual feed holder Attach the dual feed holder to the presser bar q Dual feed holder Tighten the thumbscrew with your fingers Push the dual feed link to engage it with upper feed drive w Dual feed link e U...

Страница 26: ... foot until it snaps into place q Pin w Slit q w Attaching the darning foot PD H Attach the darning foot PD H to the presser bar by putting the pin on the needle clamp screw q Pin w Needle clamp screw Tighten the thumbscrew firmly with the screwdriver Attaching the embroidery foot P Attach the embroidery foot P to the presser bar from behind refer to page 107 q 21 ...

Страница 27: ...en embroidering CAUTION Always make sure to press the lockout key to lockout the machine before replacing the needle plate Raise the needle and press the lockout key Press the presser foot lifter button to raise the presser foot q Lockout key w Unlock key e Presser foot lifter button Slide the extension table to the left to remove it Push down the needle plate release lever and the needle plate wi...

Страница 28: ... presser foot up and down The knee lifter controls zigzag width of the variable zigzag refer to page 91 NOTE Do not touch the knee lifter while stitching otherwise the fabric will not be fed smoothly Raising and Lowering the Presser Foot You can raise and lower the presser foot with the presser foot lifter button the presser foot lifter or the knee lifter q Presser foot lifter button w Presser foo...

Страница 29: ... is attached Retractable Sewing Light In addition to the twin LED lights the machine is equipped with a retractable light Place your finger in the groove and slide the arm towards you The light will turn on automatically Adjust the angle of the light to illuminate the working area q Arm w Groove Push back the arm to turn the light off and store it CAUTION Do not hit or exert excessive force on the...

Страница 30: ...he starting position To switch back to the ordinary sewing mode press the mode switch key and follow the instructions in the confirmation message w e y i o 0 u On screen Help Press the help key to open the help menu You can view movies on 7 topics of essential operations of the machine total power on time of the machine or total operating time of the machine Select the help topic by pressing the m...

Страница 31: ...icon keys to select the category NOTE In this manual the pattern number refers to the initial for each group or category For example pattern 15 in the buttonholes and specialty stitches is referred to as pattern B15 w e e r t y q w w Utility stitches U You can select utility stitches for seaming overcasting blind hemming basting and shell tucking e Buttonholes and specialty stitches B There are va...

Страница 32: ...ing project and fabric type from the designated applications in this category A S L Q D PL H BR P CS r Decorative and quilting stitches This category consists of the following 10 groups Applique stitches A Heirloom stitches H Quilting stitches Q Satin stitches S Bridge stitches BR Decorative stitches D Long stitches L Pictograph stitches P Play stitches PL Created stitches CS r 27 ...

Страница 33: ...y u Touch bar Press on the touch bar to display the next page or previous page i Startover key If you stop sewing in the middle of a stitch pattern and wish to sew the pattern again from the beginning press this key before you start sewing Press this key once to startover from the beginning of the current pattern or press this key twice to startover from the beginning of the first pattern of the c...

Страница 34: ...one of 5 fonts Select the desired font by pressing the corresponding key 5 Letter case key Press this key to select upper case or lower case for monograms 6 Letter size key Press this key to select the full size L or small size S 4 5 6 29 ...

Страница 35: ...rizontal position to avoid slipping After a few stitches the black button is released automatically w Black button Changing sewing direction Stop the machine and press the presser foot lifter button to raise the presser foot Pivot the fabric around the needle to change the sewing direction as desired Start sewing in a new direction NOTE If you turn on the foot up option the presser foot will autom...

Страница 36: ...o cut e Thread cutter Using the seam guide lines The seam guides on the needle plate and hook cover help you measure seam allowance NOTE The numbers on the needle plate indicate the distance from the center needle position in millimeters and inches Securing seams For fastening the ends of seams press the reverse button and sew several reverse stitches The machine sews in reverse as long as you pre...

Страница 37: ...orward When you press the reverse button at the end of the seam the machine will sew several locking stitches in place then stop sewing automatically U4 Straight stitch in left needle position Use this stitch to seam fabrics close to the edge U5 Triple stretch stitch This strong durable stitch is recommended for areas where both elasticity and strength are needed to ensure comfort and durability U...

Страница 38: ...ch to the machine refer to page 20 Press the dual feed key y and select the desired pattern NOTE The patterns not suitable for dual feed sewing are grayed out The dual feed key will gray out or not be indicated if you selected a pattern not suitable for dual feed sewing Place the fabric under the foot and lower the needle at the point where you wish to start Start sewing at medium speed When seami...

Страница 39: ...10 Zigzag stitches Zigzag stitches are used for various sewing needs including overcasting These stitches can be used on most woven fabrics A dense zigzag stitch can also be used for applique U11 U12 Multiple zigzag stitches These stitches are used for mending tears 34 ...

Страница 40: ...city and strength Place the fabric edge next to the guide of the foot and sew For better results use the zigzag foot A and sew leaving an adequate seam allowance After sewing trim the seam allowance close to the stitches U15 Double overedge stitch Overedge foot M This stitch is excellent for fabrics that tend to fray extensively such as linens and gabardines Place the fabric edge next to the guide...

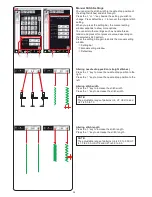
Страница 41: ...bar again to shrink the manual setting window q Setting bar w Manual setting window e Default key w q w Altering needle drop position straight stitches Press the key to move the needle drop position to the right Press the key to move the needle drop position to the left Altering stitch width Press the key to increase the stitch width Press the key to decrease the stitch width NOTE The adjustable r...

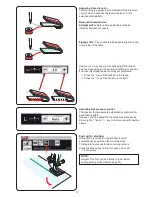
Страница 42: ...ch pattern Balanced thread tension Straight stitch Both needle and bobbin threads interlock between the layers w q Zigzag stitch The needle thread appears slightly on the wrong side of the fabric However you may need to manually adjust the tension balance depending on the sewing conditions or you can fine tune the thread tension to suit your preference q Press the key if the tension is too loose w...

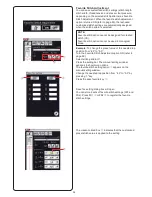
Страница 43: ...Adjustment option ON refer to page 99 Select stitch pattern U1 Press the setting bar The manual setting window expands to show more options The favorite stitch setting option q appears on the manual setting window Change the needle drop position from 4 5 to 5 0 by pressing key Press the save favorite key w r Save fav setting dialog box will open You can store 2 sets of favorite stitch settings FS1...

Страница 44: ...elected set of favorite stitch settings is indicated in red w Select the desired set of customized stitch settings by pressing FS1 w or FS2 e r To delete favorite stitch settings press the delete key r Select the desired set of favorite stitch settings by pressing FS1 w or FS2 e 39 ...

Страница 45: ...e to the default position 15 mm or 5 8 y Default key Make sure to return the carriage to the stored position by pressing the cloth guide storage key and remove the cloth guide after you finish sewing u Cloth guide storage key Cloth Guide CAUTION Always leave sufficient space to the left of the machine when using the cloth guide Do not use the cloth guide when the buttonhole foot R is attached The ...

Страница 46: ...lity Stitches U18 U19 Blind hemming Refer to page 76 for sewing instructions U20 Shell tuck Refer to page 77 for sewing instructions U22 Attaching elastic Select pattern U22 Mark the elastic into quarters Match those to the center front center back and side seams and pin the elastic to the fabric Place the elastic under the foot and stitch into place while stretching the elastic evenly 41 ...

Страница 47: ...bric to create an open work appearance and add stitch interest U26 U27 Backward stitches U26 and U27 are backward stitches Use these stitches if it is hard to guide the fabric while pressing the reverse button The machine sews in reverse without pressing the reverse button so that you can guide the fabric with both hands 42 ...

Страница 48: ...nd is used on fine delicate fabrics such as fine silk B5 Keyhole buttonhole The keyhole buttonhole is widely used on medium to heavy weight fabrics It is also suitable for larger and thicker buttons B6 Rounded keyhole buttonhole This buttonhole is used for thicker buttons on medium weight fabrics B7 Tailored buttonhole This durable buttonhole is used with thick buttons and heavy fabrics B8 Keyhole...

Страница 49: ... a test buttonhole on an extra piece of the fabric Check the length of the test buttonhole and adjust the buttonhole length if necessary by turning the adjusting screw on the buttonhole foot To increase the buttonhole length turn the adjusting screw to move the marker toward L To decrease the buttonhole length turn the adjusting screw to move the marker toward S w Adjusting screw e Marker c Draw t...

Страница 50: ... the buttonhole foot and pull down the buttonhole lever as far as it will go Start sewing while pulling the needle thread lightly to the left After sewing a few stitches free the thread and continue sewing t Buttonhole lever NOTE A warning message will appear and the machine will stop automatically if you start the machine without pulling down the buttonhole lever Press the X key pull down the but...

Страница 51: ...e adjusted from 0 3 to 1 0 r w e e r w Altering buttonhole opening width Press the key to make the buttonhole opening wider Press the key to make the buttonhole opening narrower e Altering buttonhole width Press the key to increase the buttonhole width Press the key to decrease the buttonhole width r Altering buttonhole stitch density Press the key to make the buttonhole stitches less dense Press ...

Страница 52: ... same as that for B1 sensor square buttonholes Using the stabilizer plate The stabilizer plate holds and supports the fabric so it is helpful when sewing buttonholes over the hem of thick fabrics z Insert the tab of the stabilizer plate q into the slot w of the buttonhole foot q Stabilizer plate w Slot w z x c x Place the button on the button holder of the foot Attach the buttonhole foot to the ma...

Страница 53: ...uttonhole lever If you wish to sew a buttonhole longer than the size permitted by the automatic buttonhole foot R use satin stitch foot F NOTE The opening width can be adjusted from 0 2 to 2 0 The buttonhole width can be adjusted from 2 6 to 9 0 The stitch density can be adjusted from 0 3 to 1 0 Step 1 Sew the left side up to the required buttonhole length and stop the machine Then press the rever...

Страница 54: ...ition When the buttonhole is finished a message will appear To make the next buttonhole position the fabric and start sewing again The message disappears and the machine sews another buttonhole identical to the first one then stops automatically To sew another buttonhole in a different size press the X key NOTE To cut the buttonhole opening refer to the instructions on page 45 The memorized length...

Страница 55: ... 0 2 to 2 0 The buttonhole width can be adjusted from 5 6 to 9 0 The stitch density can be adjusted from 0 3 to 1 0 B10 B12 Stretch and Antique buttonholes The sewing procedure is the same as B1 square sensor buttonhole refer to page 44 The sewing steps are as shown NOTE The opening width can be adjusted from 0 2 to 2 0 The buttonhole width can be adjusted from 2 6 to 9 0 The stitch density can be...

Страница 56: ...ed buttonhole on both fabrics together Cut the buttonhole opening as illustrated then pull the patch out through the slit to the other side q Wrong side of patch w Right side of garment fabric e Right side of patch c Pull out the patch until the right side of the patch is showing Use an iron to press both corner ends until they are squared off e Right side of patch r Wrong side of garment fabric v...

Страница 57: ... 5 8 away from the hole The corners should be cut rounded off as shown e Right side of patch r Wrong side of garment fabric 0 Place the facing on the wrong side of the garment fabric Mark the 4 corners with pins as shown t Facing y Garment fabric 1 Turn all the layers over and cut the buttonhole opening on the facing in the same way as step x Four marker pins show you the corner points on the faci...

Страница 58: ...ord on the spur on the front of the foot Bring the ends of cord toward the back and under the foot Bring up the ends of the cord and insert both ends between the ribs and metal plate q Spur w Metal plate Set the stabilizer plate as necessary and attach the buttonhole foot Specialty Stitches B14 Button Sewing See page 85 for sewing instructions q w Lower the needle into the fabric where the buttonh...

Страница 59: ... When finished sewing a confirmation message will appear Simply start the machine to sew another layer of darning stitches in the same size To sew the next layer of darning stitches in a different size press the X key To sew a shorter layer of darning stitches Sew the first line to the desired length and stop the machine Press the reverse button w and start the machine again The machine will sew t...

Страница 60: ...stitch until the machine stops automatically q Starting point Eyelets B21 to B25 The eyelet is used for belt holes etc Attach the satin stitch foot F To sew Place the garment under the foot and lower the needle to the starting point Sew until the machine stops automatically q Starting point Open the eyelet with an awl puncher or pointed scissors To correct the shape of an eyelet If the eyelet is o...

Страница 61: ...ps These patterns are programmable and you can make a pattern combination Applique stitches A 2 pages Stitches in this group are for applique Refer to page 87 Heirloom stitches H 4 pages This group provides heirloom stitches and cross stitches for craft sewing and home décor 56 ...

Страница 62: ... density remains the same Refer to page 61 Bridge stitches BR 1 page Bridge stitches are used for inserting straight stitches after a stitch pattern The number beside the stitch image on the straight stitch key indicates the stitch count of a programmable unit Patterns BR9 BR10 and BR12 will inherit the needle drop position and stitch length of the previous pattern in the programmed pattern combin...

Страница 63: ...Decorative stitches D 9 pages 140 attractive patterns are available in this group Long stitches L 2 pages Patterns in this group are ideal for decorating garments and for adding border trims 58 ...

Страница 64: ...any cute designs fancy motifs and calligraphy available in these groups Created stitches CS In this section you can select original stitch patterns created with Stitch Composer Refer to page 62 for how to transfer created stitch patterns from the PC to the machine 59 ...

Страница 65: ...ing which look like hand sewn stitches Use a transparent nylon thread for the needle and ordinary sewing thread for the bobbin The bobbin thread is pulled up on the right side of the fabric and the stitches look as if they were sewn by hand q w q Quilting Q Using the quilting guide bar The quilting guide bar is helpful when sewing parallel evenly spaced rows of stitches Insert the quilting guide b...

Страница 66: ... setting bar q to expand the manual setting window q Setting bar X1 X2 X3 X4 X5 q w e r Press the key to elongate the stitch pattern w key elongation To reduce the elongation ratio press the key e key elongation The pattern can be elongated up to 5 times the original length The elongation ratio is indicated in the box r Elongation ratio You can also alter stitch density and stitch width 61 ...

Страница 67: ...with Stitch Composer are saved in this group Insert the USB flash drive containing the original stitch patterns and press the import key or import them from Stitch Composer using a USB cable q Import key Select USB1 or USB2 and the folder list will appear Select the desired folder to open and the file list will appear Select the desired file and the original stitch pattern is saved and the pattern...

Страница 68: ... through the needle hole Make sure that the two strands of thread from the spools do not get tangled NOTE Threading from points z to v is the same as for a single needle refer to page 15 The needle threader cannot be used with the twin needle Press the twin needle key and select the desired pattern Patterns not suitable for twin needle sewing cannot be selected pattern selection keys are grayed ou...

Страница 69: ...pears on the screen and mirror image function is enabled Select the desired patterns to create the mirror image Press the vertical or horizontal mirror key again to cancel the mirror image function w Vertical mirror key e Horizontal mirror key r Vertical mirror icon t Horizontal mirror icon y Vertical and horizontal mirror icon To view the entire pattern combination press the cursor key to scroll ...

Страница 70: ...nation press the cursor key to select the pattern you wish to delete The stitch image of the selected pattern turns red Press the delete key to delete the selected pattern e Cursor key r Selected pattern Inserting a pattern Press the cursor key to select the pattern next to where you wish to insert a pattern Enter the desired pattern to insert it before the selected pattern t Inserted pattern w r ...

Страница 71: ...ver from the beginning When you stop sewing a pattern combination the startover key is activated The key shows a triangle and single bar that means the machine will start over from the current pattern When you press the startover key the key will change and show a triangle and double bar that means the machine will start over from the first pattern of the combination Current pattern startover If y...

Страница 72: ...ssing the or key In this case the theoretical value is 51 mm However if the actual length q is 45 mm enter 45 mm by pressing key Press the OK to register it q Actual length The readout is adjusted automatically when calculating the length of other pattern combinations The message Please enter the actual length of the pattern combination disappears to indicate that the displayed value is adjusted a...

Страница 73: ...le on pages 2 5 through 5 5 w e r t y q o 0 2 1 u i Monogramming You can program letters and symbol designs for monogramming Press the home key to enter the category selection Press the monogramming icon to enter the monogramming mode refer to page 26 Press the font selection key and the font selection window will open q Font selection key You can select one of 5 fonts Select the desired font by p...

Страница 74: ...etter individually select the letter by moving the cursor The selected character will be displayed at the upper left corner q when the setting bar is pressed Press or to adjust the thread tension of the selected letter The adjusted thread tension is applied to the selected letter Unified thread tension adjustment To apply the thread tension adjustment to all letters together you do not need to sel...

Страница 75: ... check the sewing results Programming a monogram Simply enter the characters by pressing the corresponding keys to program a monogram Example 1 Quilt in Block font Select Block font Enter Q Press the letter case key q to select lower case q Letter case key Enter u i l and t Example 2 Café in Broadway font Press the monogram key w and select symbol Enter a hollow heart Press the monogram key and se...

Страница 76: ... wish to assign a unique name to the file press the rename key and the keyboard window will open e Rename key Enter a new name and press the OK key to change the file name Press the OK key and the file is saved under the new name q e r Creating a new folder Select a location for a new folder and press the new folder key The keyboard window will open Enter a folder name and press the OK key The new...

Страница 77: ...ext or previous page key w to display the other pages Opening a Pattern Combination You can open the pattern combination and monogram saved in the machine s internal memory or a USB flash drive Press the open file key and the open file window will open q Open file key Select the desired folder and the file list will appear Select the desired file The screen will return to the ordinary sewing windo...

Страница 78: ...wing applications are as follows q Seaming w Overedge e Blind Hem Shell Tuck r Rolled Hem t Zipper Sewing y Gathering u Basting i Button Sewing o Tacking 0 Applique 1 Patchwork 2 Quilting The sewing applications using optional presser feet can be selected by pressing optional foot key 3 Please refer to optional feet instructions for usage details 3 Optional foot key q w e r t y u i o 0 1 2 3 73 ...

Страница 79: ...raight stitches for seaming regular woven fabrics w Stretch Knit Seaming 2 Narrow stretch stitches for seaming stretch or knit fabrics e Curve Seaming 3 Short straight stitches for seaming curved line r Topstitching Seaming 4 Long straight stitch for topstitching with thick threads q e w r 74 ...

Страница 80: ...fabrics For better results use the zigzag foot A and sew leaving an adequate seam allowance After sewing trim the seam allowance close to the stitches refer to page 35 e Woven Overlock stitch similar to a professional overlocker stitch r Heavy Double overedge stitch for preventing raw edges of linens and gabardines from ravelling q e w r 75 ...

Страница 81: ... seam on the right side of the fabric is almost invisible Adjusting the needle drop position Press the setting bar to expand the manual setting window Press the key u in the upper row to move the needle drop positions to the left Press the key i in the upper row to move the needle drop positions to the right The needle drop position will change while the stitch width 2 8 mm remains consistent The ...

Страница 82: ...e the left needle drop position r with the or key in the row q q Small Narrow shell tuck stitch w Medium Medium width shell tuck stitch e Large Regular shell tuck stitch To sew Use a light weight fabric Tricot for example Fold the fabric in bias as shown and stitch on the fold Allow the needle to barely clear the folded edge to create a shelled edge If you sew shell tucks space the rows at least 1...

Страница 83: ...press Place the fabric aligning the hem edge with the guide of the foot Turn the hand wheel to lower the needle to the starting point Lower the foot and sew several stitches slowly while pulling on the threads to assist feeding the fabric Stop the machine and lower the needle into the fabric Raise the foot and insert the folded portion of the fabric into the curl of the foot Lower the foot and sew...

Страница 84: ... step icon and the machine setting will automatically adjust to suit each sewing step r w q e t Lock a Matic Basting Zipper Sewing q Lapped zipper Lapped zipper application with the zipper foot E w Concealed zipper Concealed zipper application with the concealed zipper foot Z w q Fabric preparation Add 1 cm 3 8 to the zipper size This is the overall opening size Mark the end of opening q Zipper si...

Страница 85: ...ide at the bottom of the zipper so that the needle pierces the fabric next to the fold and the zipper tape Sew along the zipper guiding the zipper teeth along the bottom edge of the foot Sew through all layers next to the fold Stop 5 cm 2 before zipper foot E reaches the slider on the zipper tape r 5 cm 2 Raise the foot and open the zipper Lower the foot and stitch the remainder of the seam Close ...

Страница 86: ... 8 Stitch through the garment and zipper tape guiding the zipper teeth along the bottom edge on the foot Stop about 5 cm 2 from the top of the zipper Lower the needle into the fabric raise the foot and remove the basting stitches w Basting stitches Open the zipper and move the slider to the rear of the foot Lower the foot and stitch the remainder of the seam making sure the fold is even Remove the...

Страница 87: ...e to the bodice Open the zipper and put it on the right seam allowance with the back side up y Zipper teeth u Fold i Left seam allowance Prepare a concealed zipper 2 cm 3 4 longer than the opening size Press the sewing step icon and machine settings will automatically adjust to suit each sewing step o 0 Basting Baste the opening 0 3 cm 1 8 inside of the seam line t 0 3 cm 1 8 Right of teeth Attach...

Страница 88: ... r 0 3 cm e w Stitching tape Raise the foot and close the zipper Replace the foot with the zipper foot E Turn and fold the bodice to the right Seam along the edge of the left zipper tape and reverse the stitches 2 cm 3 4 before the zipper bottom Raise the zipper teeth on the left and lower the foot so the right groove of the foot catches the zipper teeth Stitch through the zipper tape and fabric u...

Страница 89: ...lly NOTE Refer to page 21 for how to attach the darning foot PD H To sew Hold the fabric taut and depress the foot control The machine will make one stitch and stop automatically Slide the fabric to the rear for the next stitch Basting There are 2 basting stitches available in this section Easing a sleeve top Pull both of the threads about 10 cm 4 Sew a pair of lines 3 mm 1 8 apart along the edge ...

Страница 90: ...utton Lower the foot to hold the button in place aligning the direction of the button e Button shank plate Raise the needle by turning the handwheel until the needle bar swings to the right Press the or key so the needle enters into the right hole of the button The maximum stitch width is 0 7 cm 1 4 Start sewing and continue until the machine stops automatically Remove the fabric from the machine ...

Страница 91: ...carriers where extra strength is needed There are 3 auto tacking sizes and manual tacking available Attach the satin stitch foot F q e r Auto tacking Lower the needle at the starting point and start sewing The machine will sew the tack of the selected size and stop automatically when it is finished q Starting point To sew the same size tack To sew another tack in the same size simply start the mac...

Страница 92: ...atically goes up when the machine stops Press the foot up key to turn on this option w Foot up key NOTE Make sure to stop the machine with the needle dropped at the outer edge of the applique Starting over from the corner Press the startover key before sewing in the new direction to sew from the beginning of the pattern e Startover key Two options of startover are available for applique stitches P...

Страница 93: ...ith right sides together Place the patchwork pieces under the foot so that the edge of the fabric matches the guide on the presser foot q Edges of fabric w Guide on the 1 4 seam foot O When you stop the machine a message will appear Press the OK key and the machine memorizes the seam length to sew another piece of the same length Press the X key to sew in a different size After sewing the memorize...

Страница 94: ...lly stops with the needle in up position when completed w q Straight stitches with dual feed Straight stitches in this section are suitable for seaming quilt layers using the dual feed foot refer to page 20 for how to attach it Quilting guide bar for dual feed foot The quilting guide bar is helpful when sewing parallel evenly spaced rows of stitching Insert the quilting guide bar into the hole in ...

Страница 95: ...lts select the upper stitches and use the darning foot PD H refer to page 21 for how to attach the darning foot Select the lower stitches for flatter quilts and use the free quilting foot QC QO or QV One stitch off The machine stops automatically after sewing one stitch so that you can bring the bobbin thread up to prevent it from bunching up on the wrong side of the fabric Hold the needle thread ...

Страница 96: ... fabric if needed Sew at slow to medium speed while guiding the fabric with your hands and controlling the stitch width with your knee NOTE When the machine stops you can raise and lower the presser foot with the knee lifter Purple tip needle is recommended for free motion quilting to prevent skipped stitch Hand look quilt stitches Use a transparent nylon thread for the needle and ordinary sewing ...

Страница 97: ...oidery Setting Mode In this mode you can customize the machine settings and options for embroidery refer to pages 152 154 for the operation t Wireless LAN Setting Mode In this mode you can set up the wireless LAN connection for both ordinary sewing and embroidery refer to pages 100 102 y Language Selection Mode In this mode you can select the desired language for the screen messages To browse page...

Страница 98: ...ng light keys to turn on or off the sewing lights y Standby Timer The sewing lights will turn off and the machine will enter standby mode if you do not use the machine within the time period set by this timer Doing any operation will turn the lights and screen on again The standby timer can be set from 1 to 30 minutes If you wish to turn off the timer press and hold the key until OFF shows in the ...

Страница 99: ... the touch screen if you feel the touch screen key is not responding properly Press the Yes key to open the calibration window Press the sign with the touch panel stylus as the sign appears When you press the last sign the screen shows END and the calibration window will close Press the next page key to show the next menu o 0 1 NOTE Custom settings for sound volume start up speed and maximum embro...

Страница 100: ... wish to change the color of the glow light press the Yes key and open the color selection window You can change the color of the glow light by pressing the desired color key You can adjust the brightness of the light by pressing the or key NOTE This option will be off when turning the color light off refer to page 93 Press the next page key to show the next menu 2 3 95 ...

Страница 101: ...on and the confirmation window will open Press the OK key to format CAUTION Do not turn off the power or disconnect the USB flash drive while a warning message is displayed otherwise it may damage the memory bank 6 Reset All to Defaults Press the Yes key to reset all the parameters except wireless LAN settings to the original values factory settings Press the OK key to register the new menu 4 6 5 ...

Страница 102: ...you wish to sew decorative stitches and sewing applications with the feed dog down Press the drop feed key to turn on this option Press the next page key to show the next menu q w e r t Foot height for pivoting When the foot up option is turned on the presser foot will automatically go up when the machine stops The height of the foot in the up position can be adjusted by pressing the key or key in...

Страница 103: ...radually increase to maximum You can select the desired start up speed from slow normal or high by pressing the corresponding key and set the speed for the start stop button or foot control individually Press the key or key to adjust the position of the cloth guide Press the OK key The message is displayed and the carriage will return to the home position Saving favorite positions If you have set ...

Страница 104: ...he threads after sewing locking stitches when this option is turned on 0 1 2 3 2 Resume Mode Turn on this option when you wish to resume the last pattern sewn before turning the power switch off When the power is turned on again the confirmation message will appear Press the OK key to resume the last pattern After customizing the settings press the OK key to enable the new settings NOTE Resume dat...

Страница 105: ...DHCP option is turned on The IP address can be changed in the network settings r MAC Address The MAC address of the MC15000 is displayed t Sewing Machine Name The sewing machine name for network identification is displayed The sewing machine name can be changed in the network settings y Network setting button Press this button to open the Network Settings window u OK key Press this key to confirm ...

Страница 106: ...Entry dialog box appears Enter the encryption key and press the OK key to establish the network q e w r Network Settings NOTE Please refer to your wireless router s instructions when the using the push button or PIN method to connect with the wireless LAN connection q Push button method Press Push button q The Push Button Sys dialog box appears on the screen Press the push button on the wireless L...

Страница 107: ...s Press the OK key t to confirm the network settings Press X key y to cancel the settings r u Sewing Machine Name Settings Press Yes key i to open the sewing machine name setting screen Enter the sewing machine name for the network identification Press the OK key to change the name Press X to cancel the settings u i w t y NOTE You do not need to turn off the DHCP option and configure the network s...

Страница 108: ... of layers etc Always test sew on a scrap piece of the fabric that you wish to use If decorative stitch patterns letters numbers or the manual buttonhole stitch are deformed correct them with the feed balancing dial Remove the cap with your finger q Cap NOTE In normal sewing set the feed balancing dial to the neutral position i e the groove on the dial is centered with the standard setting mark De...

Страница 109: ...NOTE Be sure to provide sufficient space around the machine to allow the hoop to move freely Do not place anything inside the area shown on the left r e 73 cm 28 3 4 q x Place the embroidery unit on the back side of the machine base matching the small dots as shown e Embroidery unit r Small dots c Slide the embroidery unit along the machine to the right and push the embroidery unit firmly until it...

Страница 110: ...ever to extend the carriage arm q Carriage arm release lever w Carriage arm w q CAUTION Do not push on the carriage arm when it is extended Do not forcefully move the carriage or carriage arm by hand Do not hold the carriage or carriage arm while it is moving Failure to follow these instructions may result in damage to the carriage mechanism z x ...

Страница 111: ... q Carriage arm release lever w Carriage arm WARNING Be careful not to get your finger caught between the embroidery unit and machine bed with the extension table removed when the carriage returns to home position x Push down the carriage arm release lever to retract the carriage arm t e r c Turn the power switch off Push the embroidery unit release button Slide the embroidery unit to the left and...

Страница 112: ...t with the presser foot lifter q Lockout key w Presser foot lifter w t q e r x Loosen the thumbscrew with the screwdriver and remove the foot holder e Thumbscrew r Foot holder c Attach the embroidery foot P to the presser bar from behind Tighten the thumbscrew partially by hand t Embroidery foot P v Lower the foot with the presser foot lifter Tighten the thumbscrew securely with the screwdriver z ...

Страница 113: ...idery CAUTION Always make sure to press the lockout key to lockout the machine before replacing the needle plate z Raise the needle and press the lockout key Press the presser foot lifter button to raise the presser foot Slide the extension table to the left to remove it Push down the needle plate release lever and the needle plate will snap off A message will appear warning that the needle plate ...

Страница 114: ...n Janome bobbin thread for embroidery NOTE The special bobbin holder is marked with a yellow dot for identification q Yellow dot w r e z Remove the needle plate refer to the previous page Take out the standard bobbin holder w Standard bobbin holder z x t q Bobbin Winding While Working on an Embroidery Project You can wind a bobbin while running the machine To set the additional spool pin please re...

Страница 115: ...area r Embroidery hoop ASQ22 A square embroidery hoop with a 22 cm 8 7 square embroidery area Hoop ASQ22 is very useful for filling a large size quilt with AcuFil design patterns created with AcuFil Tool refer to pate 144 q w t e y r t Embroidery hoop FA10 A free arm embroidery hoop with a 10 cm by 4 cm 3 9 by 1 6 embroidery area y Blocking plate u Magnetic clamp SQ23 and GR A short magnetic clamp...

Страница 116: ...e it easier to peel off the excess stabilizer after stitching Ironing temperatures vary depending on the kind of adhesive stabilizer you are using Type Tear away Iron on Cut away Water soluble Heat away Usage Stable woven fabrics Knits and all kinds of unstable fabrics Knits and all kinds of unstable fabrics Cutwork or lace embroidery Right side of looped fabrics such as towels to avoid loops comi...

Страница 117: ...p Remove the template NOTE Make sure to match the alignment marks of the outer and inner hoops when stretching the fabric u Alignment marks Setting the Fabric in an Embroidery Hoop z Prepare a fabric and attach a stabilizer to the wrong side of the fabric The fabric and stabilizer should be larger than the hoop size Draw the centerlines on the fabric with tailor s chalk q Fabric w Centerlines x La...

Страница 118: ...racted a confirmation message will appear Do not press the OK key or X key Instead open the carriage arm x Place the hoop on the machine and attach the hoop to the carriage by inserting the lock pin of the hoop into the hole in the carriage Turn the knob clockwise to secure the hoop w Lock pin e Hole Thread Holder To avoid sewing over a tail of the needle thread place the thread end on the thread ...

Страница 119: ...Y GANAHA Sashiko Designs Page 2 of 4 Home Decor Designs Everyday Holiday Designs Abstract Designs Monochrome Designs Page 3 of 4 Border Designs Quilting Designs Cross Stitch Alphabet Designs Cross Stitch Designs Page 4 of 4 Favorite Designs Lace Designs Fringe Designs Calibration Pattern Press the desired category to select and the pattern selection window will open Browse the pattern list with th...

Страница 120: ... selection key to open the font selection window q Monogram key w Font selection key You can select one of the 11 fonts for monogramming as well as 2 letter 3 letter border patterns and normal sew patterns The following fonts and patterns are available q w Press the icon key of the desired font and the monogram window will open Browse pages with the previous next page keys You can enter alphabet l...

Страница 121: ...s key to delete the character above the cursor y Save file key Pressing this key opens the save file window and allows you to save the text or monogram as a file u Cursor key Press these keys to move the cursor to the left or right i OK key Press this key to confirm your entry and open the embroidery screen o Space adjust key This key is activated only when a space is entered If the spaces between...

Страница 122: ...t small size q Letter size key Enter the cursor shifts to the right and is automatically memorized Press the letter size key and select medium size Enter B the cursor shifts to the right and B is automatically memorized Press the OK key and a warning message will appear Press the OK key and the carriage moves to starting position The hoop confirmation window will appear Press the OK key The screen...

Страница 123: ...ll appear Press the OK key The screen changes to the ready to sew window NOTE The 3 letter monogram is sewn in the same way as the 2 letter monogram The starting position for the 2 letter and 3 letter monogram is in the center of the hoop 2 Letter monogram Example 2 Letter in an octagon z Press the font selection key q Select 2 letter w z q w x c x Select the octagon ...

Страница 124: ...ng R from MART Press the cursor key to move the cursor under R x Press the delete key and letter R is deleted c Inserting a character Inserting E into MAT Press the cursor key to move the cursor under A v Enter E The letter E is inserted before A z x c v ...

Страница 125: ...m sewing speed o Required sewing time 0 Stitch count 1 Thread color 2 Cross mark 3 Progress bar q w Ready to Sew Window The ready to sew window shows embroidery function keys and information on the selected pattern Function keys q Color section key w Color list key e Trace key r Adjust key t Hoop back key y Stitch back key u Stitch forward key i Jog key o Cross key 0 Previous color section key 1 N...

Страница 126: ...s bar returns to 0 t Progress bar Cross key Press the cross key y to display the current sewing point as a cross mark u Press the cross key again to hide the cross mark y Cross key u Cross mark Current sewing point Color section key Press this key i to show the complete image of the selected design or partial image of each color section only To view the next color section press the next color sect...

Страница 127: ...tracing with basting stitches First the machine bastes inside the pattern then traces the pattern outline with basting stitches NOTE The machine will baste around the embroidery area with a 5 mm allowance However the allowance will be null if the pattern spreads over the maximum limit of embroidery area To close the tracing option window press the X key Hoop back key Raise the needle by pressing t...

Страница 128: ...jump threads This option is can be used when the jump thread cutting length setting or cutting command is activated refer to page 153 Press the or key to adjust the tail length of jump thread Adjust Key Press the adjust key to open the manual setting window You can adjust the following settings in this window q Adjust key q t Auto thread tension level Press the or key to adjust the thread tension ...

Страница 129: ...auto thread cutting is activated automatically when the first color section is finished Change the thread to the next color and sew the next section Sewing results The embroidery pattern is sewn against the centerlines on the fabric as shown e Centerlines on the fabric NOTE Refer to page 153 for how to set auto thread cutting Starting to Sew Embroidery z Select the desired pattern w e q x Adjust t...

Страница 130: ...move the fabric from the hoop Cut the needle threads along the red broken line at the outer edge of the pattern as shown Ruffle the threads to make fringe Example Fringe design FA10 67 Select fringe design FA10 67 and sew the pattern as you would sew a normal embroidery design Remove the fabric from the hoop Cut the bobbin threads on the wrong side of the fabric along the red broken line as shown ...

Страница 131: ...bobbin threads on the wrong side of the fabric along the broken line as shown Pull the needle threads up and bring the loop ends to the right side of the fabric to make fringe SQ14 266 SQ14 267 SQ14 268 FA10 63 FA10 64 FA10 65 SQ14 265 SQ14 264 ...

Страница 132: ...y Applique Designs Fringe designs SQ14 265 and SQ14 266 are special designs for machine embroidery applique You can attach applique piece to background fabric and embroider applique design at the same time Example Fringe design SQ14 265 Prepare background fabric and applique fabric Select fringe design SQ14 265 and set the background fabric to the hoop Remove the hoop from the machine but do not u...

Страница 133: ...repare background fabric and set it to the hoop Attach the hoop to the carriage Press the previous color section key to go back to the first section color and sew the first section color to mark the applique position q Previous color section key Place the applique piece on the background fabric and align the applique piece with the positioning mark Fix the applique piece in place with sticky tape ...

Страница 134: ...he first section color only Remove the hoop from the machine but do not unhoop the fabric Cut away the inside of the marked area Baste the heat away stabilizer over the marked area Attach the hoop to the machine again Sew the remaining sections colors of the applique design Remove the unnecessary parts of the stabilizer Melt away the rest of stabilizer with an iron Prepare your favorite picture et...

Страница 135: ...signs SQ14 178 through SQ14 201 comprise 3 color sections However you sew the following specific sections only by pressing the relevant icon keys q Outer frame stippling and center design w Stippling and center design e Center design Use the same thread for the bobbin as the needle thread Use the purple tip needle to avoid skipped stitches Adjust the foot height if necessary refer to page 123 or 1...

Страница 136: ...ilt in design key w Select the desired pattern from the design list refer to page 114 q Home key w Built in design key w q x Press the next page key w to show the other hoops Press the hoop icon key to select the desired hoop Select the desired hoop The screen will return to the editing window w Next page key NOTE In the editing mode you cannot select patterns larger than the size of the selected ...

Страница 137: ...o the center of the editing window q Layout keys w Cross key The carriage will not move when you press the layout keys since the pattern position will move relative to the hoop not to the machine q w t y q w e r u i o 4 1 2 3 0 5 6 7 8 9 0 Editing tool bar information The editing tool bar contains the following keys as shown Press the down arrow key y to show the next set of editing tools Press th...

Страница 138: ...ating a pattern z Press the duplicate key to make a copy of the selected pattern q Duplicate key w The duplicated pattern will be superimposed over the original pattern Move the duplicate to show the original pattern q z x e w q z x r Selecting a pattern with pattern selection keys When multiple patterns are closely positioned it can be hard to select the desired pattern Pattern selection keys app...

Страница 139: ...ttern 1 degree counterclockwise Press the key r to rotate the selected pattern 45 degrees clockwise Press the key t to rotate the selected pattern 45 degrees counterclockwise The angle of a rotated pattern is displayed in the window y Press the OK key to confirm q z x e w t r y Deleting a pattern z Press on the pattern to delete x Press the delete key q to delete the selected pattern q Delete key ...

Страница 140: ...rizontal mirror image key q Vertical mirror image key w Horizontal mirror image key x Press the key q to create the vertical mirror image of a selected pattern q z w q x w c c Press the key w to create the horizontal mirror image of a selected pattern ...

Страница 141: ...age key Move the duplicate to the left q Duplicate key w Vertical mirror image key c Press the duplicate key Press the horizontal mirror image key Move the duplicate up e Horizontal mirror image key v Press the duplicate key Press the vertical mirror image key Move the duplicate to the right Press the OK key b The ready to sew window will open z x c v b q w e ...

Страница 142: ...indow e Group all key x e r c c If you wish to group the selected patterns only press the group select key r Select the desired patterns by pressing on the pattern images Press the selected pattern again to unselect the pattern Press the OK key to group the selected patterns r Group select key v The grouped patterns can be moved and duplicated as a unit When grouping the selected patterns only the...

Страница 143: ...u press on the images Press the sewing order key q again to return to the previous screen q Sewing order key q q z For example the combined design pattern created on page 136 has 20 color sections x Press the color group key q and the color grouping window will open Press the OK key to unite all color sections of the same color and the ready to sew window opens q Color group key c The number of co...

Страница 144: ... change the shade of the selected color press or key or drag the slider to the left or right u Background color key NOTE If a design in JPX format is open you can display the background image in the editing window by pressing the background image key refer to the instruction book of Digitizer MBX i Background image key Zooming in the editing window Press the zoom key to view the enlarged image in ...

Страница 145: ...e displayed in the editing window Press the arc key and the arc layout window will open q Arc key c Press the upper arc key w to make an upper arc Press the lower arc key e to make a lower arc Press the enlarge key r to make an arc longer Press the shorten key t to make an arc shorter Press the OK key to confirm w Upper arc key e Lower arc key r Enlarge key t Shorten key z x c ...

Страница 146: ... design pattern 90 degrees counterclockwise refer to page 134 Press the OK key to open the ready to sew window Remove the extension table Set the garment in the hoop FA10 as shown Position the garment so that the centerlines match those on the template in the hoop Place the garment over the free arm of the machine and attach the hoop FA10 to the carriage Roll up the cuff so that it will not jam at...

Страница 147: ...aper for border design patterns SQ14 145 and SQ14 146 by using Horizon Link Suite q Template sheet x Place the template sheet on the fabric and mark the end points of the centerlines with tailor s chalk Draw centerlines on the fabric The horizontal line should be long enough to connect the next patterns w Centerlines c Set the fabric in the hoop and attach the hoop to the carriage Select border de...

Страница 148: ... right until the marking points of both patterns overlap Press the zoom key to enlarge the pattern image Press the scroll key and drag the image to show the marking points Press the jog keys and adjust the position of the second pattern to align the marking points exactly q Zoom key w Scroll key To adjust the pattern position more precisely use EmbLinkTool available in Horizon Link Suite Press the...

Страница 149: ...ich may be affected by the strong magnetic field There is no inner hoop but the quilt layers are held in the hoop by means of the magnetic clamps AcuFil template t Centerlines for AcuFil design pattern y Maximum area of embroidery u Arrow mark Calibrate the center position before use see page 153 q w e r t t u y Preparing quilt layers Start AcuFil Tool on your PC and click AcuFil Multiple Design L...

Страница 150: ...idery area when deciding the overall quilt size Draw centerlines and arrowhead with a washable marker Pin or baste all layers together If the template sheet is printed on 2 pages cut each section out and glue them together as shown Save the AcuFil design pattern on a USB flash drive NOTE You can transfer the design pattern to the machine and save it to the machine s built in memory with the direct...

Страница 151: ...ark facing up on the quilt and adjust the position of the quilt aligning the centerlines of the quilt and AcuFil template Set the quilt layers in the hoop and press down the AcuFil template While pressing the AcuFil template close to the outer frame snap the magnetic clamps onto the hoop to fasten the quilt layers to the hoop Remove pins and basting stitches from the hooped area Then rehoop the qu...

Страница 152: ...d Insert the USB flash drive that contains the AcuFil design files H W Click Adjust Last Pattern Size and the Open dialog box will open Select the design file that you have sewn and click Open Enter the measured size of the blank section and click OK Save the adjusted design on the USB flash drive Do not overwrite the design file Save the file under a new name Insert the USB flash drive into the m...

Страница 153: ... combining element patterns from the Design Collection folder Click Create Original AcuFil Designs Enter the overall size of the quilt and click OK to calculate the optimum size of the AcuFil design pattern and number of patterns to fill the quilt Edit and arrange the imported patterns to create your original design On Home tab in Step group click Save the design as a file on the USB flash drive t...

Страница 154: ...st the design size Example Sewing leaf design border along the quilt edge Click Edit Designs Enter the hoop size 220 x 220 and click OK On Home tab in Edit group click Design Select the desired pattern to import Rotate the design 245 degrees and place it at the upper edge as shown ...

Страница 155: ...d place it opposite to the first one Repeat the above steps and line up 4 element patterns Adjust the width of the working area by dragging the anchor point Click Save the design as a file on the USB flash drive Enter the overall quilt width W and enter 220 for height H and then click OK Click Save the design on the USB flash drive ...

Страница 156: ...ction Place the template sheet at the next section and draw the vertical centerline Sew the next section and repeat these steps to sew the remaining sections from the center outward Eliminating blank margin If the design pattern created in the previous section is smaller than the calculated design size there will be a blank margin around the design The blank margin can be eliminated by adjusting t...

Страница 157: ...et from 400 to 1000 spm in 100 spm intervals by pressing the or key Sewing speed can be varied with the speed control slider even while running the machine NOTE Reduce the sewing speed when sewing patterns with narrow zigzag stitches that tend to warp at high speeds y Embroidery foot height The machine measures fabric thickness and automatically sets the presser foot to the optimum height However ...

Страница 158: ... setting is turned on you can configure the Jump thread cutting 0 Cut at color change end 1 and Cutting Command 2 options individually Press the OK key to confirm the advanced setting i Hoop calibration You can calibrate the center position of the hoops You need to enter embroidery mode before opening the embroidery setting window Extend the carriage arm and press the Yes key i 1 Yes key The carri...

Страница 159: ... press the retain original color key to retain this information 1 1 Retain original color key 2 Resume mode When Resume Mode is turned on the last stitch sewn before turning the power off will resume when you turn the power on again 1 1 1 2 When you turn the power on the confirmation window opens Press the OK key to resume the last stitch of the sewn pattern After customizing the settings press th...

Страница 160: ...ss the folder icon File names are assigned automatically in numerical order starting from M_001 Press the OK key and the file is saved in the selected folder To assign a particular name to the file press the rename key w Rename key The keyboard window opens Enter a new name and press the OK key The file is saved under the new name When you attempt to save a file with a name that already exists the...

Страница 161: ...ile or folder Press the delete key and select the file or folder to delete A confirmation message appears Press the OK key to delete the file or folder w Delete key e The file list of the selected folder is displayed To open the file press the file icon In the embroidery mode file attributes can be shown on the file icon To show the file attribute press the large icon key w Large icon key There ar...

Страница 162: ... with Stitch Composer and original embroidery design data from a PC to the MC15000 Refer to on screen help of Horizon Link Suite for more details CAUTION Do not turn the power off or disconnect the USB cable while the data transfer is in progress as this will cause loss of data and can damage the machine s memory Changing a name of the file or folder Press the rename key and select the file or fol...

Страница 163: ...the bobbin holder with a lint brush Apply a few drops of the bobbin holder cleaner included in the standard accessories to a soft cloth and wipe the bobbin holder both inside and outside w Lint brush e Soft cloth Clean the feed dog and auto thread cutter device with the lint brush r Feed dog t Auto thread cutter device Clean the inside and lip of the hook race with a soft cloth Insert the bobbin h...

Страница 164: ...t the thread guide plate on the machine inserting the tenons into the slots Push the thread guide plate down to snap it in place r Tenon q w e r IMPORTANT To carry the sewing machine hold the carrying handle with your hand and support the sewing machine with the other hand Clean the outside of the machine with a soft cloth Do not use chemical solvents Store the machine in cool and dry place Do not...

Страница 165: ... blue needle is not being used for sewing stretch very fine or synthetics 5 The needle thread is not threaded properly 6 The needle is defective rusted burr on needle eye or tip 7 The embroidery hoop is not set properly 8 The fabric is not stretched tightly enough on the embroidery hoop 9 A purple needle is not being used for sewing thick fabrics denims and across the hem 1 The needle tension is t...

Страница 166: ...caught or trapped when sewing embroidery 9 The embroidery foot is trapped by a jump thread 10 The embroidery foot stumbles on a mound of embroidery threads 1 The stitch length is not suitable for the fabric being sewn 2 The feed balancing dial is not set properly 3 Interfacing is not being used with stretch fabric 1 The electronic control circuit is not working correctly 2 The key position is out ...

Страница 167: ...ay from you or toward you to move the needle up a little The automatic needle threader will return to the up position automatically If the automatic needle threader still does not return to the up position follow the procedure below z Turn the power switch off Open the face plate x Lift the shaft plate with your finger as far as it goes z x c c Close the face plate Turn the power switch on ...

Страница 168: ...1 42 43 44 45 46 47 48 49 50 51 52 53 54 55 56 57 01 01 02 03 04 05 06 07 08 09 10 11 12 13 14 01 02 03 04 05 06 07 08 09 10 11 12 15 16 17 18 19 20 2122 23 24 25 26 27 28 29 30 31 02 03 04 05 06 07 08 09 10 11 12 13 14 15 16 17 18 19 20 21 22 23 24 25 26 27 28 21 22 23 24 25 26 27 57 58 59 60 61 62 63 64 65 66 67 68 69 70 71 72 73 74 75 76 77 78 79 80 81 82 83 84 85 29 30 31 32 33 34 35 36 37 38 ...

Страница 169: ...33 134 135 136 137 138 139 140 24 25 26 27 28 29 30 01 02 03 04 05 06 07 08 09 10 11 12 13 14 15 16 17 18 19 20 21 22 23 54 55 56 57 31 32 33 34 35 36 37 38 39 40 41 42 43 44 45 46 47 48 49 50 51 52 53 01 02 03 04 05 06 07 08 09 10 11 12 13 14 15 16 17 18 19 20 21 22 01 02 03 04 05 06 07 08 09 10 11 12 13 14 15 16 17 18 19 20 21 22 27 55 56 9 30 31 7 28 6 27 57 58 29 6 01 02 03 04 05 06 07 08 09 1...

Страница 170: ...165 STITCH CHART Ordinary Sewing Block Script Symbol Broadway Block 9 mm ...

Страница 171: ...166 DESIGN CHART Embroidery World of Embroidery Designs SQ14 SQ23 GR Pattern images are not to scale ...

Страница 172: ...ry Designs Sublime Stitching by Jenny Hart Designers Designs Leah Day Lonni Rossi Stitchique by Tira Schulteis Noriko Nozawa Pattern images are not to scale The gaps in the outline and the white spaces that appear between the color patterns on Noriko Nozawa designs are part of the design ...

Страница 173: ...168 DESIGN CHART Embroidery Redwork Designs by Y GANAHA Sashiko Designs Home Decor Designs Everyday Holiday Designs Pattern images are not to scale GR SQ14 FA10 GR SQ14 SQ23 SQ14 FA10 SQ14 FA10 SQ23 ...

Страница 174: ...169 SQ23 SQ14 SQ14 SQ14 SQ23 FA10 FA10 DESIGN CHART Embroidery Abstract Designs Monochrome Designs Border Designs Pattern images are not to scale Everyday Holiday Designs ...

Страница 175: ...170 DESIGN CHART Embroidery Quilting Designs Cross Stitch Alphabet Designs Border Designs Pattern images are not to scale SQ14 SQ23 FA10 FA10 ...

Страница 176: ...171 SQ14 FA10 SQ23 GR SQ14 FA10 FA10 SQ14 DESIGN CHART Embroidery Favorite Designs Lace Designs Pattern images are not to scale Cross Stitch Designs ...

Страница 177: ...172 DESIGN CHART Embroidery Fringe Designs Calibration Pattern Pattern images are not to scale FA10 SQ23 SQ14 ...

Страница 178: ...173 DESIGN CHART Embroidery Gothic Script Cheltenham Bauhaus Galant Typist ...

Страница 179: ...174 DESIGN CHART Embroidery Brush First Grade 2 letters 3 letters Border Normal Sew Hollowblock Jupiter ...

Страница 180: ...175 DESIGN CHART Embroidery Micro Gothic ...

Страница 181: ...ing Speed 9 94 98 152 Corded Buttonhole 53 Correcting Deformed Stitch Patterns 103 Created Stitches CS 59 62 99 Cut at color change end 153 Cutting command 123 153 Cutting threads 31 D Darning 54 Decorative satin stitches 61 Decorative Stitches 56 59 Detaching the embroidery unit 106 Direct PC Link 157 Drawing up the Bobbin Thread 17 Drop feed 28 97 Dual feed device 2 3 21 33 89 Attaching the dual...

Страница 182: ...dle stop position 87 97 Needles 18 O On screen Help 25 One stitch off stop 90 152 Opening a Pattern Combination 72 Optic Magnifier 4 24 Ordinary Sewing Setting Mode 97 99 Overcasting Stitches 35 75 Overedge 35 75 P Patchwork 60 88 Pivoting at applique corners 87 Programming a Pattern Combination 64 Bridge stitches 64 Mirror image of patterns 64 Q Quiet Mode 94 Quilting 60 89 91 Clasp stitches 89 F...

Страница 183: ...n startover 66 STITCH CHART 163 175 Embroidery 166 175 Ordinary Sewing 163 165 Straight stitches 30 32 T Tacking 86 Thread Cut after Auto Lock 99 Thread Cutter Switch 4 5 6 Adjusting the lateral position 6 Adjusting the longitudinal position 6 Placing the thread cutter switch to the left 5 Thread cutting Ordinary Sewing Mode 31 Thread cutting Embroidery Mode 153 Cut at color change end 153 Cutting...

Страница 184: ...862 801 005 EN ...

Отзывы: