background image

PR-655/670 User Manual


48


D

EFINING 

P

ASS 

/


F

AIL 

R

EGIONS


R

ECTANGLES 

(

OR 

S

QUARES

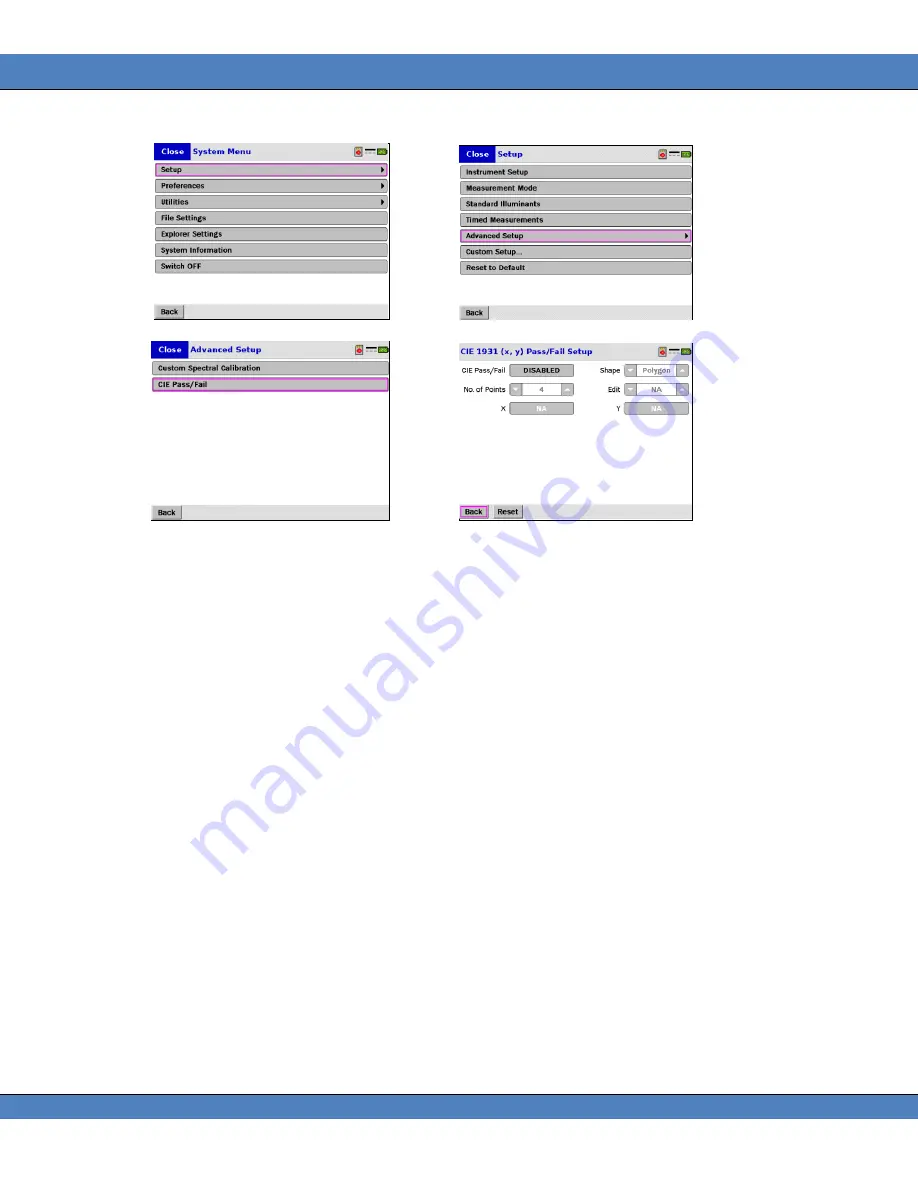
To define a Rectangle or square, two sets of values are entered.  The first set is the CIE 1931 x, y coordinate of 
the upper left hand corner referred to in the Pass / Fail menu as the rectangles are oriented so that the sides are 
parallel to boundaries (axes) of the CIE diagram. 

1.


Touch the field adjacent to 

CIE Pass / Fail 

so that it reads 

Enabled.


2.


Touch the 

▼▲

 icons in the 

Shape 

field until 

Rectangle 

appears. 

3.


Define the Upper Left Corner by: 

a.


Touching the 

▼▲

 icons in the 

Edit 

field until 

Corner

 appears. 

b.


Touch the gray field next to 

Left 

to display the data entry field for the 

Upper


Left


CIE 1931 x


coordinate. 

c.


Enter the value (including the decimal point) then touch 

Back.  

This value is the 

absolute 

position

 of the x coordinate in the CIE 1931 diagram.


d.


Touch the gray field next to 

Top 

to display the data entry field for the 

Upper


Left CIE 1931 y


coordinate. 

e.


Enter the value (including the decimal point) then touch 

Back.  

This value is the 

absolute 

position

 of the y coordinate in the CIE 1931 diagram. 

4.


Define the 

Size 

by: 

a.


Touching the 

▼▲

 icons in the 

Edit 

field until 

Size

 appears. 

b.


Touch the gray field next to 

Width 

to display the data entry field for the 

Lower Right


CIE 1931 x


coordinate. 

Содержание PHOTO RESEARCH SpectraScan PR-655

Страница 1: ...PR 655 670 SpectraScan User Manual PHOTO RESEARCH 7279 William Barry Blvd North Syracuse NY 13212 Phone 315 701 0678 FAX 315 701 0679 Email sales pr photoresearch com URL www photoresearch com...

Страница 2: ...This page intentionally left blank...

Страница 3: ...nt contains proprietary information that is protected by copyright All rights are reserved worldwide No part of this document may be reproduced photographically electronically or by any other means wi...

Страница 4: ...xcept legal holidays to aid in technical support Call 315 701 0678 FAX 315 701 0679 or e mail for technical support support pr photoresearch com for instrument repair or calibration service pr photore...

Страница 5: ...System Status Icons 5 Command Bar 6 Back Button 6 Making Measurements 6 Viewing Measurements 6 I O ports 7 1 Remote Head Port 7 2 External Trigger Connector 8 3 Power Connector 10 1 Mini USB 1 1 Conne...

Страница 6: ...ies 19 Neutral Density ND Filters 19 Variable Focus Lenses 20 Fixed Focus Lenses 21 Setup 22 Introduction 22 Before you Begin Using the Instrument 22 Calibrating the Touch Screen Display 22 Setting In...

Страница 7: ...easurement File 37 Renaming a Measurement File 37 Auto Save 38 Auto Save on Shutdown 38 Explorer Settings 39 Accessing the Explorer Settings Screen 39 Current View 39 Recalling measurements stored on...

Страница 8: ...USB 86 Installing the USB Driver Windows XP only 86 USB Hub Type 89 Determining USB Hub Power on Windows XP 89 Setting USB Hub Type 91 Bluetooth optional 92 Installing the Photo Research supplied Blue...

Страница 9: ...6 Remote Control Error Codes 133 Remote Control Measurement Errors 133 Remote Control Parsing Errors 133 Routine Maintenance 135 Cleaning Lenses Optical Accessories 135 Cleaning Exterior Surfaces 135...

Страница 10: ...L TRIGGER PIN OUT 8 FIGURE 10 SAMPLE EXTERNAL TRIGGER INPUT CIRCUIT DRIVERS 9 FIGURE 11 SAMPLE EXTERNAL TRIGGER OUTPUT CIRCUIT 10 FIGURE 12 PR 655 670 POWER CONNECTOR 10 FIGURE 13 MINI B USB CONNECTOR...

Страница 11: ...E 34 SYNC PERIOD DATA ENTRY SCREEN 34 FIGURE 35 SECURE DIGITAL CARD FILE SETTINGS 35 FIGURE 36 MEASUREMENT FILE DOES NOT EXIST ON SD CARD 36 FIGURE 37 SD CARD NEW MEASUREMENT FILE NAME ENTRY 36 FIGURE...

Страница 12: ...ECT SCREEN 62 FIGURE 57 SELECT RGB ILLUMINANT SCREEN 64 FIGURE 58 RGB DISPLAY CAL SETUP SCREEN 64 FIGURE 59 Y XY DATA ENTRY SCREEN 65 FIGURE 60 RGB DATA ENTRY 66 FIGURE 61 RGB MEASUREMENT SCREEN 67 FI...

Страница 13: ...STALL 87 FIGURE 83 PR 655 670 USB DRIVER LOCATION SELECTION 87 FIGURE 84 WINDOWS XP COMPATIBILITY WARNING FOR PR 655 670 USB DRIVER 88 FIGURE 85 PR 655 670 USB DRIVER INSTALL COMPLETE 88 FIGURE 86 SYS...

Страница 14: ...FIGURE 106 BLUETOOTH USB CONNECTIVITY MENU 100 FIGURE 107 BLUETOOTH USB CONNECTIVITY MENU 101 FIGURE 108 BLUETOOTH DISCOVERABLE DURATION INPUT 102 FIGURE 109 BLUETOOTH CONNECTIVITY SETUP WINDOW 103 FI...

Страница 15: ...R TERMINAL 111 FIGURE 121 MY COMPUTER PROPERTIES RIGHT CLICK DROP DOWN OPTION 111 FIGURE 122 SYSTEM PROPERTIES MENU 112 FIGURE 123 WINDOWS XP DEVICE MANAGER 112 FIGURE 124 WINDOWS XP COM PROPERTIES WI...

Страница 16: ...to the PR 655 with four automated apertures two measurement sensitivity modes Standard and Extended and four measurement speed modes Normal Fast 2X Fast and 4X Fast STANDARD EQUIPMENT The standard PR...

Страница 17: ...se view finder 8 3 5 LCD Data Navigation 3 View Finder View target measuring aperture 9 SD Slot Data storage 4 Measure Switch Execute measurement 10 I O Connector Panel Instrument connection panel 5 P...

Страница 18: ...ntrolled and viewed directly on the vivid color display SYSTEM INFORMATION The system status screen is displayed when the unit is powered on and shows system information such as serial number calibrat...

Страница 19: ...imilar to that of a tree structure In a tree structure there are roots and from the roots exist branches sub menus indicated by the following icon which have more branches or end nodes leafs Traversin...

Страница 20: ...tion Steps Preferences Date Time Root From System Menu navigate to and select Preferences Branch From Preferences navigate to and select Date Time End Node Leaf To traverse back to the System Menu sim...

Страница 21: ...Below are all system status icons and their corresponding indication Battery Charge ICON DESCRIPTION Green w 2 bars 100 Charge Green w 1 bars 66 Charge Yellow w bar 33 Charge Orange w bar blinking Low...

Страница 22: ...Navigate Back to the previous menu screen 2 Abort a measurement 3 Save measurements to the SD card 4 Navigate through measurement results screen 5 Display Line or Hist histogram plot when in the Spect...

Страница 23: ...or 2 External Trigger Connector 3 Power Connector 4 USB Connector 5 RS 232 Connector optional 1 REMOTE HEAD PORT The PR 655 670 is equipped with an 8 pin mini din connector for connection to auxiliary...

Страница 24: ...rce capable of being externally triggered such as a xenon strobe lamp FIGURE 9 EXTERNAL TRIGGER PIN OUT The pin designations for the connector are PIN NAME FUNCTION 1 VDD 5V 25mA Max 2 GND Ground 3 IN...

Страница 25: ...PR 655 670 User Manual 9 FIGURE 10 SAMPLE EXTERNAL TRIGGER INPUT CIRCUIT DRIVERS...

Страница 26: ...e unit can also be powered using the standard Li Ion battery pack FIGURE 12 PR 655 670 POWER CONNECTOR 1 MINI USB 1 1 CONNECTOR The PR 655 670 is equipped with a Mini B USB connector providing remote...

Страница 27: ...ustom RJ 12 cable lengths BATTERY The PR 655 670 is powered by a high capacity rechargeable Lithium Ion Li Ion battery pack The battery compartment of the instrument is located at the front of the ins...

Страница 28: ...ery door FIGURE 15 PR 655 670 BATTERY COMPARTMENT CLOSE UP TABLE 5 PR 655 670 BATTERY COMPARTMENT DESCRIPTION Description 1 Lithium Ion Li Ion Battery Pack 2 Battery Eject Button 3 Battery Compartment...

Страница 29: ...place 4 Close the battery door Make sure the Battery Door Latch has engaged FIGURE 16 INSERTING BATTERY INTO THE PR 655 670 REMOVING THE BATTERY 1 Facing the front of the instrument slide the battery...

Страница 30: ...ble c There are three status LED s on the charger MED HI and MAX Depending on the charge state of the battery the LED s will blink in succession For example for a fully discharged battery the MED HI t...

Страница 31: ...inant wavelength etc For applications other than radiance or luminance the PR 655 670 can be supplied with optical accessories such as a cosine receptor for irradiance illuminance LR 127 LED Analyzer...

Страница 32: ...ns counter clock wise until the lens separates from the lens mount INSTALLING THE OBJECTIVE LENS 1 Grasping the rear rubber ring see 2 FIGURE 18 turn the lens clock wise until the lens seats on the le...

Страница 33: ...mance and compatibility SpectraWin 2 software should be run under the Microsoft Windows XP system All software is serialized to an instrument One licensed copy is required per instrument SPECTRAWIN 2...

Страница 34: ...ium wavelength calibration source WC 600 or equivalent and variable spectral radiance luminance standard LRS 455 or equivalent 5 Unit License Same capabilities as single unit license but for 5 PR 655...

Страница 35: ...able ND filters and their respective characteristics Neutral Density Filter Signal Attenuation Transmission ND 0 3 2 50 ND 0 7 5 20 ND 1 10 10 ND 2 100 1 ND 3 1000 0 1 TABLE 6 NEUTRAL DENSITY FILTERS...

Страница 36: ...670 Luminance Adapter For contact measurements of radiance and luminance Adapter covers 0 52 13 2 mm diameter and replaces the MS 75 during use FP 655 FP 670 Flexible Probe A 2 foot 60 9 cm long probe...

Страница 37: ...rements Threads into the MS 75 lens during use See the Specifications section for field coverage and working distance FIXED FOCUS LENSES MS 2 5X MicroSpectar Lens A 2 5X magnification fixed focus lens...

Страница 38: ...ginning operations we suggest a couple of steps to help maximize the functionality and longevity of your new instrument Namely calibrating the touch screen display and charging the battery CALIBRATING...

Страница 39: ...ch Screen The following screen appears FIGURE 21 CALIBRATE TOUCH SCREEN 4 Using a pointed object begin the calibration by touch center of the X in the upper left hand corner of the screen 5 You will b...

Страница 40: ...aving Brightness and Contrast Connectivity and optional Bluetooth Date and Time Units and 650 Remote Mode PR 655 only 1 To access the Preferences menu navigate to the System Menu by either touching Me...

Страница 41: ...ed in the window adjacent to Power Saving In the preceding example Power Saving is enabled Touch this field to Disable Power Saving It will then read Disabled 3 To instruct the instrument to shut down...

Страница 42: ...and Contrast 2 To adjust the brightness of the PR 655 PR 670 display touch the or icons on either side of the Brightness field The brightness level is adjustable from 0 to 100 3 To adjust the screen...

Страница 43: ...e and disable these features FIGURE 26 SOUNDS AND ALERTS SCREEN 1 From the Preferences menu touch Sounds Alerts 2 The field to the right of the field descriptor displays the status of that feature To...

Страница 44: ...ument battery and AC Adapter the date and time will be maintained for at least 1 year To reset the date and time FIGURE 27 DATE AND TIME SCREEN 1 Touch Date and Time from the Preferences menu 2 Touch...

Страница 45: ...PR 670 only during the upcoming test to insure that proper calibration factors are applied following a measurement FIGURE 28 MAIN SCREEN FIGURE 29 SYSTEM MENU FIGURE 30 PR 655 INSTRUMENT SETUP FIGURE...

Страница 46: ...DD ON ACCESSORY An Add on Accessory is one that is used in conjunction with a Primary Accessory usually an objective lens Up to 3 Add on Accessories may be used during a measurement Examples of Add on...

Страница 47: ...ity make sure the field next to Adaptive reads Enabled SETTING A FIXED EXPOSURE TIME It may be desirable to set a fixed exposure time for an application For example when measuring a display for lumina...

Страница 48: ...only 4 Touch Back when done SETTING THE INSTRUMENT SENSITIVITY RANGE PR 670 ONLY The PR 670 has two Adaptive sensitivity ranges Standard and Extended For Standard sensitivity the exposure time range i...

Страница 49: ...st the exposure time to the frequency of the source This can significantly improve the accuracy and precision of the measurement of repetitive intense sources When measuring these types of sources the...

Страница 50: ...and a second measurement of the detector dark current Dark By enabling the Smart Dark feature the PR 670 will attempt to use the same dark current values for more than one measurement thus reducing t...

Страница 51: ...ts exists in RAM ACCESSING THE FILE SETTING SCREEN 1 Touch Menu 2 Touch File Settings 3 Touch Back to exit to the Main Manu after all options have been selected FIGURE 35 SECURE DIGITAL CARD FILE SETT...

Страница 52: ...this screen will appear after every successful measurement unless Auto Save is disabled CREATING A NEW MEASUREMENT FILE Multiple measurements files with up to 200 measurements per file can be saved o...

Страница 53: ...t as long as Auto Save is enabled all measurements are saved to the selected file DELETING A MEASUREMENT FILE To delete a measurement file 1 Insert the SD card with the measurement file to be deleted...

Страница 54: ...DOWN When Save unsaved measurements to SD card on shutdown is enabled the instrument will prompt the user to save all measurements in RAM before shutting down The user will have 5 minutes 300 sec to s...

Страница 55: ...1 EXPLORER SETTINGS CURRENT VIEW The Current View option selects the memory location Internal RAM or External SD Touch the or icon to toggle between Internal RAM and External SD Card SD FILE If Extern...

Страница 56: ...ing the instrument explorer see Explorer Settings section for more information 2 Using SpectraWin 2 0 optional Import feature refer to SpectraWin 2 manual for more information 3 Using the in built Rem...

Страница 57: ...restore all calibration factors and standard illuminant files to the factory default settings Requirements 1 Secure Digital SD card 2 SD card reader 3 Zip file with calibration illuminant information...

Страница 58: ...ruct the instrument to update Note Calibration and Illuminant factors DO NOT have to be reloaded after a firmware update REQUIREMENTS SECURE DIGITAL SD CARD 1 SD card reader 2 Latest firmware PR6XXHW...

Страница 59: ...45 PR 655 670 FIRMWARE UPDATE PROMPT 9 If Yes was selected the firmware is automatically updated 10 At the screen that appears following the completion of the update press OK to restart the instrument...

Страница 60: ...blish a set of unique spectral calibration factors for one instrument based on the measurement of a sample from a second instrument Then when both instruments analyze the sample in question they will...

Страница 61: ...txt extension first during the spectral calibration sequence 2 Measure the sample with the Source instrument 3 Save the measurement to the file from Step 1 Make sure that this measurement is the only...

Страница 62: ...e the same starting and ending wavelength points and the same wavelength data increment B The file must have a TXT file extension C The file must have the following file format Line 1 Title Alpha Nume...

Страница 63: ...ion is set to Disabled CIE PASS FAIL OPTIONAL The CIE Pass Fail option provides a convenient means of using the PR 655 or PR 670 as a GO NO GO CIE colorimeter Using CIE Pass Fail you can create an acc...

Страница 64: ...in the Edit field until Corner appears b Touch the gray field next to Left to display the data entry field for the Upper Left CIE 1931 x coordinate c Enter the value including the decimal point then...

Страница 65: ...point then touch Back This value is the distance from the Top Left y coordinate in Step 3e Note To define a square the Width and Height values must be identical For a horizontal rectangle the Width v...

Страница 66: ...y field next to Left to display the data entry field for the Upper Left CIE 1931 x coordinate c Enter the value including the decimal point then touch Back This value is the absolute position of the x...

Страница 67: ...gram screen Pass or Fail appears in the lower right hand corner of the screen POLYGONS A polygon is generally described as a shape with three or more straight lined sides The Pass Fail option provides...

Страница 68: ...31 x value for Point 1 including the decimal point and then touch Back 6 Touch the gray field next to Y1 to access the data entry screen Enter the CIE 1931 y value for Point 1 including the decimal po...

Страница 69: ...ASURED BY THE PR 655 AND PR 670 For the PR 655 and PR 670 the measurement wavelength range is 380 nanometers nm violet to 780 nm deep red the visible spectrum of the electromagnetic spectrum see Figur...

Страница 70: ...6 5 nm and 728 13 nm Next the data is corrected by spectral factors These factors insure that the spectral power distribution SPD of the target is and calculated values such as CIE Chromaticity are ac...

Страница 71: ...omponent Y also serves as the photometric value when using the standard MS 75 lens Y gives candelas meter the SI unit for luminance To find footlamberts English unit of luminance multiply cd m by 0 29...

Страница 72: ...the three Tristimulus values have been derived useful colorimetric values such as CIE 1931 x y and 1976 u v can be calculated by the following formulae CIE 1931 x y Z Y X X x Z Y X Y y CIE 1976 u v Z...

Страница 73: ...light used to illuminate the object is mathematically removed from the measurement The resultant spectra are then weighted by the white reference e g CIE D 65 as if the sample were being illuminated...

Страница 74: ...l standard illuminants appears An illuminant may also be a previously measured and stored file for example a florescent lamp If it is desirable to use a previous measurement then select internal ram o...

Страница 75: ...make a Reference or Source measurement In most cases a Source or Reference measurement is a Luminance measurement Therefore the instrument should be set up to perform this type of measurement In the c...

Страница 76: ...eviously stored measurement touch Prev or Next until the measurement of choice appears then touch Recall 7 Once the Illuminant and Source and optional Reference have been selected and or measured the...

Страница 77: ...litude and direction of the three RGB primaries from the target settings Once the RGB levels of the display are adjusted to the target values set by the RGB algorithm the white point is properly adjus...

Страница 78: ...display primaries Phosphor is used as a historical reference to CRT s The data for several types of phosphors are pre stored in the PR 655 PR 670 They are CIE NTSC EBU PAL SECAM SMPTE and HDTV The us...

Страница 79: ...into these fields SETTING THE WHITE POINT The White Point White Pt is the background or ambient illumination under which the display is viewed and has an effect on the perceived color of the display...

Страница 80: ...ions Select Internal RAM or External SD Card then touch Prev or Next to scroll through selections The title of the currently displayed data set appears at the top of the screen in this example CIE Ill...

Страница 81: ...670 measures the spectral content of the sample it is possible for the instrument to calibrate the display white point based on user entered values for luminance and CIE chromaticity The user can sel...

Страница 82: ...brings up a data entry screen like the following example for Y FIGURE 60 RGB DATA ENTRY Note If xy is selected data entry for Y is unavailable 3 Enter the value for Y and then touch Back 4 Repeat for...

Страница 83: ...of the calibration STANDARD ILLUMINANTS A Standard Illuminant is a spectral file of a white or near white stimulus that is used for L a b L v v and RGB These illuminants were obtained from the CIE Co...

Страница 84: ...a given direction and is calculated from Radiance watts steradian meter The SI equation for luminance is cd m lumens steradian meter The English equivalent is footlamberts 1 lumens steradian foot The...

Страница 85: ...he light being reflected from the surface is luminance FIGURE 63 ILLUMINANCE LUMINANCE CONCEPT HOW TO MAKE A LUMINANCE RADIANCE MEASUREMENT If using an objective lens the first step is to align and fo...

Страница 86: ...ttom of the aperture are in focus 3 Focus on the target If using the MS 75 lens rotate the lens focusing ring until the target is in focus If using a fixed focus lens move either the instrument or the...

Страница 87: ...70 FIGURE 68 FP 655 FP 670 The FP 655 FP 670 Flexible Probe enables the PR 655 to measure surface luminance and radiance of backlit sources e g cathode ray tubes fluorescent lamps and self luminous di...

Страница 88: ...display 1 Remove the MS 75 Objective lens or other accessory by turning it counter clock wise 2 Install the FP 655 FP 670 by screwing in clock wise Do not over tighten 3 From the Instrument Setup men...

Страница 89: ...nstall the Luminance Adaptor by screwing in clock wise Do not over tighten 3 From the Instrument Setup menu touch the icons adjacent to Primary Accessory until LA 655 or LA 670 appears 4 Make any othe...

Страница 90: ...d I cd EQUATION 6 CANDELAS FROM ILLUMINANCE HOW TO MAKE AN ILLUMINANCE IRRADIANCE MEASUREMENT Illuminance measurements are made one of two ways with the PR 655 and PR 670 The first method involves the...

Страница 91: ...ATING SPHERE The ICC 655 ICC 670 is a 3 76 2 mm integrating sphere with a 1 inch 25 4 mm measuring port It is used to make illuminance measurements typically of point sources such as lamps MEASURING P...

Страница 92: ...aque Any surface damage or discoloration will result in erroneous readings Always keep the plaque cover closed when not in use Refer to the Cleaning and Handling Instructions for the RS 3 and SRS 3 at...

Страница 93: ...atched restore its original optical condition by sanding the surface under a stream of running water using a 220 240 grit waterproof emery cloth Sand until the surface is totally hydrophobic water bea...

Страница 94: ...D Receptor enables the PR 655 670 to measure the axial spectral radiant intensity watts steradian and luminous intensity millicandelas and color of light emitting diodes LED s The LR 55 consists of a...

Страница 95: ...e threaded holes in the adapter with the through holes in the tube 4 Replace and tighten the screws DO NOT OVER TIGHTEN THE SCREWS MAKING MEASUREMENTS 1 Remove the MS 75 lens or other accessory by tur...

Страница 96: ...the adapter 2 Insert the LED adapter into the main section of the LR 127 LED Side see Figure 75 then tighten the thumb screw to secure it 3 Gently insert the T1 75 5 mm LED into the acceptance port of...

Страница 97: ...0 emittance pattern of the device under test For the PR 655 and PR 670 the IS 655 or IS 670 integrating sphere is available for measuring the luminous and radiant flux of LEDs OVERVIEW Figure 76 IS 65...

Страница 98: ...nting Tube Push the LED in as far as possible Take care to note the polarization of the leads For simplicity the POSITIVE LEAD should be inserted into the socket corresponding to the RED Banana Jack l...

Страница 99: ...eight Adjustment Screw 6 Tighten the Set Screw to hold the Mounting Tube in place DO NOT OVER TIGHTEN FIGURE 78 HEIGHT ADJUSTMENT MAKING A MEASUREMENT 1 Touch MENU then Setup then Instrument Setup 2 T...

Страница 100: ...at pre defined intervals for a certain period of time You may also want to make continuous repetitive measurements or a fixed number of measurements This can be accomplished using the Timed Measuremen...

Страница 101: ...d The following data entry screen appears FIGURE 80 MEASUREMENT INTERVAL ENTRY FIELD 4 Enter the measurement interval range is 1 to 86400 seconds 24 hours then press Back 5 Press the Measurement Butto...

Страница 102: ...The USB port can only be used to recharge the battery The PR 655 670 cannot be powered solely off the USB hub INSTALLING THE USB DRIVER WINDOWS XP ONLY Prior to using Remote Control commands or Spectr...

Страница 103: ...ck Next FIGURE 82 PR 655 670 USB DRIVER INSTALL 6 Insert the CD supplied with PR 655 670 into an appropriate CD drive 7 Choose Search for the best driver in these locations then browse to CD Drive Wit...

Страница 104: ...PR 655 670 User Manual 88 9 Click on Continue Anyway FIGURE 84 WINDOWS XP COMPATIBILITY WARNING FOR PR 655 670 USB DRIVER 10 Click Finish FIGURE 85 PR 655 670 USB DRIVER INSTALL COMPLETE...

Страница 105: ...If there is insufficient current available for the USB device PR 655 670 Windows will issue a warning and disable the device DETERMINING USB HUB POWER ON WINDOWS XP 1 Click on 2 Right click on My Com...

Страница 106: ...PR 655 670 User Manual 90 FIGURE 87 USB POWER SCREEN Total power available Total power required...

Страница 107: ...to USB Hub Type until Low Power appears When the PR 655 670 is powered on the instrument will run partially on the battery and partially on the USB power This will help preserve the battery charge as...

Страница 108: ...er enables Bluetooth connectivity on the PC host side The adapter allows the Host to communicate with the PR 655 670 wirelessly Before Bluetooth communication can commence between the Host PC and the...

Страница 109: ...PR 655 670 User Manual 93 6 Click on Next FIGURE 90 PR 6XX INSTALLER 7 Choose I Agree and click Next FIGURE 91 PR 6XX INSTALLER LICENSE AGREEMENT SCREEN...

Страница 110: ...README 9 Click Next The following software Destination location screen appears FIGURE 93 PR 6XX INSTALLER INSTALL DIRECTORY SELECTION 10 Click Next then go to Step 11 to install the driver to the def...

Страница 111: ...TORY SELECTION 11 Navigate to and select the drive and folder of choice and then click OK 12 From the screen that appears select the Windows XP Bluetooth Drive A demo version of SpectraWin2 can also b...

Страница 112: ...Click Next to start the installation FIGURE 96 PR 6XX INSTALLER START INSTALLATION 14 The WIDCOMM Bluetooth software installation will start FIGURE 97 PR 6XX UTILITIES INSTALLATION FINISH 15 Click on...

Страница 113: ...During the Setup the driver will prompt for the USB dongle DO NOT INSERT DONGLE UNTIL PROMPTED TO DO SO 19 Click Finish FIGURE 99 WIDCOMM DRIVER INSTALLATION COMPLETED 20 The My Bluetooth Places icon...

Страница 114: ...tooth Configuration Wizard will appear FIGURE 101 INITIAL BLUETOOTH CONFIGURATION WIZARD 22 Click Next 23 Click Next allowing the default settings FIGURE 102 DEVICE NAME AND TYPE SELECTION 24 Make sur...

Страница 115: ...PR 655 670 User Manual 99 FIGURE 103 BLUETOOTH SERVICE SELECTION 25 Click Skip FIGURE 104 BLUETOOTH FIND DEVICE PROMPT 26 Click Finish to complete the Initial Bluetooth Configuration Wizard setup...

Страница 116: ...ications is enabled via the connectivity preferences menu 1 Navigate to Menu Preferences Connectivity FIGURE 106 BLUETOOTH USB CONNECTIVITY MENU 2 The PR 655 670 displays the current Bluetooth status...

Страница 117: ...on made with a remote host TABLE 7 PR 655 670 BLUETOOTH MODES BLUETOOTH DISCOVERY MODE Once Bluetooth has been enabled refer to Enable Disable Bluetooth section the PR 655 670 must be made discoverabl...

Страница 118: ...a remote host only once Once pairing has occurred both the remote host and the PR 655 670 will remember their pairing information This allows the remote host to automatically when Bluetooth enabled on...

Страница 119: ...al 103 FIGURE 109 BLUETOOTH CONNECTIVITY SETUP WINDOW Host 1 Double click on the icon located on the desktop 2 Click on Add a Bluetooth Device located in the top right corner of the window FIGURE 110...

Страница 120: ...Bluetooth Setup Wizard will appear FIGURE 111 BLUETOOTH DRIVER SETUP WIZARD 4 Click Next 5 The wizard will attempt to find the PR 655 670 FIGURE 112 REMOTE HOST DEVICE SEARCH WIZARD Make sure that is...

Страница 121: ...NAME AND COM SELECTION SCREEN 9 A default virtual COM port will be assigned by the wizard for this communication link The COM port address can be attained by clicking on Configure This information wi...

Страница 122: ...er of the PR 655 670 Wireless communication link has been established between the PR 655 670 and the Remote Host HyperTerminal or SpectraWin 2 can be launched at this point to communicate with the PR...

Страница 123: ...ng to ATE environments and older generation PC systems The below diagrams depicts the connection between the PR 655 670 and the host computer To establish a connection between the PR 655 670 simply op...

Страница 124: ...hing on Menu then Preferences 2 Touch RS 232 Connectivity 3 The following screen will appear FIGURE 117 RS 232 CONNECTIVITY BAUD RATE SETUP 4 Touch the next to the RS 232 Baud Rate text field to selec...

Страница 125: ...0 Communication protocol is identical to RS 232 communications The USB driver emulates an RS 232 interface including opening a COM port setting a baud rate parity stop bits and flow control This makes...

Страница 126: ...ed period of time See Page 28 of this manual for Power Saving options Step 3 Connect the 655 670 to the PC via the USB interface cable FIGURE 118 PR 655 670 USB CONNECTOR Step 4 Click on on your compu...

Страница 127: ...r is listed in the drop down window that appears FIGURE 120 COM PORT SELECTION IN HYPER TERMINAL If in doubt about which COM port is correct the proper port can be identified in the Device Manager sys...

Страница 128: ...670 User Manual 112 2 Click on Properties 3 Click on Hardware FIGURE 122 SYSTEM PROPERTIES MENU 4 Click on Device Manager 5 Note the COM port assigned to the PR 655 670 FIGURE 123 WINDOWS XP DEVICE M...

Страница 129: ...emote Control Commands Step 12 Type E then press Enter to put the PR 655 670 in Echo or Full Duplex mode This enables display of characters sent to the instrument on the HyperTerminal window ENTERING...

Страница 130: ...Preferences 2 Touch RS 232 Connectivity 3 The following screen will appear FIGURE 125 PR 650 REMOTE MODE COMPATIBILITY OPTION 4 The button next to PR 650 Remote Mode Compatibility displays the status...

Страница 131: ...f light source I Requests instrument status or error report from PR 655 670 L Defines measurement title Maximum of 20 characters M Measure command for the PR 655 670 Returned datum depends on the acco...

Страница 132: ...ff Hertz Period nnnnn milliseconds If all OK else NNNN CR LF NNNN Error code I Purpose Return instrument status error report Syntax I CR Response 0000 CR LF If all OK else NNNN CR LF NNNN Error code...

Страница 133: ...be that stored in the internal memory RAM of the instrument instead of the SD card data in response code refers to the specific measurement data set returned based on the data code sent to the instrum...

Страница 134: ...sory For example a neutral density filter Add on Accessory used with the MS 75 Primary Accessory Up to 3 Add on accessories can be specified for a measurement Syntax SAn CR Where n Accessory code Resp...

Страница 135: ...an be found by running report 116 command D116 See the Data Codes section for specific details SD Select Dark Current Mode PR 670 only Two dark current modes are available Standard and Smart Dark In S...

Страница 136: ...onse 0000 CR LF If all OK else NNNN CR LF NNNN Error code Note Standard and Extended modes apply only to PR 670 PR 655 exposure range is 3 to 6 000 ms SF Aperture Select PR 670 only Select the apertur...

Страница 137: ...requency in Hertz of the source being measured The range is 20 to 400 Hz This command works in unison with the SYNC Mode setting See the S specifier for complete details on setting the SYNC Mode Synta...

Страница 138: ...CR Where n CIE Observer 2 2 10 10 Response 0000 CR LF If all OK else NNNN CR LF NNNN Error code SP Primary Accessory A Primary Accessory is one that replaces the standard objective lens typically the...

Страница 139: ...hat it is an even multiple of the source period 1 frequency User Frequency will adjust the exposure time based on a user enter frequency in Hertz as entered using the SK command See the User Sync Freq...

Страница 140: ...or code If qqqqq is all zeros 00000 no error has occurred during the request All other values for qqqqq relate to an error condition Refer to the Remote Mode Error Code section of the manual for a com...

Страница 141: ...us Raw uncorrected Dark Current per pixel 11 status units Scotopic Brightness 12 status units Photometric brightness CIE 1931 x y CIE 1960u v 13 status Gain description exposure time in milliseconds 1...

Страница 142: ...odes using the D command until all required data types have been returned Data Code Description 1 Output Format qqqqq UUUU Y YYYe ee x xxxx y yyyy CRLF where Y Photometric brightness e g Luminance or...

Страница 143: ...exponent i iii integrated radiometric value sum of all spectral data times WL increment p ppp integrated photon radiometric value wl spectral dataCRLF wl spectral dataCRLF wl spectral dataCRLF Output...

Страница 144: ...CRLF lllll CRLF where lllll Raw signal light data variable length from 1 to 5 digits for all detector pixels from 0 to 255 Output Example 00000 3475 3426 3477 3451 3483 3459 9 Output Format qqqqq CRL...

Страница 145: ...Description is a text description of the Gain Used Possibilities are Normal Fast 2X Fast and 4X Fast nnnnnn Last exposure time in milliseconds Output Example 00000 Fast 16500 msec 14 Output Format qq...

Страница 146: ...ccessory ss Accessory name variable length tt Accessory type Possibilities are Primary or Addon pp Photometry Mode Possibilities are Luminance Illuminance Luminous Intensity or Luminous Flux rr Radiom...

Страница 147: ...put Example 00000 201 0 00 380 780 2 256 7 247 401 Output Format qqqqq CRLF where qq Number of stored measurements in RAM Output Example 6 402 Output Format qqqqq dt tm CRLF Directory of stored Measur...

Страница 148: ...DarkMode SyncMode CaptureMode SyncPeriod CRLF Note The exposure time reported in 601 and 602 following reports 0 if the instrument is set in Adaptive Exposure mode To view the exposure time for the l...

Страница 149: ...e not constant REMOTE CONTROL PARSING ERRORS Error Meaning Valid Values 1000 Illegal command 1001 Too many fields in setup command 1002 Invalid primary accessory code 1003 Invalid Addon 1 accessory co...

Страница 150: ...title too long 20 characters 1022 Measurement title field empty after sending L command 1023 Invalid user Sync period 20 to 400 Hz 1024 Invalid R command 1025 Invalid Addon 3 accessory code 1026 Inval...

Страница 151: ...w water to enter the instrument CLEANING EXTERIOR SURFACES If the exterior plastic surfaces such as the display face plate or instrument case becomes dirty or full of fingerprints use a mild dish wash...

Страница 152: ...protective packaging along with a note describing the nature of the malfunction The instrument will be returned by a commercial surface transportation method of Photo Research s choice If Air Freight...

Страница 153: ...array Aperture 1 1 2 optional Wavelength Range 380 to 780 nm Optics Pritchard viewing and measuring system Digital Resolution 16 bits Spectral Resolution 3 12 nm pixel Spectral bandwidth 8 nm 5 nm opt...

Страница 154: ...ight 3 75 lbs 1 7 kg Operating Temperature 34 to 95 F 1 to 35 C PR 670 Parameter Specification Detector 256 detector array Aperture 1 1 2 1 4 1 8 Wavelength Range 380 to 780 nm Optics Pritchard viewin...

Страница 155: ...d color temperature dominant wavelength Measurement Time 6 ms to 30 secs Battery Rechargeable Lithium Ion 12 hours continuous operation Secure Digital SD Card Supports cards up to 1GB Weight 3 75 lbs...

Страница 156: ...mm to 1 27 mm 0 375 mm to 0 635 mm 0 188 mm to 0 318 mm SL 1X 46 mm to 66 mm 0 890 mm to 1 32 mm 0 445 mm to 0 660 mm 0 226 mm to 0 330 mm 0 111 mm to 0 165 mm MS 2 5X 46 mm 0 51 mm 0 225 mm 0 128 mm...

Страница 157: ...to 102 800 13 6 to 411 100 SL 1X 3 4 to 102 800 13 6 to 411 100 MS 2 5X 10 3 to 310 700 41 2 to 1 243 000 MS 5X 13 7 to 310 700 54 800 to 1 243 000 MS 7 5 3 4 to 102 800 13 6 to 411 100 LA 600 3 4 to...

Страница 158: ...cd m 3 20 to 275 000 cd m 12 8 to 1 100 000 cd m MS 2 5X 1 25 to 50 000 cd m 5 00 to 200 000 cd m 20 0 to 800 000 cd m 80 0 to 3 200 000 cd m MS 5X 1 75 to 70 000 cd m 7 00 to 280 000 cd m 28 0 to 1...

Страница 159: ...PR 655 670 User Manual 143 PR 655 PR 670 OUTLINE DRAWINGS...

Страница 160: ...PR 655 670 User Manual 144...

Отзывы: