50
50
50
50
File Management
Since there is no need to specify recording directories for RADAR
24, file management is required only for
managing the importing, exporting, backing up and restoring of files and projects.
Export
There are two ways to initiate a file export from the RADAR
24:
!
Using the
EXPORT MENU
, which is available using both the
Session Controller
and the
KC-24
.
!
Using the
FILE EXPORT
or
CLIP EXPORT
keys on the
Session Controller
.
To export audio in the BWF (Broadcast Wave) or .wav format using the
FILE EXPORT
key:
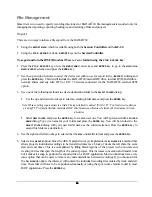
1. Press the
FILE EXPORT
key or use the
MENU/PREV
, arrow keys and
ENTER
key to go to the
MAIN / FILE
MENU / EXPORT
selection and press the
ENTER
key.
2. Use the up and down arrows to select the device you wish to use for export in the
../EXPORT TO
dialog and
press the
ENTER
key. This list will include the RADAR
24 internal IDE drive, internal DVD-RAM drive,
network shares and any Mac HFS or FAT 32 devices connected via the RADAR
24 external SCSI
option.
3. Use one of the following methods to select a destination folder in the
SELECT FOLDER
dialog:
!
Use the up and down arrow keys to select an existing folder name and press the
ENTER
key.
Note: When exporting you are always in a folder. The top level folder is named “!RADAR!”. You’ll never see it unless you
are using FTP to transfer files from the internal IDE drive because you will always be inside of it or inside one of its sub-
directories.
!
Select
NEW FOLDER
and press the
ENTER
key to create a new one. You will be presented with a
FOLDER
NAME
dialog. Type in a name for your folder and press the
ENTER
key. You will be returned to the
SELECT FOLDER
dialog with your new folder name as the current selection. Press the
ENTER
key to
accept this folder as a destination.
4. Use the right and left arrow keys to select either the
WAV
or
BWF
file format and press the
ENTER
key.
5. Select
a
FILL SILENCE
option. Since the AES-31 playlist is not yet implemented,
FILL SILENCE
is a method that
allows projects individual recordings to be transferred intact as a block of tracks that all share the same
start and end times. This is accomplished by filling blank regions of the project with zero data and
creating 24 files that span the length of the current project. This increases conversion and transfer time
but it makes it a snap to position the exported files in a DAW application. Most workstations have a
strip
silence
option that can be used to remove any unwanted silence between recordings. If you choose
NO
for
the
FILL SILENCE
option, the directory will contain the individual recording files ordered by track and start
time. These files will have to be re-positioned manually or using the spot-to-time feature found in most
DAW applications. Press the
ENTER
key.

