


27
INSTALLATION AND ASSEMBLY
aV100 extract air system – Avio N 100
•
Installation and operating instructions
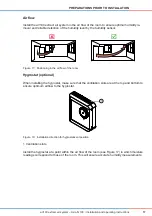
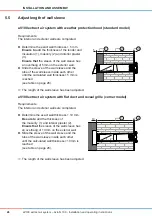
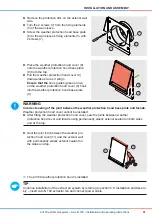
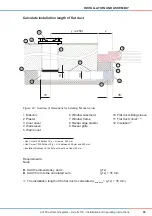
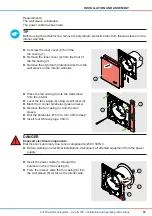
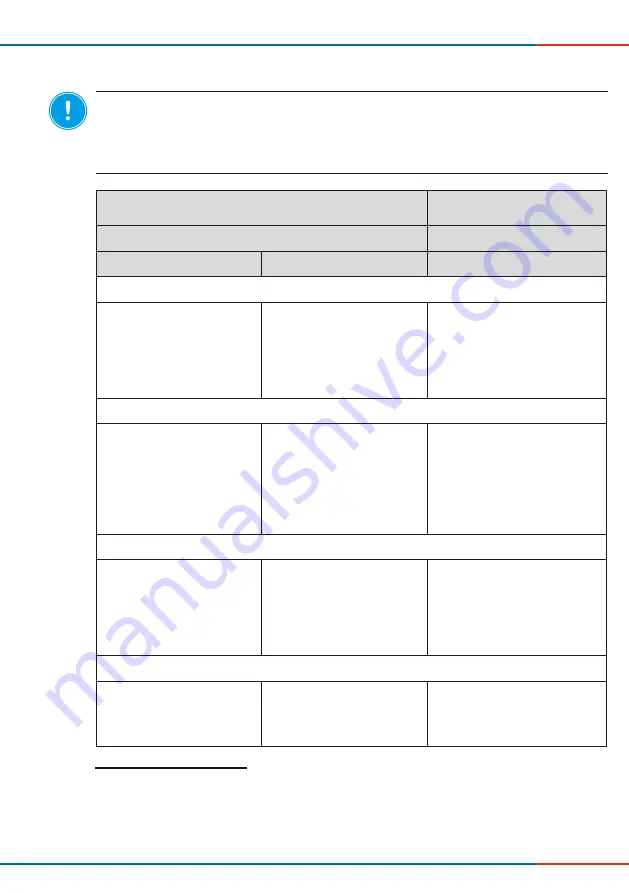
Procedure for adjusting the length of the wall sleeve
NOTE
The length of the wall sleeve is dependent on the exterior outlet.
Correct installation of the weather protection hood/flat duct corner is not possible!
►
Weather protection hood: add 5 mm to the determined wall thickness.
►
Flat duct and reveal grille: add 10 mm to the determined wall thickness.
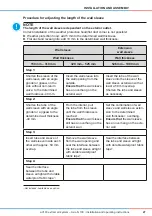
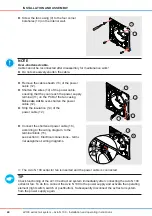
Wall sleeve
Extension
wall sleeve
Wall thickness
Wall thickness
150 mm – 319 mm
320 mm – 525 mm
526 mm – 1000 mm
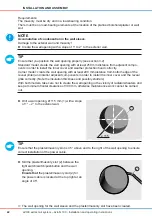
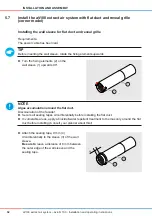
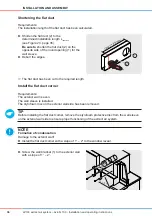
Step 1:
Shorten the sleeve of the
wall sleeve with an angle
grinder or jigsaw, on the
side without non-return
valve, to the determined
wall thickness -40 mm.
Insert the wall sleeve into
the wall opening from the
outside.
Ensure that
the wall sleeve
has an overhang on the
exterior wall.
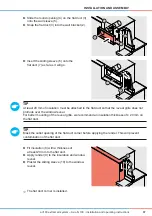
Insert the tube of the wall
sleeve into the sleeve of the
wall sleeve extension with at
least a 50 mm overlap.
Shorten the tube and sleeve
as necessary.
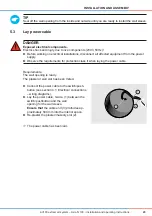
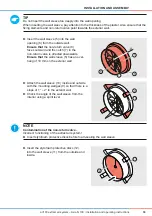
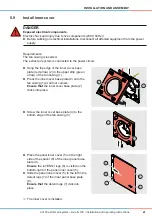
Step 2:
Shorten the tube of the
wall sleeve with an angle
grinder or a jigsaw to the
determined wall thickness
-40 mm.
From the interior, pull
the tube from the sleeve
until the wall thickness is
reached.
Ensure that
the wall sleeve
still has an overhang on the
exterior wall.
Set the combination of wall
sleeve and wall sleeve exten-
sion to the determined
wall thi overhang.
Ensure that
the wall sleeve
has an overhang on the exte-
rior wall.
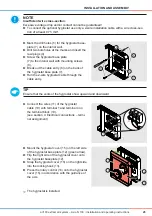
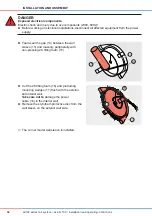
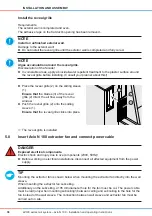
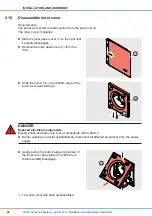
Step 3:
Insert tube and sleeve of
the wall sleeve inside each
other with approx. 50 mm
overlap.
Remove the wall sleeve
from the wall opening and
seal the interface between
the tube and sleeve airtight
with durable waterproof
fabric tape
1)
.
Seal the interface between
the tube and sleeve airtight
with durable waterproof fabric
tape
1)
.
Step 4:
Seal the interface
between the tube and
sleeve airtight with durable
waterproof fabric tape
1)
.
1)
Not included. Available as an option.


