


25
INSTALLATION AND ASSEMBLY
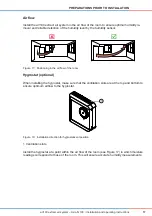
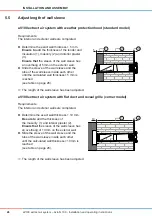
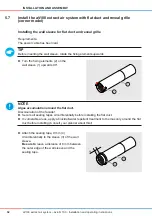
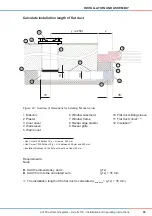
aV100 extract air system – Avio N 100
•
Installation and operating instructions
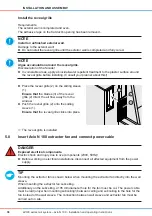
NOTE
Insufficient wire cross-section.
Excessive voltage drop and/or contact cannot be guaranteed!
►
To connect the optional hygrostat use only a 2-wire installation cable with a wire cross-sec-
tion of at least 0.75 mm².
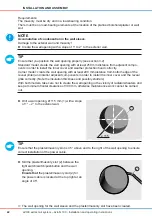
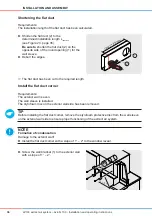
TIP
Ensure that the vents of the hygrostat show upward and downward.
Ö
Ö
The hygrostat is installed.
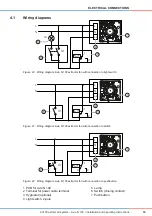
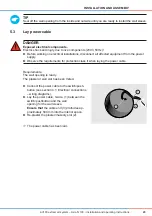
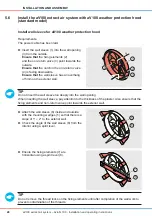
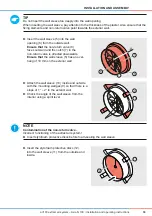
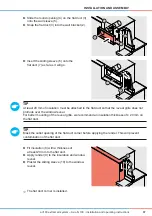
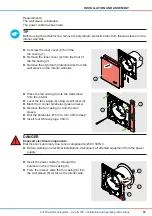
►
Mark the drill holes (5) for the hygrostat base-
plate (7) on the interior wall.
►
Drill two boreholes at the marks and insert the
rawl plugs (4).
►
Screw the hygrostat base plate
(7) to the interior wall with mounting screws
(8).
►
Break out the cable entry (6) on the back of
the hygrostat base plate (7).
►
Run the 2-wire hygrostat cable through the
cable entry.
5
8
4
7
6
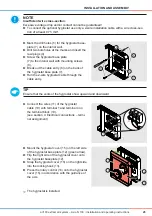
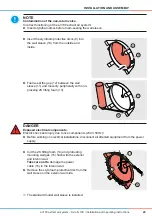
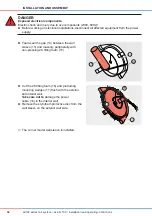
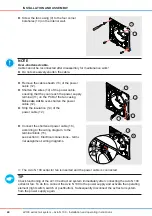
►
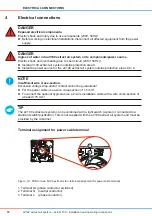
Connect the wires (11) of the hygrostat
cable (10) with terminal 1 and terminal 4 on
the terminal block (10).
(see section 4: Electrical connections – termi-
nal assignment).
9
10
11
4
1
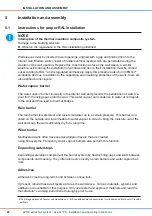
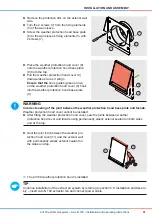
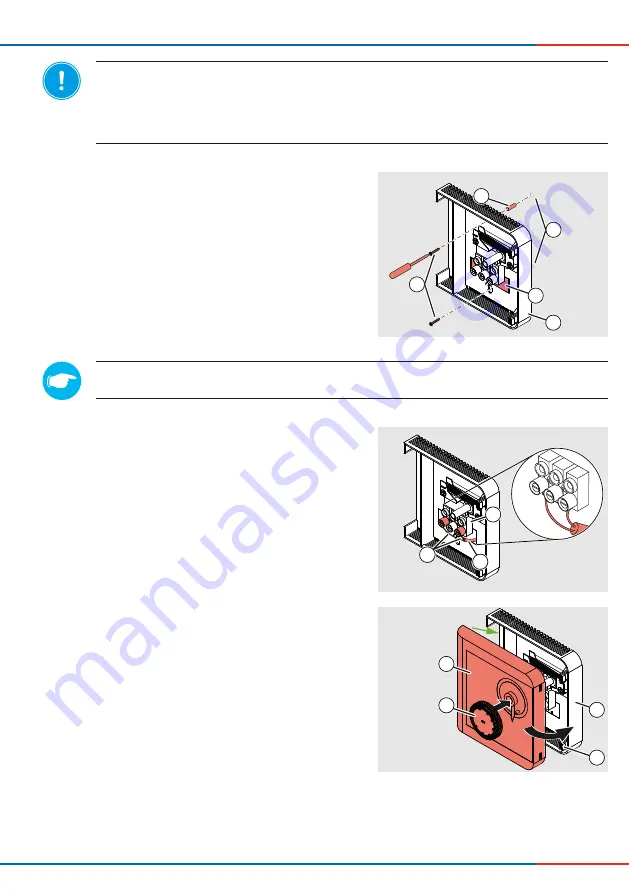
►
Mount the hygrostat cover (15) on the left side
of the hygrostat base plate (12) (green arrow).
►
Flip the right side of the hygrostat cover onto
the hygrostat baseplate (12).
►
Snap the hygrostat cover (15) on the right side
into the locking hook (13).
►
Press the rotary control (14) onto the hygrostat
cover (15) in accordance with the guidance of
the axis.
3
1
2
1
4
1
5
1


