This document is property of NIIGATA POWER SYSTEMS CO., LTD. It must be neither reproduced nor communicated nor published without permission.
SECTION
4
- DISASSEMBLY AND REASSEMBLY
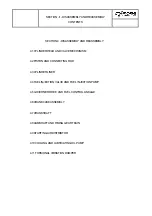
4.2 PISTON AND CONNECTING ROD
4-2-01
4.2 PISTON AND CONNECTING ROD
The pistons are one-piece nodular iron pistons with three compression rings and
two oil-control rings each. The connecting rod is a two-piece assembly with an
angled serrated joint for the rod bearing cap. Each rod bearing cap is
connected to the shank of the rod by four bolts. The angled joint provides
enough clearance to permit removing the rod upward through the cylinder liner.
The piston pin is secured by snap rings at both ends.
Tools required for servicing
The following special tools are provided for working on the piston and
connecting rod assemblies:
- Socket and wrench for tightening the rod cap bolts
- Hanger for lifting the piston and rod assembly
- Piston ring compressor
4.2.1 Piston and Rod Assembly Removal
- Remove the cylinder head (Refer to Section 4.1) and remove the crankcase
inspection cover for the cylinder involved.
- Turn the crankshaft manually until the piston is slightly below the top dead center position.
- Fill the gap between the top of the piston and the cylinder liner with grease (to prevent debris
from dropping into the gap) and clean the carbon ridge from the top of the cylinder liner.
- To remove the rod bearing cap, rotate the crankshaft until the rod bearing
journal is about 30 degrees from top dead center on the camshaft side of the engine.
WARNING
There is a danger of parts of the body being entangled into the rotating parts or
gears of turning device in the course of turning with the turning device.
Do not allow your hand, leg, etc. to gain access to the parts.
There is a danger of injuries being caused by contra rotation of crankshaft if
turning is carried out without opening the indicator cock or explosion check plug.
Be sure to open the indicator cock or explosion check plug when carrying out
turning.
- Clean the lifting bolt hole in the top of the piston, screw in a lifting
eye, and support the piston with a hoist or other device to prevent the
piston from falling when the rod bearing cap is removed.
- Loosen the connecting rod cap bolts using the special tools provided. Do
not turn the crankshaft from this point on - if the connecting rod separates
from the crankshaft journal, the piston and rod assembly could fall and result in injury.
Содержание NIIGATA MG(L)26HLX
Страница 1: ...DOCUMENT No 2086X 50000D REMARKS 12 2021 INSTRUCTION MANUAL FOR NIIGATA DIESEL MODEL MG L 26HLX...
Страница 2: ......
Страница 34: ......
Страница 38: ......
Страница 40: ......
Страница 60: ......
Страница 66: ......
Страница 68: ......
Страница 80: ......
Страница 82: ......
Страница 86: ......
Страница 88: ......
Страница 94: ......
Страница 107: ......
Страница 108: ......
Страница 110: ......
Страница 130: ......
Страница 132: ......
Страница 170: ......
Страница 174: ......
Страница 186: ......
Страница 188: ......
Страница 192: ......


