


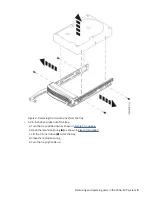
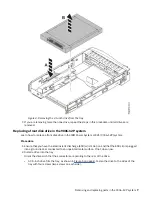


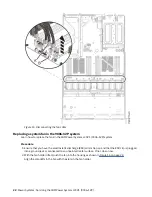

Figure 4. Removing the 2.5-inch drive from the tray
7. If you are removing more than one drive, repeat the steps in this procedure until all drives are
removed.
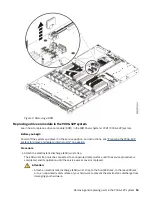
Replacing a front disk drive in the 9006-12P system
Learn how to replace a front disk drive in the IBM Power System LC921 (9006-12P) system.
Procedure
1. Ensure that you have the electrostatic discharge (ESD) wrist strap on and that the ESD clip is plugged
into a ground jack or connected to an unpainted metal surface. If not, do so now.
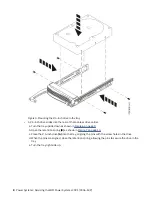
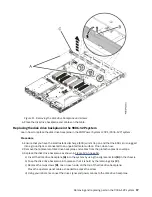
2. Install a drive into the tray.
Orient the drive such that the connectors are pointing to the rear of the drive.
• A 3.5-inch drive fills the tray, as shown in Figure 5 on page 8. Fasten the drive to the sides of the
tray with four screws (two screws on each side).
Removing and replacing parts in the 9006-12P system 7
Содержание Power System LC921 9006-12P
Страница 1: ...Power Systems Servicing the IBM Power System LC921 9006 12P IBM...
Страница 14: ...xiv Power Systems Servicing the IBM Power System LC921 9006 12P...
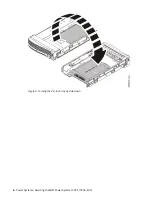
Страница 20: ...Figure 3 Turning the 2 5 inch tray upside down 6 Power Systems Servicing the IBM Power System LC921 9006 12P...
Страница 23: ...Figure 6 Turning the 2 5 inch tray upside down Removing and replacing parts in the 9006 12P system 9...
Страница 118: ...104 Power Systems Servicing the IBM Power System LC921 9006 12P...
Страница 120: ...106 Power Systems Servicing the IBM Power System LC921 9006 12P...
Страница 131: ......
Страница 132: ...IBM...