The
rescan-scsi-bus
tool is available in the sg3_utils package; install the package by using the
following command:
yum install sg3_utils
You may also want to refer to: Adding a Storage Device or Path (https://access.redhat.com/
documentation/en-US/Red_Hat_Enterprise_Linux/7/html/Storage_Administration_Guide/
adding_storage-device-or-path.html)
Verify that the new drive is active by running the following command:
lsscsi
8. Load or restore data from your backup media.
Upgrading memory in the 8335-GTG, 8335-GTH, or 8335-GTX system
To upgrade memory in the system, complete the steps in this procedure.
Memory plugging rules in the 8335-GTC, 8335-GTG, 8335-GTH, 8335-GTW, or 8335-GTX
system
Learn the memory placement rules for the system.
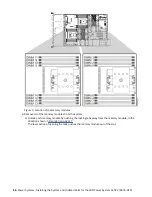
The system has memory configurations of 128 GB, 256 GB, 512 GB, 1024 GB, or 2048 GB. All memory
modules must be installed and must be of the same size and type. The system has a total of 16 memory
modules. The supported memory module sizes are either 8 GB, 16 GB, 32 GB, or 128 GB. Mixing of
memory module feature codes is not allowed.
Table 1 on page 14 lists the supported memory feature codes.
Table 1. Memory feature codes
Supported feature codes (FC)
Size
EM60
8 GB
EM61
16 GB
EM63
32 GB
EM64
64 GB
EM65
128 GB
Upgrading memory modules in the 8335-GTX system
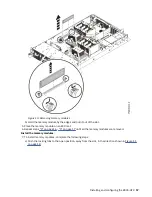
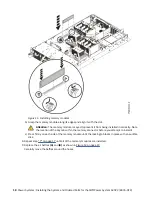
To upgrade memory modules, complete the steps in this procedure.
Before you begin
See “Memory plugging rules in the 8335-GTC, 8335-GTG, 8335-GTH, 8335-GTW, or 8335-GTX system”
on page 14 to ensure that you follow the rules for memory.
Power off the system and place it in the service position. For instructions, see “Preparing the 8335-GTC,
8335-GTG, 8335-GTH, 8335-GTW, or 8335-GTX system to remove and replace internal parts” on page
90.
Procedure
1. Attach the electrostatic discharge (ESD) wrist strap.
The ESD wrist strap must be connected to an unpainted metal surface until the service procedure is
completed, and if applicable, until the service access cover is replaced.
14 Power Systems: Installing the System and Ordered Parts for the IBM Power System AC922 (8335-GTX)
Содержание Power System AC922
Страница 1: ...Power Systems Installing the System and Ordered Parts for the IBM Power System AC922 8335 GTX IBM...
Страница 4: ...iv...
Страница 14: ...xiv Power Systems Installing the System and Ordered Parts for the IBM Power System AC922 8335 GTX...
Страница 105: ...or or or or Installing and configuring the 8335 GTX 91...
Страница 121: ...Figure 54 Routing the power cord loop in the cable management arm Installing and configuring the 8335 GTX 107...
Страница 126: ...112 Power Systems Installing the System and Ordered Parts for the IBM Power System AC922 8335 GTX...
Страница 137: ......
Страница 138: ...IBM...


