GR4000 Installation Guide Version 1.00 - Preliminary
152
520-10-014-20X
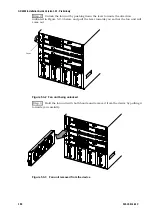
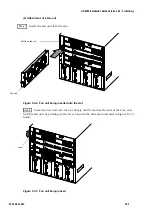
Step 3
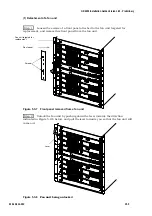
Attach the front panel to the fan unit by fixing it into its position with screws.
Figure 5.3-6 Front panel to be attached to a fan unit
!
Caution: Use a driver when screwing up the front panel, and make sure that it is fixed
firmly.
*
NOTE: In the GR4000-160E1 and GR4000-160E2, the front panel attached to FAN0 and
that attached to FAN1 are different Make sure that each front panel is set back to
the right position where it was before being removed.
5.3.2
Case of GR4000
-
320E (AC) /GR4000
-
320E (DC)
You can replace a fan unit without powering off the device.
WARNING: THE REPLACEMENT OF A FAN UNIT SHOULD BE DONE BY A TRAINED
ENGINEER OR A QUALIFIED MAINTENANCE PERSON.
!
Caution: When replacing a fan unit while powered on, it must be done within one
minute after being detached. If replacement takes more than one minute, the
temperature inside the device will start to rise and could affect other
components.
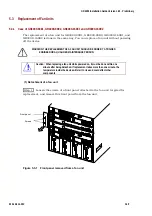
Screw
s
Front panel
Содержание GR4000 Series
Страница 1: ...Hitachi Gigabit Router GR4000 Series Installation Guide Version 1 00 Preliminary ...
Страница 98: ...GR4000 Installation Guide Version 1 00 Preliminary 80 520 10 014 20X This page left intentionally blank ...
Страница 152: ...GR4000 Installation Guide Version 1 00 Preliminary 134 520 10 014 20X ...
Страница 164: ...GR4000 Installation Guide Version 1 00 Preliminary 146 520 10 014 20X This page left intentionally blank ...

