


Component Replacement
52
17730-241
AR2
™
40K • 46K
FIguRE 8‑22
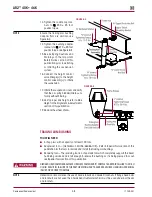
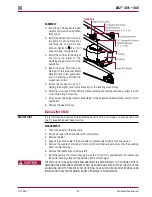
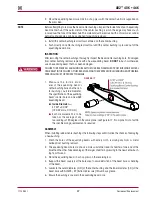
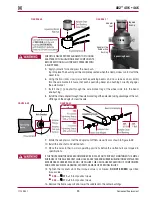
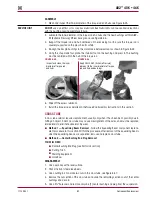
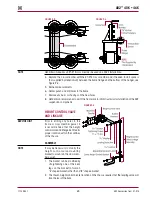
2 . Install Hendrickson Part No . 66086-103 (OTC 1757) end bushing installation tool (refer to
Special Tools section of this publication) on the new end bushing as shown in Figure 8-22 .
Tighten the through bolt until the two (2) halves of the tool touch . The installation tool com-
presses the rubber between the inner and outer metal of the bushing to allow press force to
be transmitted only to the outer metal of the bushing .
3 . Lubricate the equalizing beam end hub inside diameter AND the bar pin end bushing’s
outer metal with a heavy layer of NLGI #2 – EP (Extreme Pressure) lithium base grease, see
Figure 8-22 .
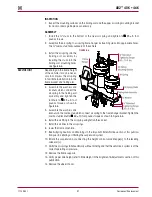
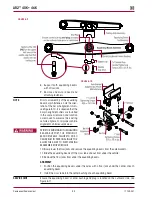
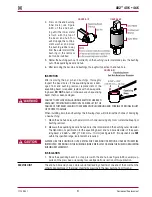
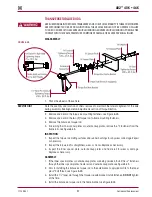
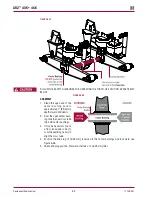
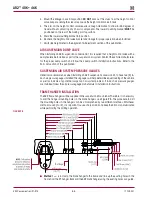
4 . Position the equalizing beam end bushing and installation tool on the end hub . Verify the bolt
holes in the end bushing are in line with the beam axis, see Figure 8-23 .
NOTE
The end bushing must be square with the equalizing beam end hub before pressing the end bush-
ing into the equalizing beam . End bushings pressed in at an angle will damage the end bushing
and the equalizing beam .
FIguRE 8‑23
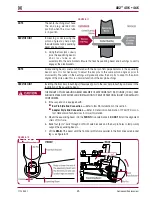
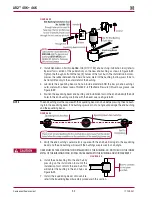
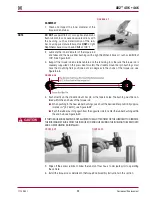
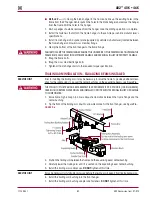
5 . Verify the end bushing’s outer metal is square with the end hub . Damage to the equalizing
beam and the end bushing will result if the bushings are pressed in at an angle .
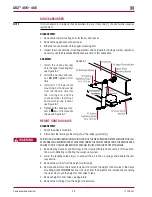
CARE MUST BE TAKEN DURING THE INSTALLATION OF THE BUSHING . DO NOT PUSH ON THE INNER
METAL OF THE BUSHING, DOING SO WILL CAUSE DAMAGE TO THE BUSHING AND VOID WARRANTY .
FIguRE 8‑24
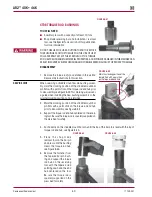
6 . Install the end bushing into the end hub by
pressing on the installation tool until the
installation tool contacts the end hub . This
will center the bushing in the end hub, see
Figure 8-24 .
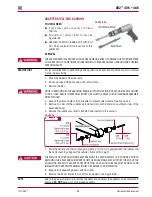
7 . Install the equalizing beam onto vehicle,
refer to the Equalizing Beam Assembly procedure in this section .