


72_
setup
setup
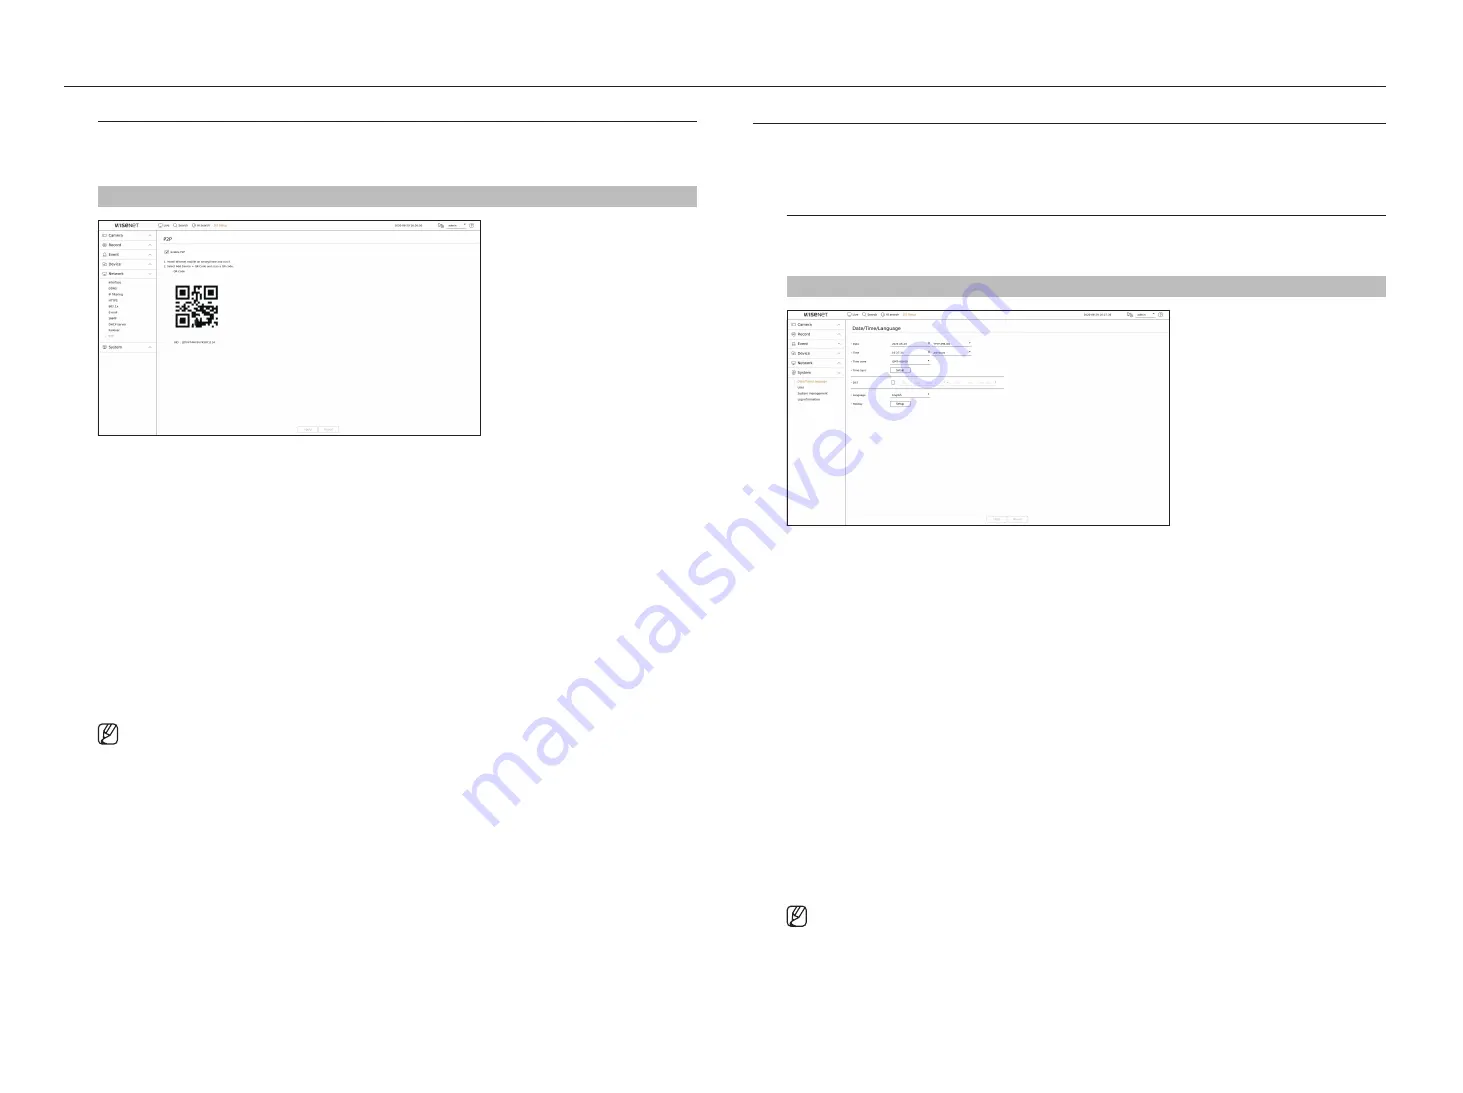
P2P
This function is only available for products that support P2P.
You can connect the recorder to Wisenet Mobile for easy use when using P2P service.
Setup > network > P2P
• Enable P2P : Select check box if you want to use P2P service.
• QR Code : Scan QR code by mobile device.
to run the P2P service
1.
Click <
enable P2P
> to test the connection to see if the current recorder can be connected remotely.
2.
When the connection is successful, search for Wisenet Mobile from the smart phone, and then install and run it.
`
When "
Add a device
>
QR code
” is selected, the Recorder QR code can be scanned.
3.
When the QR code is scanned, the device ID that can be seen in Recorder is automatically converted to mobile
viewer ID, and the mobile viewer can be used right away when the ID/password of Recorder is entered.
4.
After this, it automatically connects to Recorder and can be monitored easily with a smart phone when running
Wisenet mobile app saved in the smart phone.
`
P2P service period expires in 3 years. If you want to extend it after expiration, contact your vendor.
Setting tHe SySteM
You can set the date, language, authority, etc. displayed when using the system, and query system information or log
information.
date/time/language
You can check and setup the current Date/Time and time related properties, as well as the language used for the
interface on the screen.
Setup > System > date/time/language
• Date : Sets the date and its format that will appear on the screen.
• Time : Sets the time and its format that will appear on the screen.
• Time zone : Sets the time zone of your area based on the Greenwich Mean Time (GMT).
`
GMT (Greenwich Mean Time) is standard World Time and the basis of world time zone.
• Time Sync. : Specify the use of synchronization with the time server.
Click the <
Setup
> button to display time synchronization setup screen.
If you select to use the <
time Server
>, the current time will be synchronized on a regular basis by the server
defined as <
time Server
>.
You cannot change the time information manually if the time server is enabled.
- Synchronization : Specify the use of synchronization with the time server.
- Time Server : Enter an IP or URL address of the time server.
- Last Sync Time : Displays the most recent synchronization time from the selected time server.
- Activate as server : If you select <
use
>, this recorder will act as a time server for another recorder or network
camera.
• DST : Set up Daylight Saving Time with its period to make the time earlier than the GMT of its time zone by 1
hour during the set period.
• Language : Select your language. Sets the language for the interface.
`
Depending on the location of the product release, the language and standard time setup may vary.
Содержание Wisenet XRN-6410DB4
Страница 1: ...NETWORK VIDEO RECORDER User Manual Wisenet NVR...
Страница 118: ......


