background image

245

Managing hard drive space

www.gateway.com

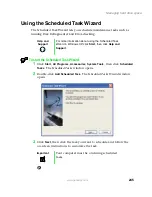
Using the Scheduled Task Wizard

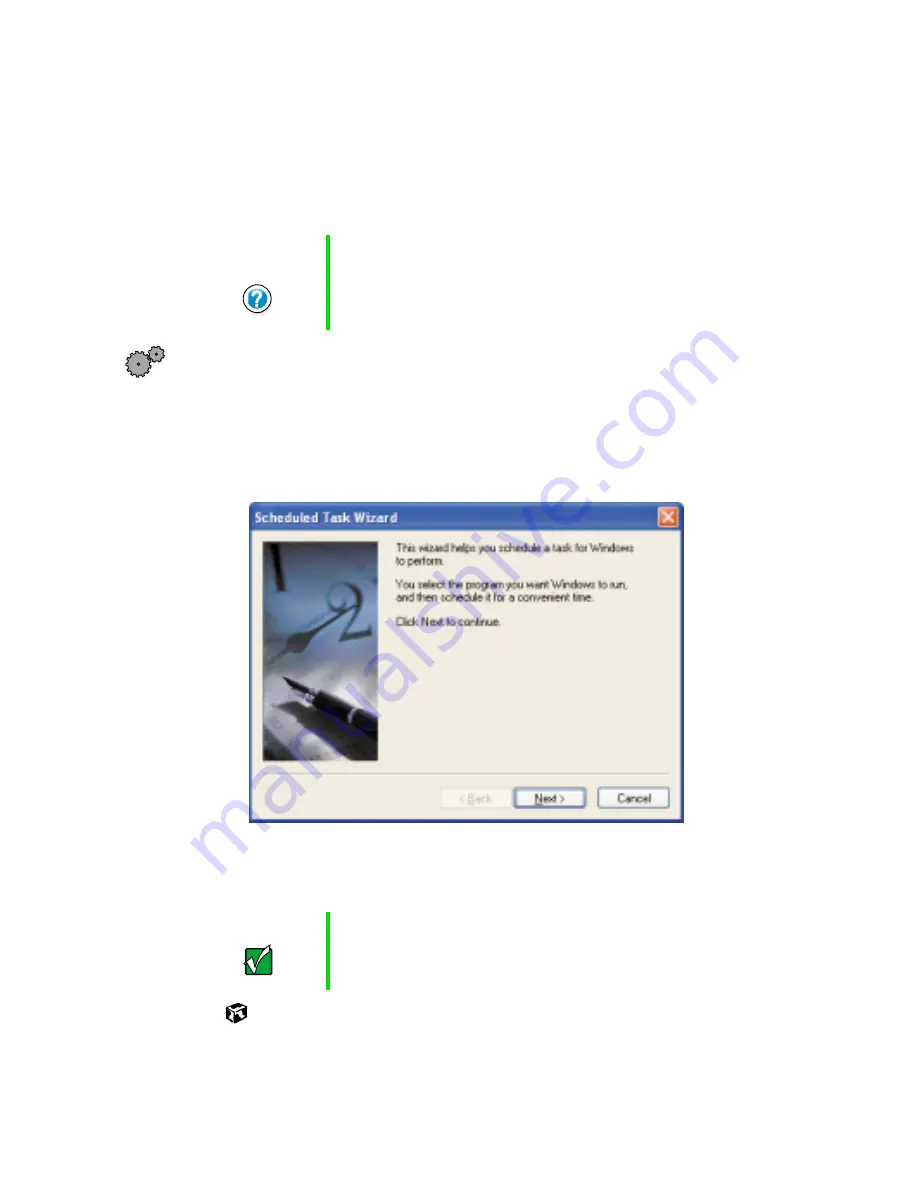
The Scheduled Task Wizard lets you schedule maintenance tasks such as 
running Disk Defragmenter and Error-checking.

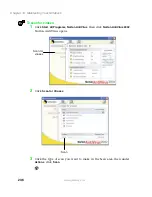
To start the Scheduled Task Wizard:

1

Click

 Start

All Programs

Accessories

System Tools

, then click 

Scheduled 

Tasks

. The 

Scheduled Tasks

 window opens.

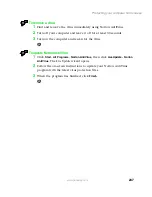
2

Double-click 

Add Scheduled Task

. The 

Scheduled Tasks Wizard

 window 

opens.

3

Click 

Next

, then click the task you want to schedule and follow the 

on-screen instructions to customize the task.

Help and 

Support

For more information about using the Scheduled Task 
Wizard in Windows XP, click 

Start

, then click 

Help and 

Support

.

Important

Your computer must be on during scheduled 
tasks

.

Содержание 200STM

Страница 1: ...ront 17 Left Side 18 Right Side 19 Back 20 Bottom 22 3 Getting Started 23 Connecting the AC adapter 24 Protecting from power source problems 26 Starting your notebook 27 Waking up your notebook 28 Tur...

Страница 2: ...rives 61 Creating folders 62 Copying and moving files and folders 63 Deleting files and folders 64 Browsing for files and folders 66 Searching for files 67 Using the Search utility 68 Working with doc...

Страница 3: ...with the Windows Media Player 108 Playing a DVD 109 Using MusicMatch 110 Playing CDs 110 Creating music files 113 Editing track information 114 Building a music library 115 Listening to Internet radio...

Страница 4: ...top background 154 Selecting a screen saver 157 Changing the touchpad settings 159 Adding and modifying user accounts 161 12 Upgrading Your Notebook 163 Adding PC Cards 164 Changing drives 166 Prevent...

Страница 5: ...29 Reinstalling your old programs 230 15 Maintaining Your Notebook 231 Caring for your computer 231 Creating an emergency startup diskette 233 Protecting your computer from viruses 235 Managing hard d...

Страница 6: ...File management 267 Hard drive 268 Internet 268 Keyboard 270 Memory 270 Modem 270 Mouse 275 Networks 275 Passwords 275 PC Cards 275 Power 276 Printer 276 Sound 278 Touchpad 278 Video 279 Telephone su...

Страница 7: ...1 1 www gateway com Checking Out Your Gateway 200 Tips Tricks To access the contents of this guide while you are traveling download an electronic copy from www gateway com support manlib...

Страница 8: ...2 Chapter 1 Checking Out Your Gateway 200 www gateway com Front Component Icon Description LCD panel release latch Open the LCD panel by sliding the release latch to the right LCD panel release latch...

Страница 9: ...nector USB port Plug USB Universal Serial Bus devices such as a USB Iomega Zip drive printer scanner camera mouse or keyboard into this port IEEE 1394 port Plug an IEEE 1394 also known as Firewire or...

Страница 10: ...www gateway com PC Card eject button Press the eject button to remove a PC Card from the PC Card slot PC Card slot Insert one Type I or II PC Card into this slot For more information see Adding PC Car...

Страница 11: ...internal components Do not block or insert objects into these slots USB port Plug USB Universal Serial Bus devices such as a USB Iomega Zip drive printer scanner camera keyboard or mouse into this por...

Страница 12: ...r 1 Checking Out Your Gateway 200 www gateway com Back Component Icon Description Kensington lock slot Secure your computer to an object by connecting a Kensington cable lock to this slot Kensington l...

Страница 13: ...this bay Docking connector Connect the docking station to this connector Warning Power is passed through this connection This docking connection is UL certified for use only with Gateway 200 docking s...

Страница 14: ...hen a drive is in use or when a button has been pressed that affects how the keyboard is used For more information see Status indicators on page 34 Touchpad Provides all the functionality of a mouse F...

Страница 15: ...nformation see Using the keyboard on page 36 Power button Press to turn the notebook on or off You can also configure the power button for Standby Resume mode For more information on configuring the p...

Страница 16: ...eway serial number The Gateway serial number is Printed on a white sticker on the bottom or back of your notebook Printed on the customer invoice that came with your notebook The invoice will also con...

Страница 17: ...s your computer contains a wireless communications device Microsoft Certificate of Authenticity The Microsoft Certificate of Authenticity label found on the bottom of your notebook includes the produc...

Страница 18: ...apacity carrying cases if you need additional space for accessories or supplies Docking Station Although you can attach devices directly to your notebook a docking station lets you make all of those c...

Страница 19: ...or more information about attaching a printer to your notebook Inkjet printers and cartridges are relatively inexpensive but usually they are slower than laser printers Using an inkjet color printer y...

Страница 20: ...14 Chapter 1 Checking Out Your Gateway 200 www gateway com...

Страница 21: ...s and ports not found on the notebook The docking station also gives you a convenient way to attach external devices such as a monitor or a full size keyboard Although devices can be attached directly...

Страница 22: ...or Warning Power is passed through this connection This docking connection is UL certified for use only with Gateway 200 notebooks 3 5 inch module bay release latch Slide to release the module 5 25 in...

Страница 23: ...type of drive in the bay examine the drive tray s plastic cover and compare the logo to those listed in Identifying drive types on page 88 Undock button Press this button to prepare the notebook to be...

Страница 24: ...the docking station For instructions on releasing the notebook from the docking station see Separating from the docking station on page 31 S PDIF digital audio jack Plug a digital audio cable into thi...

Страница 25: ...o output when headphones or amplified speakers are not plugged in Docking release lever Pull to release the notebook from the docking station For instructions on releasing the notebook from the dockin...

Страница 26: ...Universal Serial Bus devices such as a USB Iomega Zip drive printer scanner camera mouse or keyboard into these ports IEEE 1394 port Plug an IEEE 1394 also known as Firewire or i Link cable into this...

Страница 27: ...e information see Connecting to an Ethernet network on page 45 and Using the Internet on page 75 Power connector Plug the AC adapter cord into this connector Kensington lock slot Secure your docking s...

Страница 28: ...umber on this label 5 25 inch module bay Install a CD RW DVD or combination DVD CD RW drive into this bay For more information see Changing drives on page 166 To determine the type of drive in the bay...

Страница 29: ...find out How to connect the AC adapter How to start and turn off your notebook How to connect to and separate from the docking station How to identify the status indicators How to use the keyboard Ho...

Страница 30: ...ttery Allow 24 hours for the battery to fully charge To connect the AC adapter 1 Connect the power cord to the AC adapter Important If the battery is not fully charged before you use your notebook on...

Страница 31: ...tebook s power connector OR Connect the AC adapter to the docking station if the docking station is installed Warning Replace the power cord if it becomes damaged The replacement cord must be of the s...

Страница 32: ...from power source problems During a power surge the voltage level of electricity coming into your computer can increase to far above normal levels and cause data loss or system damage Protect your co...

Страница 33: ...e LCD panel 2 Press the power button located above the keyboard The power button is preset to On Off mode However you can also set it to function in Standby Resume mode For instructions on changing th...

Страница 34: ...y enter a power saving mode called Standby While in Standby the power indicator blinks See Status indicators on page 34 for the location of the power indicator If your notebook is in Standby mode wake...

Страница 35: ...Down Windows dialog box opens 2 Click the arrow button to open the What do you want your computer to do list then click Shut down 3 Click OK Windows shuts down and turns off your notebook Important I...

Страница 36: ...ect external devices to the ports and jacks on the docking station 2 Connect the AC adapter to the docking station 3 Place the front part of the notebook on the two docking station hooks Caution Unplu...

Страница 37: ...notebook from the docking station while the notebook is off 1 Disconnect the AC adapter from the docking station 2 Pull out the two docking release levers until they click The notebook will pop up sl...

Страница 38: ...ok from the docking station while the notebook is on 1 Press the Undock button on front of the docking station for one second The Dock Change message appears on the screen OR Caution Do not detach the...

Страница 39: ...In Windows 2000 click Start then click Eject PC The Eject PC menu item appears in the Start menu only while the notebook is docked The Dock Change message appears on the screen 2 Pull out the two doc...

Страница 40: ...arted www gateway com Status indicators Status indicators inform you when a drive is being used or when a button has been pressed that affects how the keyboard is used Pad lock Caps lock Scroll lock P...

Страница 41: ...ation see System key combinations on page 38 Power indicator The notebook is turned on This indicator shows the notebook power status LED on power is on LED blinking power is in Standby mode LED off p...

Страница 42: ...ing shortcut keys for Windows function keys for specific system operations and the Pad Lock keys for the numeric keypad You can attach an external keyboard to the notebook using a USB or PS 2 port You...

Страница 43: ...ions Navigation keys Press these keys to move the cursor to the beginning of a line to the end of a line up the page down the page to the beginning of a document or to the end of a document FN key Pre...

Страница 44: ...displays at the same time A monitor must be plugged into the monitor port on the notebook Enter Standby mode Press the power button to leave Standby mode Mute the sound Press the key combination again...

Страница 45: ...are currently running This function is only available in some programs Move the cursor up one screen This function is only available in some programs Decrease the brightness of the display Move the cu...

Страница 46: ...application you want to open with this button If you use America Online as your Internet provider you may want to choose that program to open when you press the Internet button If you have an always o...

Страница 47: ...way com Using the EZ Pad touchpad The EZ Pad consists of a touchpad and two buttons When you move your finger on the touchpad the pointer arrow on the screen moves in the same direction Left touchpad...

Страница 48: ...tinue moving your finger Select an object on the screen Position the pointer over the object Press the left button below the touchpad once This action is called clicking Start a program or open a file...

Страница 49: ...an object on the screen Position the pointer over the object Press the left button and hold it down then use the touchpad to move drag the object to the appropriate part of the screen Release the butt...

Страница 50: ...ck on the left side of the notebook For the location of the modem jack see Left side on page 3 2 Insert the other end of the modem cable into a telephone wall jack The modem will not work with digital...

Страница 51: ...etwork cable into the network jack on the left side of the notebook OR Insert one end of the network cable into the network jack on the back side of the docking station 2 Insert the other end of the n...

Страница 52: ...ese ports are used for connecting peripheral devices such as printers scanners and digital cameras to your computer For more information about port locations see Checking Out Your Gateway 200 on page...

Страница 53: ...4 www gateway com Getting Help This chapter tells you about additional information resources available to help you use your computer It includes the following topics HelpSpot Online help Gateway Web s...

Страница 54: ...cover and use the many features of your Gateway computer HelpSpot also has an area called Contact Gateway that helps you find the right resource at Gateway to answer your questions or help solve your...

Страница 55: ...m You can find help information by clicking a link performing a search or browsing the index To learn about using your Gateway computer your touchpad and other tasks click the Using your computer link...

Страница 56: ...entered in the Search box Microsoft Knowledge Base These topics are located on the Microsoft com Web site you must be connected to the Internet to search for and access these topics and contain the w...

Страница 57: ...contains several short videos to help introduce you to new concepts or show you how to perform various tasks To play a HelpSpot video To watch a video in HelpSpot click Video Tutorials on the HelpSpo...

Страница 58: ...or learn how to perform a task while you are using the program Most online help information can be accessed by selecting a topic from a Help menu or by clicking a Help button You can search for inform...

Страница 59: ...e your computer Visit the Gateway Web site at www gateway com for Technical documentation and product guides Technical tips and support including online chat services Hardware drivers Order status Fre...

Страница 60: ...54 Chapter 4 Getting Help www gateway com...

Страница 61: ...ics Read this chapter to get basic information on how to Use the Windows desktop Manage files and folders Work with documents Use shortcuts Help and Support For more information about Windows click St...

Страница 62: ...arts the first screen you see is the Windows desktop The desktop is like the top of a real desk Think of the desktop as your personalized work space where you open programs and perform other tasks You...

Страница 63: ...ning Click a program s button on the taskbar to open the program s window The Start button provides access to programs files help for Windows and other programs and computer tools and utilities Click...

Страница 64: ...tart menu 1 Click the Start button on the lower left of the Windows desktop The Start menu opens showing you the first level of menu items 2 To see all programs and files in the Start menu click All P...

Страница 65: ...ms When you double click the icon for a drive folder file or program a window opens on the desktop This example shows the Local Disk C window which opens after double clicking the Local Disk C icon in...

Страница 66: ...shows the window title Clicking the minimize button reduces the active window to a button on the taskbar Clicking the program button in the taskbar opens the window again Clicking the maximize button...

Страница 67: ...y information in a file cabinet Viewing drives Drives are like file cabinets because they hold files and folders A computer almost always has more than one drive Each drive has a letter usually Local...

Страница 68: ...after you double click its icon click Show the contents of this drive Creating folders Folders are much like the folders in a file cabinet They can contain files and other folders Files are much like...

Страница 69: ...opy and move files are called copying cutting and pasting When you copy and paste a file or folder you place a copy of the file or folder on the Windows clipboard which temporarily stores it Then when...

Страница 70: ...der that you want to move A pop up menu opens on the desktop 2 Click Cut on the pop up menu 3 Open the destination folder 4 With the pointer inside the destination folder right click 5 Click Paste The...

Страница 71: ...u have thrown away since you last emptied it 2 Click the files or folders that you want to restore For instructions on how to select multiple files and folders see Shortcuts on page 74 3 Click File th...

Страница 72: ...evels than a file cabinet in fact So you usually will have to search through levels of folders to find the file or folder that you need This is called browsing To browse for a file 1 In Windows XP cli...

Страница 73: ...ey are stored on your hard drive you can use the Search utility to search by Name or part of a name Creation date Modification date File type Text contained in the file Time period in which it was cre...

Страница 74: ...n Windows 2000 click Start Search then click For Files or Folders The Search Results window opens 2 If you want to search by file or folder name type in all or part of the file or folder name in the n...

Страница 75: ...or 4 Open a file folder or program by double clicking the name in the list Using advanced search options Search can find files meeting more criteria than file name You can select options to narrow you...

Страница 76: ...ng Microsoft Word Similar procedures apply to other programs such as Microsoft Excel Microsoft WordPad and Microsoft Publisher For more information about using a program click Help on its menu bar Cre...

Страница 77: ...and toolbar buttons at the top of the window to format the document Saving a document After you create a document you need to save it if you want to use it later To save a document in Microsoft Word 1...

Страница 78: ...eed to open it Open the document in the program that it was created in To open a document in Microsoft Word 1 Click Start All Programs then click Microsoft Word Microsoft Word starts and a blank docum...

Страница 79: ...printer connected to your computer or have access to a network printer For more information about installing or using your printer refer to the printer documentation To print a document in Microsoft...

Страница 80: ...inside the folder or window where you want to paste the object then press CTRL V Select multiple items in a list or in a window Click the first item press and hold down the CTRL key then click each o...

Страница 81: ...he Internet This chapter provides information about the Internet and the World Wide Web and tells you how to set up the America Online Internet service so that you can send and receive e mail and acce...

Страница 82: ...er ISP Cable and DSL modems a connection known as broadband use your TV cable or special telephone lines to connect to your ISP and access the Internet Cable and DSL modems connect to your computer th...

Страница 83: ...the World Wide Web you need to set up an Internet account with an Internet Service Provider ISP If you have chosen America Online as an ISP follow these instructions to set up and connect to your acco...

Страница 84: ...necting the Web browser window opens For information about the Web and the Web browser see Using the World Wide Web on page 79 To disconnect from your America Online Internet account Click X in the to...

Страница 85: ...n your new computer Web pages can contain text animations music and other multimedia features A group of related Web pages is called a Web site You can access Web sites to shop track investments read...

Страница 86: ...e browser address bar for example www gateway com then click GO on the browser address bar OR On the current Web page click a link to a Web site The Web browser locates the server computer on the Inte...

Страница 87: ...Web page to navigate to the Web site containing the file that you want to download 3 Create or locate the folder where you want to store the file on your computer 4 Click the link on the Web page for...

Страница 88: ...most e mail addresses in minutes An e mail address consists of a user name the symbol and the Internet domain name of the Internet Service Provider ISP or company that hosts that user Your e mail addr...

Страница 89: ...ct of your e mail in the Subject box 5 Type the e mail message 6 When finished click Send Now Your e mail is sent over the Internet to the e mail address you specified Checking your e mail To check yo...

Страница 90: ...84 Chapter 6 Using the Internet www gateway com...

Страница 91: ...of your notebook Read this chapter to learn how to Use the diskette drive Use the CD RW DVD or combination DVD CD RW drive Create CDs Adjust the volume Play CDs and DVDs Record and play audio files Us...

Страница 92: ...ing Multimedia www gateway com Using drives This section explains how to use the diskette and optical drives installed in the docking station Activity light Eject button Manual eject hole Diskette slo...

Страница 93: ...r To use a diskette 1 Insert the diskette into the diskette drive on the docking station with the label facing up Warning Do not expose diskettes to water or magnetic fields Exposure could damage the...

Страница 94: ...ontain one of the following drive types Look on the front of the drive for one of the following logos CD RW drive Use a CD RW drive for installing programs playing audio CDs and accessing data You can...

Страница 95: ...cing up then press down carefully on the disc until it snaps into place 3 Push the tray in until it is closed Important If the drive you want to use is not in the docking station bay you will need to...

Страница 96: ...record copyrighted material on a CD you need permission from the copyright owner Otherwise you may be violating copyright law and be subject to payment of damages and other remedies If you are uncerta...

Страница 97: ...dialog box opens click Create a CD using Roxio Easy CD Creator then click OK The Project Selector window opens OR If a dialog box does not open click Start All Programs Roxio Easy CD Creator then cli...

Страница 98: ...Move your pointer over make a data CD then click dataCD project The Easy CD Creator window opens 4 Click the arrow button to open the Select Source Files list then click the folder where your files a...

Страница 99: ...ick the file you want to record hold down the CTRL or SHIFT key when you click to select multiple files in the Source pane then click Add 6 After you have added all of your files click record The Reco...

Страница 100: ...ight law and be subject to payment of damages and other remedies If you are uncertain about your rights contact your legal advisor Important You must have a CD RW or combination DVD CD RW drive in you...

Страница 101: ...dialog box opens click Create a CD using Roxio Easy CD Creator then click OK The Project Selector window opens OR If a dialog box does not open click Start All Programs Roxio Easy CD Creator then clic...

Страница 102: ...our pointer over make a music CD then click musicCD project The Easy CD Creator window opens 4 Click the arrow button to open the Select Source Files list then click the folder where your files are lo...

Страница 103: ...RL or SHIFT key when you click to select multiple files in the Source pane then click Add Tips Tricks You can add any combination of music tracks or MP3 files to a music CD project You can add up to 9...

Страница 104: ...station to create a CD To determine the type of drive in the module bay examine the drive tray s plastic cover and compare the logo to those listed in Identifying drive types on page 88 To be able to...

Страница 105: ...ange the volume or press the mute system key combination FN MUTE to turn off all sound To adjust the overall volume level from Windows 1 Click Start then click Control Panel The Control Panel window o...

Страница 106: ...Mute check box then click OK To adjust specific volume levels 1 Click Start then click Control Panel The Control Panel window opens If your Control Panel is in Category View click Sounds Speech and Au...

Страница 107: ...o adjust does not appear in the window click Options Properties the check box next to the audio device you want to appear then click OK 5 Drag the volume level and balance sliders for the device you w...

Страница 108: ...me of specific sound devices in your computer To adjust overall volume level On the keyboard press the volume system key combinations FN and FN to change the volume or press the mute system key combin...

Страница 109: ...ns If the device you want to adjust does not appear in the Volume Control window click Options Properties the audio device you want to appear then click OK 2 Drag the volume level and balance sliders...

Страница 110: ...to your CDs To play a CD 1 Insert a CD into the CD RW DVD or combination DVD CD RW drive on your docking station 2 If a message asks you to chose a CD player click Windows Media Player The Windows Med...

Страница 111: ...D Player does not open automatically when you insert the CD open it from the Start menu by clicking Start Programs Accessories Entertainment then clicking CD Player When the CD Player opens click play...

Страница 112: ...tart All Programs Accessories Entertainment then click Sound Recorder The Sound Recorder opens 3 Click record then speak into the microphone 4 When you finish recording click stop 5 Click File then cl...

Страница 113: ...play an audio recording in Sound Recorder 1 Open the Sound Recorder 2 Click File then click Open The Open dialog box opens 3 Click the file you want to play then click Open 4 Play the file by clickin...

Страница 114: ...ts For more information about the using the Windows Media Player click Help To play a file using the Windows Media Player 1 In Windows XP click Start All Programs then click Windows Media Player OR In...

Страница 115: ...in the DVD player program To play a DVD 1 Make sure that the speakers are turned on or headphones are plugged in and that the volume is turned up 2 Turn off your screen saver and standby timers 3 Cli...

Страница 116: ...o For more information on using MusicMatch see its online Help Playing CDs You can use the MusicMatch program to play music CDs To play a music CD in Windows XP 1 Insert the music CD into the CD RW DV...

Страница 117: ...gateway com When you insert a CD the Audio CD dialog box opens 2 Click Play Audio CD using MUSICMATCH Jukebox then click OK MusicMatch opens the CD begins playing and the names of the music tracks app...

Страница 118: ...into the CD RW DVD or combination DVD CD RW drive on your docking station 3 Click the CD tab in the MusicMatch window The names of the music tracks appear in the playlist area 4 Click play Important...

Страница 119: ...ch by clicking Start All Programs MusicMatch then clicking MusicMatch Jukebox 2 Insert a CD into the CD RW DVD or combination DVD CD RW drive on your docking station then click record The Recorder win...

Страница 120: ...ation To edit track information 1 In MusicMatch click My Library The library window opens 2 In the library window right click the file then click Edit Track Tag s The Edit Track Tag dialog box opens 3...

Страница 121: ...can add music tracks to your music library by Creating MP3 files When you create MP3 files from the tracks on your music CD MusicMatch automatically adds these files to your music library Dragging an...

Страница 122: ...music library display settings To change the music library display settings 1 In MusicMatch click Options then click Settings The Settings window opens 2 Click the Music Library tab 3 Click the categ...

Страница 123: ...m Listening to Internet radio Use the Radio feature in MusicMatch to listen to Internet Radio stations To listen to an Internet radio station 1 Connect to the Internet then open MusicMatch 2 Click Rad...

Страница 124: ...OR To play another Internet radio station click Broadcast Stations the appropriate category in the Station Selector the radio station then click Play MusicMatch connects to the station and plays the...

Страница 125: ...as already been installed on your system To use MGI VideoWave 1 Connect the IEEE 1394 cable on your external source such as a video camera to the IEEE 1394 port on the side of your notebook or the bac...

Страница 126: ...120 Chapter 7 Using Multimedia www gateway com...

Страница 127: ...sheets and fax headers will contain this information which is required by law Help and Support For more information about using the fax functions in Windows XP click Start then click Help and Support...

Страница 128: ...en type your personal information in the User boxes 4 Click the Fax tab then enter your name and fax number in the Fax identifier text box This identifier information is required by law You can enter...

Страница 129: ...If you do not want the PhoneTools logo on your cover page click the picture then click the clear button OR If you want to replace the PhoneTools logo with one of your own click the import button then...

Страница 130: ...pter 8 Sending and Receiving Faxes www gateway com Sending a fax To send a fax 1 If PhoneTools is not open click Start All Programs PhoneTools then click PhoneTools 2 Click Send Fax The Send Fax Wizar...

Страница 131: ...sage in the Message Text area you must select a cover page 6 Click Next 7 If you want to attach a file make sure the file is not open then click browse click the file then click Open 8 Click Next then...

Страница 132: ...nter CAPTURE FAX BVRP then click OK The Send Fax Wizard opens 3 Complete the wizard as instructed in Sending a fax on page 124 Receiving and viewing a fax To receive and view a fax 1 If PhoneTools is...

Страница 133: ...uld manage power consumption to get the most use out of the battery This chapter shows you how to Check and recharge the battery Recalibrate the battery Change batteries Extend the life of the battery...

Страница 134: ...battery icon in the taskbar The Power Meter dialog box opens Pressing FN STATUS to view the power status box which opens in the upper left corner of the display The power status box shows the current...

Страница 135: ...y what looks like an inaccurate charge you may need to recalibrate the battery For more information see Recalibrating the battery on page 130 Recharging the battery The battery recharges while it is i...

Страница 136: ...ess F2 The BIOS Setup utility opens 4 Open the Power menu 5 Highlight Smart Battery Calibration then press ENTER You are prompted to start the recalibration program 6 After the battery has been fully...

Страница 137: ...lugged into an AC outlet save your work and turn off the notebook 2 Close the LCD panel undock the notebook if it is docked and turn your notebook over 3 Slide the locking battery release latch to the...

Страница 138: ...battery out of the bay 5 Slide a recharged battery into the bay Make sure the battery is fully inserted into the bay 6 Slide the locking battery latch to the locked position 7 Turn the notebook over 8...

Страница 139: ...g the DVD CD RW or combination DVD CD RW drives only when necessary These drives use a large amount of power Recharge the battery often take an extra battery and fully recharge the batteries before tr...

Страница 140: ...mode on page 139 Using Standby mode Always save your work before using Standby mode When in Standby your computer reduces or turns off the power to most devices except memory However the information i...

Страница 141: ...of the defined power schemes or create a custom power scheme Alarms can alert you when the battery charge is low Advanced power settings let you assign different power saving modes to the power button...

Страница 142: ...the Power Schemes list then click the power scheme you want OR Set the timers then save your custom power scheme by clicking Save As and typing a name for the scheme 4 Click OK Important During idle t...

Страница 143: ...Control Panel window opens If your Control Panel is in Category View click Performance and Maintenance OR In Windows 2000 click Start Settings then click Control Panel The Control Panel window opens...

Страница 144: ...If your Control Panel is in Category View click Performance and Maintenance OR In Windows 2000 click Start Settings then click Control Panel The Control Panel window opens 2 Click Double click the Pow...

Страница 145: ...ance OR In Windows 2000 click Start Settings then click Control Panel The Control Panel window opens 2 Click Double click the Power Options icon The Power Options Properties dialog box opens 3 Click t...

Страница 146: ...list then click Hibernate Click OK Changing SpeedStep settings The processor installed in your notebook may use Intel SpeedStep technology to conserve battery power A SpeedStep equipped processor can...

Страница 147: ...s and press ENTER 6 Select Yes then press ENTER To change SpeedStep settings in Windows 2000 1 Click Start Settings then click Control Panel The Control Panel window opens 2 Double click the Power Opt...

Страница 148: ...ocessor at reduced speed using less power regardless of the power source click the arrow button to open the Plugged in list then click Battery Optimized Performance To turn off the SpeedStep technolog...

Страница 149: ...rovides information on Using the modem Using your radio frequency wireless connections Transferring files Protecting your notebook from loss and theft Managing your notebook s power efficiently Tips T...

Страница 150: ...ireless devices If your notebook is equipped with a wireless device when traveling between countries check with the local radio approval authorities prior to your trip for any restrictions on the use...

Страница 151: ...Be ready to claim your notebook as soon as it passes through the x ray machine in security checkpoints Write down your notebook model number and serial number available on the system label in case of...

Страница 152: ...ress ENTER 6 To exit the BIOS Setup utility open the Exit menu then select Exit Saving Changes When you start your computer you are prompted to enter the user password you set in Step 3 Power Take you...

Страница 153: ...k This chapter provides information about customizing your computer by changing settings in Windows You can Change screen and display settings Change the background and screen saver Adjust the touchpa...

Страница 154: ...imum appearance For example simple color drawings may appear adequately in 256 colors while color photographs need millions of colors to be displayed with optimum quality Windows lets you choose from...

Страница 155: ...hemes OR In Windows 2000 click Start Settings then click Control Panel The Control Panel window opens 2 Click Double click the Display icon The Display Properties dialog box opens 3 Click the Settings...

Страница 156: ...s icons and menu bars appear To adjust the screen resolution 1 In Windows XP click Start then click Control Panel The Control Panel window opens If your Control Panel is in Category View click Appeara...

Страница 157: ...www gateway com 3 Click the Settings tab 4 Drag the Screen resolution or Screen area slider to the size you prefer 5 To save your changes in Windows XP click OK then click Yes OR To save your changes...

Страница 158: ...e or create your own To select a color scheme in Windows XP 1 Click Start then click Control Panel The Control Panel window opens If your Control Panel is in Category View click Appearance and Themes...

Страница 159: ...tab 4 If you want to apply one of Windows color schemes click the arrow button to open the Scheme list click the scheme you want then click OK The new scheme appears on your desktop OR If you want to...

Страница 160: ...a picture or an HTML document Windows provides several background pictures You can also use pictures or HTML documents that you have created or retrieved from other sources To change the desktop back...

Страница 161: ...n list then click Stretch or Tile 5 If the picture you chose does not cover the entire screen and you did not choose to tile or stretch the image in Step 4 you can change the solid color behind the pi...

Страница 162: ...ther location by clicking Browse 5 If you want the picture you chose to cover the entire screen click the arrow button to open the Picture Display list then click Tile 6 If the picture you chose does...

Страница 163: ...t and as commercial products To select a screen saver 1 In Windows XP click Start then click Control Panel The Control Panel window opens If your Control Panel is in Category View click Appearance and...

Страница 164: ...mize the screen saver click Settings then make your changes If the Settings button is not available you cannot customize the screen saver you selected 6 In Windows XP if you want to display the Welcom...

Страница 165: ...your touchpad settings 1 In Windows XP click Start then click Control Panel The Control Panel window opens If your Control Panel is in Category View click Printers and Other Hardware OR In Windows 20...

Страница 166: ...pter 11 Customizing Your Notebook www gateway com 2 Click Double click the Mouse icon The Mouse Properties dialog box opens 3 Click one of the tabs to change your touchpad settings 4 Click OK to save...

Страница 167: ...ed in one account it may not be available in other accounts If this happens install the program or device in the accounts that need it Files created in one account are not accessible from other accoun...

Страница 168: ...in Windows XP 1 Click Start then click Log Off The Log Off Windows dialog box opens 2 Click Switch User The Windows Welcome screen opens 3 Click the user account that you want to use When you switch b...

Страница 169: ...163 12 www gateway com Upgrading Your Notebook This chapter provides information about adding hardware devices to your notebook including PC Cards Drives Memory...

Страница 170: ...s hot swapping Hot swapping means that you can insert a PC Card while your notebook is running If your PC Card does not work after hot swapping refer to the PC Card manufacturer s documentation for fu...

Страница 171: ...bar then select the PC Card name and click Stop OR Turn off the notebook 2 Release the eject button by pressing the PC Card eject button once 3 Eject the PC Card by pressing the eject button again Imp...

Страница 172: ...a diskette drive To change bay modules 1 Make sure your notebook is off 2 Detach the notebook from the docking station For instructions see Separating from the docking station on page 31 Important The...

Страница 173: ...u are changing 5 25 inch or 3 5 inch toward the middle of the docking station The module will pop out slightly 4 Slide the bay module out 5 Firmly push the new bay module straight into the bay until t...

Страница 174: ...omponents follow these guidelines Avoid static causing surfaces such as carpeted floors plastic and packing foam Remove components from their antistatic bags only when you are ready to use them Do not...

Страница 175: ...nder Preventing static electricity discharge on page 168 2 Shut down your notebook then disconnect the power adapter and modem and network cables 3 Detach the notebook from the docking station For ins...

Страница 176: ...170 Chapter 12 Upgrading Your Notebook www gateway com 5 Remove the memory bay cover screw then remove the memory bay cover...

Страница 177: ...Installing memory www gateway com 6 If you are removing a module gently press outward on both clips at either end of the memory module until the module tilts upward Pull the memory module out of the s...

Страница 178: ...be inserted in one direction If the module does not fit make sure the notch in the module lines up with the tab in the memory bay 8 Gently push the module down until it clicks in place 9 Replace the m...

Страница 179: ...ters lets you share drives printers and a single Internet connection among the connected computers This chapter contains information about Benefits of using a network in your home small office or home...

Страница 180: ...can copy files from computer to computer by copying and pasting or dragging and dropping You will no longer waste your time transferring files by using diskettes In addition you can map a drive from...

Страница 181: ...any networked computer then play them on any of the other computers or devices connected to your network a process called streaming Playing multi player games With a home network you can play multi pl...

Страница 182: ...teway com Example network A network connects all your computers and other devices so that you can share files programs peripheral devices and much more from any computer in your home or office The pic...

Страница 183: ...ast Ethernet Ethernet is a type of connection commonly used in offices around the world This type of connection can also be used to build small computer networks in the home Ethernet is available at t...

Страница 184: ...802 11b or WiFi exceeds the speed of either HPNA 2 0 or standard Ethernet In addition this type of network allows you the freedom to move about your home or office with your notebook For example you c...

Страница 185: ...ing to a telephone jack A USB port to connect to a HPNA adapter Cost savings is more important than network speed Your connection speed needs are less than 10000 Kbps see Comparing data transfer speed...

Страница 186: ...ng the Internet Your computer has wireless Ethernet IEEE 802 11b for networking Your connection speed needs are less than 11000 Kbps see Comparing data transfer speed on page 180 Comparing data transf...

Страница 187: ...two MP3 audio files simultaneously requires 200 Kbps 200 Kbps 400 Kbps If at the same time you are playing two MP3 audio files you also print a file to your printer the speed required increases to 20...

Страница 188: ...mercial aircraft Current aviation regulations require wireless devices to be turned off while traveling in an airplane IEEE 802 11b also known as wireless Ethernet or WiFi communication devices are ex...

Страница 189: ...alls the wireless Ethernet drivers Immediately following the initial startup you may be instructed to run the Network Setup Wizard Important The network setup procedure uses the Windows XP Network Set...

Страница 190: ...Setup Wizard 1 Click on the Network Setup Wizard icon on the Windows XP taskbar The Network Setup Wizard window opens OR Click Start All Programs Accessories Communications then click Network Setup Wi...

Страница 191: ...twork www gateway com 3 Click Next The wizard found disconnected network hardware screen opens 4 Click to select the Ignore disconnected network hardware check box then click Next The Select a connect...

Страница 192: ...d that the notebook uses to access the Internet then click Next The Your computer has multiple connections screen opens OR Click Other then click Next for a list of additional methods Make a selection...

Страница 193: ...network then click Next The Select the connections to bridge screen opens 7 Click to select the check box for your wireless network connection then click Next The Give this computer a description and...

Страница 194: ...then click Next The Name your network screen opens 10 Type the name of the workgroup this notebook belongs to in the Workgroup name box This name is usually assigned by the network system administrato...

Страница 195: ...lling and configuring the network on your other computers then click Next 14 Click Finish Configuring Windows XP for wireless Ethernet To configure Windows XP to use the wireless Ethernet network 1 Cl...

Страница 196: ...teway com 3 Right click Wireless Network Connection then click Properties The Wireless Network Connection Properties dialog box opens 4 Click Internet Protocol TCP IP then click Properties The Interne...

Страница 197: ...ss then type the IP address in the IP address box and Subnet mask in the Subnet mask box 7 Click OK to close the Internet Protocol TCP IP Properties dialog box 8 Click OK to close the Wireless Network...

Страница 198: ...a wireless network and access a wired network at the same time You can create an access point wireless network if you purchased an RG1000 or equivalent access point This illustration shows an example...

Страница 199: ...www gateway com 3 Right click Wireless Network Connection then click View Available Wireless Networks The Connect to Wireless Network dialog box opens 4 Click Advanced The Wireless Network Connection...

Страница 200: ...194 Chapter 13 Networking Your Notebook www gateway com 5 Click the Wireless Networks tab...

Страница 201: ...cryption WEP enabled check box 9 Click to clear the The key is provided for me automatically check box 10 Type the network key in the Network key box This key must be the last five digits of the netwo...

Страница 202: ...d 16 Click OK to close the Wireless Network Properties dialog box 17 Click the General tab 18 Click to select Internet Protocol TCP IP in the This connection uses the following items list If you do no...

Страница 203: ...se the following IP address then type the IP address in the IP address box and Subnet mask in the Subnet mask box 22 Click OK to close the Internet Protocol TCP IP Properties dialog box 23 Click OK to...

Страница 204: ...l devices This type of network does not include an access point into a wired network To create a peer to peer wireless Ethernet network in Windows XP 1 Click Start then click Control Panel The Control...

Страница 205: ...www gateway com 3 Right click Wireless Network Connection then click View Available Wireless Networks The Connect to Wireless Network dialog box opens 4 Click Advanced The Wireless Network Connection...

Страница 206: ...200 Chapter 13 Networking Your Notebook www gateway com 5 Click the Wireless Networks tab...

Страница 207: ...If an encryption key has been agreed to by the other members of your network go to Step 10 OR If your network is not using an encryption key go to Step 16 10 Click the Data encryption WEP enabled chec...

Страница 208: ...vanced list 16 Click OK to close the Wireless Network Properties dialog box 17 Click the General tab 18 Click to select Internet Protocol TCP IP in the This connection uses the following items list If...

Страница 209: ...203 Using a wireless network www gateway com 20 Click the General tab 21 Click Use the following IP address...

Страница 210: ...24 Click OK to close the Wireless Network Connection Properties dialog box Connecting to a wireless Ethernet network in Windows XP To connect to an existing wireless Ethernet network 1 Click Start the...

Страница 211: ...network www gateway com 3 Right click Wireless Network Connection then click View Available Wireless Networks The Connect to Wireless Network dialog box opens 4 Click the network you want to connect t...

Страница 212: ...click Network Connections The Network Connections window opens 3 Right click Wireless Network Connection then click Enable to turn on wireless Ethernet or click Disable to turn off wireless Ethernet C...

Страница 213: ...x opens The meter shows the signal strength for wireless Ethernet on your notebook if other computers with the same network name are within range of your notebook Important Signal strength is affected...

Страница 214: ...system automatically installs the wireless Ethernet drivers Immediately following the initial startup you may be asked to install the ORiNOCO Client Manager You may also need to install the ORiNOCO C...

Страница 215: ...e wireless Ethernet you need to configure your network settings To configure the ORiNOCO Client Manager 1 Click Start Programs ORiNOCO then click Client Manager The ORiNOCO Client Manager window opens...

Страница 216: ...le screen 4 Type the name of the profile you are creating in the Profile Name box When you create the first profile you should rename the Default profile to the name of your profile For example if you...

Страница 217: ...network type if you are joining a wireless network and accessing a wired network through an access point Contact your network system administrator or refer to the access point documentation for more...

Страница 218: ...y com Peer to Peer Group Use this network type if you are setting up or joining a temporary or permanent computer to computer network for sharing files and peripheral devices This type of network does...

Страница 219: ...for example RG1000 1ff60a OR Type Any to connect to the first access point available OR Click Scan to scan for all access points that are within range of your notebook Click to select a network name f...

Страница 220: ...type must be the same type that has been agreed upon by the other members of the network 11 Type the network key in the Key 1 box For an access point or residential gateway this key must be the last f...

Страница 221: ...5 Using a wireless network www gateway com 13 Click Next The Power Management screen opens 14 Click to select the type of power management you want to use 15 Click Next The TCP IP Behavior screen open...

Страница 222: ...he network in Windows 2000 If this is the first time you have used networking on your notebook you need to provide Windows with the name of the notebook and the workgroup to which it belongs To identi...

Страница 223: ...k is most likely to communicate with 6 Type a description of the notebook in the Computer Description box This description lets other network users identify who this notebook belongs to 7 Click OK Con...

Страница 224: ...ces 4 Click Properties The TCP IP Properties dialog box opens 5 Click the IP Address tab 6 If you are using a DHCP server click Obtain an IP address automatically OR If you are not using a DHCP server...

Страница 225: ...e ORiNOCO Client Manager icon on the taskbar 2 Click Configuration Profile then click the profile for the network you want to access Turning your wireless Ethernet on or off in Windows 2000 There are...

Страница 226: ...ur wireless Ethernet network Click Start Programs ORiNOCO then click Client Manager The ORiNOCO Client Manager window opens The meter on the left side shows the signal strength for wireless Ethernet o...

Страница 227: ...desktop computer OR An HPNA V 90 combination card installed in each desktop computer OR A USB HPNA adapter attached to each desktop computer or notebook OR An HPNA PC Card installed in each notebook M...

Страница 228: ...k An Ethernet hub or switch with enough ports for all computers and devices in the network hubs are slightly cheaper than switches but may run slower than switches Ethernet cable going from each compu...

Страница 229: ...11b Access Point if you want to connect your wireless Ethernet to the Internet or a wired network For more information For more information about networking your home or office discuss your particular...

Страница 230: ...224 Chapter 13 Networking Your Notebook www gateway com...

Страница 231: ...r new one Using the Windows XP Files and Settings Transfer Wizard If your new computer is running Windows XP you can move your data files and personal settings such as display Internet and e mail sett...

Страница 232: ...der Look in your old computer s My Documents folder for personal data files Use Windows Find or Search to locate other personal data files To find files in the My Documents folder 1 In Windows XP clic...

Страница 233: ...XLS extension To find files using Search 1 Click Start Search then click All Files or Folders or For Files or Folders The Search Results window opens 2 Use Windows Search to locate data files by file...

Страница 234: ...d To use the Internet Connection Wizard 1 Click Start All Programs Accessories Communications then click New Connection Wizard The New Connection Wizard window opens 2 Configure your Internet settings...

Страница 235: ...se steps To reinstall your old printer 1 Exit Windows and turn off your computer 2 Connect your parallel port printer 3 Turn on your printer then your computer 4 If Windows detects your printer instal...

Страница 236: ...are graphics programs or games Spend some time going through your old computer s Start and Programs menus making note of any programs you want to install on your new computer Locate your original prog...

Страница 237: ...gnetic fields can erase data on both diskettes and hard drives Never turn off your computer when the hard drive indicator is on because data on the hard drive could be lost or corrupted Avoid subjecti...

Страница 238: ...t Maintenance task Immediately after purchase Monthly When needed See Create an emergency diskette X page 233 Check for viruses X X page 235 Manage hard drive space X page 238 Clean up hard drives X X...

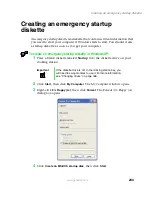
Страница 239: ...er To create an emergency startup diskette in Windows XP 1 Place a blank diskette labeled Startup into the diskette drive on your docking station 2 Click Start then click My Computer The My Computer w...

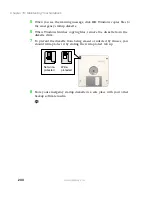
Страница 240: ...skette 6 When Windows finishes copying files remove the diskette from the diskette drive 7 To prevent the diskette from being erased or infected by viruses you should write protect it by sliding the w...

Страница 241: ...Using your Norton AntiVirus program to check files and programs that are on diskettes attached to e mail messages or downloaded from the Internet Checking all programs for viruses before installing t...

Страница 242: ...To scan for viruses 1 Click Start All Programs Norton AntiVirus then click Norton AntiVirus 2002 Norton AntiVirus opens 2 Click Scan for Viruses 3 Click the type of scan you want to make in the Scan...

Страница 243: ...t off for at least 30 seconds 3 Turn on the computer and rescan for the virus To update Norton AntiVirus 1 Click Start All Programs Norton AntiVirus then click LiveUpdate Norton AntiVirus The LiveUpda...

Страница 244: ...To check hard drive space 1 In Windows XP click Start then click My Computer OR In Windows 2000 double click the My Computer icon 2 Right click the drive that you want to check for available file spa...

Страница 245: ...then click My Computer OR In Windows 2000 double click the My Computer icon 2 Right click the hard drive that you want to delete files from for example Local Disk C then click Properties The Properti...

Страница 246: ...e for physical flaws and file and folder problems This program corrects file and folder problems and marks flawed areas on the hard drive so that Windows does not use them If you use your computer sev...

Страница 247: ...or example Local Disk C then click Properties The Properties dialog box opens 3 Click the Tools tab 4 Click Check Now 5 Click the options to use then click Start For help press F1 Windows checks the d...

Страница 248: ...ata on the drive so that each file is stored as one unit rather than as multiple pieces scattered across different areas of the drive Defragmenting the information stored on the drive can improve hard...

Страница 249: ...k the hard drive that you want to defragment for example Local Disk C then click Properties The Properties dialog box opens 3 Click the Tools tab 4 Click Defragment Now 5 If Disk Defragmenter does not...

Страница 250: ...y to a writable CD if you have a CD RW or combination DVD CD RW drive or to diskettes Use a backup device such as a CD R CD RW or Zip drive to do a complete hard drive backup see Creating CDs using yo...

Страница 251: ...essories System Tools then click Scheduled Tasks The Scheduled Tasks window opens 2 Double click Add Scheduled Task The Scheduled Tasks Wizard window opens 3 Click Next then click the task you want to...

Страница 252: ...y components Use a damp lint free cloth to clean the computer and other parts of your system Do not use abrasive or solvent cleaners because they can damage the finish on components Your computer is c...

Страница 253: ...ter to clean the screen Squirt a little water on the cloth never directly on the screen and wipe the screen with the cloth Cleaning the mouse If you have a mouse and the mouse pointer begins moving er...

Страница 254: ...com 3 Remove the retaining ring and mouse ball 4 Remove any dust lint or dirt from the mouse ball with a soft cloth 5 Clean the mouse rollers with a cotton swab dipped in isopropyl alcohol 6 Replace t...

Страница 255: ...reinstalling software from your Gateway Restoration CDs make sure that you have tried these steps first Use the diagnostics and troubleshooting tools found in HelpSpot click Start then click Help and...

Страница 256: ...is a problem with a device driver If you just reinstalled Windows XP the device drivers were automatically reinstalled If you just reinstalled Windows 2000 reinstall the device drivers by following th...

Страница 257: ...ice driver you want to reinstall click the Find More button at the bottom of the window to complete the list of available device drivers 8 Click Manual Installation then select a single device driver...

Страница 258: ...s XP click Start then click Help and Support Important If your system came equipped with a wireless device only use the drivers approved for the country the device will be used in See the red Drivers...

Страница 259: ...ystem Restoration Kit program starts 5 If the Welcome to the System Restoration Kit window opens close it by clicking OK 6 Click the Update tab 7 Click Check Now The Connect window opens 8 Install ava...

Страница 260: ...Run dialog box opens 3 In the Open text box type d runmenu exe where d is the drive letter of your CD RW DVD or combination DVD CD RW drive 4 Click OK The System Restoration Kit program starts 5 If th...

Страница 261: ...f a setup wizard opens when you restart your computer follow the on screen instructions To reinstall Works Suite including Word games or other programs from a CD 1 If you just reinstalled Windows go t...

Страница 262: ...are reinstalling Windows XP the Restoration CDs automatically reinstall the hardware device drivers and some programs as well If you are reinstalling Windows 2000 you need to install the hardware devi...

Страница 263: ...your CD RW DVD or combination DVD CD RW drive then press any key to continue 10 Wait while the setup program copies files to your hard drive When the computer restarts do NOT press any key to boot fro...

Страница 264: ...ng software by following the instructions in To reinstall Works Suite including Word games or other programs from a CD on page 255 To reinstall Windows 2000 and the device drivers 1 Insert the red Dri...

Страница 265: ...sues This chapter also includes information about Telephone support Automated troubleshooting systems Tutoring and training If the suggestions in this chapter do not correct the problem see Getting He...

Страница 266: ...ory bay cover while your computer is turned on while the battery is installed and while the modem cable network cable and AC power adapter are connected Make sure you are correctly grounded before acc...

Страница 267: ...ite down the exact message The message may help Gateway Technical Support in diagnosing and fixing the problem If you added or removed modules or peripheral devices review the installation procedures...

Страница 268: ...agnostic and system information tool that can test your computer and determine its configuration PC Doctor provides 85 professional diagnostic tests directly from your computer This support tool is av...

Страница 269: ...may be experiencing some temporary memory problems Shut down and restart your computer An audio CD does not produce sound Make sure the CD label is facing up Make sure the volume control on your noteb...

Страница 270: ...trol DVD title exports and help reduce illegal disc distribution To be able to play a DVD the regional code on the disc and the regional code for the DVD drive must match The regional code on your DVD...

Страница 271: ...IRQs and their hardware assignments are displayed To check IRQ usage in Windows 2000 1 Click Start Settings then click Control Panel The Control Panel window opens 2 Double click the System icon clic...

Страница 272: ...kettes are IBM compatible Make sure the diskette you are using is IBM compatible Try a different diskette Occasionally diskettes are flawed and cannot be read by the diskette drive You receive a Disk...

Страница 273: ...the display settings For more information see Adjusting the screen and desktop settings on page 148 The screen has pixels that are always dark or too bright This condition is normal and inherent in t...

Страница 274: ...checking program For more information see Checking the hard drive for errors on page 240 The hard drive cannot be accessed or you receive a General failure reading drive C error message If a diskette...

Страница 275: ...try a different URL If the error message still appears disconnect from the ISP connection and close your browser then reconnect and open the browser If you still get the error your ISP may be having...

Страница 276: ...yboard stuck or Key failure error message Make sure that nothing is resting on the keyboard Make sure a key is not stuck Press each key to loosen a key that might be stuck then restart the computer Me...

Страница 277: ...then click Control Panel The Control Panel window opens If your Control Panel is in Category View click Printers and Other Hardware OR In Windows 2000 click Start Settings then click Control Panel Th...

Страница 278: ...rt for help See if the modem works with a different communications program The problem may be with just one program Your 56K modem does not connect at 56K Current FCC regulations restrict actual data...

Страница 279: ...See Left side on page 3 to make sure that the connections have been made correctly If the modem shares the telephone line with another device make sure the telephone line is not in use for example som...

Страница 280: ...al getting acquainted conversation between the two modems that establishes connection speeds and communication protocols You may hear unusual handshaking sounds when the modems first connect If the ha...

Страница 281: ...oes not accept your password Make sure that CAPS LOCK and PAD LOCK are turned off then retype the password You forgot your startup password The password feature which is set in the BIOS Setup utility...

Страница 282: ...s installed correctly For more information see Changing batteries on page 131 Make sure the battery is fully recharged For more information see Recharging the battery on page 129 Make sure the battery...

Страница 283: ...ou want to be the default printer then click Set as Default Reinstall the printer driver Use the guide that came with your printer for instructions on installing the printer driver You receive a Print...

Страница 284: ...ge After adding paper make sure the printer is online Most printers have an online offline button that you need to press after adding paper Sound You are not getting sound from the built in speakers M...

Страница 285: ...w gateway com Video The external monitor is not working Make sure you have pressed FN LCD CRT to activate the external monitor option Make sure that the monitor is turned on and that the video cable i...

Страница 286: ...refer to the manufacturer s documentation and technical support resources If you have how to questions about using a program consult Online Help Printed documentation The Microsoft Windows documentat...

Страница 287: ...ged to your credit card 900 555 4695 charged to your telephone bill Gateway Technical Support Talk to a Gateway Technical Support representative about a non tutorial technical support question Refer t...

Страница 288: ...wing resources The printed or online documentation that came with your hardware or software In many cases additional product information and online documentation for Gateway supplied hardware can be f...

Страница 289: ...grams including Microsoft Word Excel and PowerPoint www gateway com country Gateway Learning Libraries A variety of courses and tutorials are available on CD Select from several easy to use learning l...

Страница 290: ...284 Chapter 17 Troubleshooting www gateway com...

Страница 291: ...ear water or a heat source such as a radiator Set up the system on a stable work surface The product should be operated only from the type of power source indicated on the rating label If your compute...

Страница 292: ...laceable CMOS battery on the system board There is a danger of explosion if the CMOS battery is replaced incorrectly Replace the battery with the same or equivalent type recommended by the manufacture...

Страница 293: ...are safe for use Regardless of the power levels care should be taken to minimize human contact during normal operation As a general guideline a separation of 20 cm 8 inches between the wireless devic...

Страница 294: ...ess device do not operate the wireless device unless all covers and shields are in place and the system is fully assembled Warning Wireless devices are not user serviceable Do not modify them in any w...

Страница 295: ...ter per FCC Part 15 This device has been tested and found to comply with the limits for a Class B digital device pursuant to Part 15 of the FCC rules These limits are designed to provide reasonable pr...

Страница 296: ...0STM This device complies with Part 15 of the FCC Rules Operation of this product is subject to the following two conditions 1 this device may not cause harmful interference and 2 this device must acc...

Страница 297: ...e telephone company may request that you disconnect the equipment until the problem is resolved The telephone company may make changes in its facilities equipment operations or procedures that could a...

Страница 298: ...exposure limits as set by Industry Canada Operation of this device is subject to the following two conditions 1 This device may not cause harmful interference and 2 this device must accept any interfe...

Страница 299: ...o certified equipment should be made by an authorized Canadian maintenance facility designated by the supplier Any repairs or alterations made by the user to this equipment or equipment malfunctions m...

Страница 300: ...on the system label As a general guideline a separation of 20 cm 8 inches between the wireless device and the body for use of a wireless device near the body this does not include extremities is typi...

Страница 301: ...d as Class 1 Laser Products under a US Department of Health and Human Services DHHS Radiation Performance Standard Should the unit ever need servicing contact an authorized service location Warning Us...

Страница 302: ...a friend in the business slogan are registered trademarks and black and white spotted box logo GATEWAY Gateway Astro Gateway Work Gateway Connected touch pad Gateway Connected music player Gateway Cy...

Страница 303: ...editing track information 114 inserting 89 playing 104 110 112 troubleshooting 263 audio file streaming 175 automobile power adapter 12 133 AVI file 108 B background 154 backing up files 244 battery 1...

Страница 304: ...using 88 Certificate of Authenticity 11 changing bay modules 166 cleaning case 246 component exteriors 246 keyboard 247 mouse 247 screen 247 clicking 42 close button 60 color changing depth 149 changi...

Страница 305: ...44 digital audio S PDIF jack 18 digital audio jack 18 digital audio S PDIF jack 18 Disk Cleanup 239 Disk Defragmenter 242 diskette inserting 87 write protect 234 diskette drive 87 eject button 86 repl...

Страница 306: ...le 86 replacing drive module 166 troubleshooting 263 using 88 E electrostatic discharge ESD 168 e mail 77 82 address 82 checking for messages 83 sending 83 emergency startup diskette 233 EmPower power...

Страница 307: ...aying a video 51 searching 50 starting 48 Using your computer link 49 Hibernate mode 134 139 140 home office network 174 HPNA 177 179 221 hyperlinks 79 I i Link 3 20 46 119 IEEE 1394 port 3 20 46 119...

Страница 308: ...ion 37 LCD brightness 39 LCD CRT 38 mute 38 navigation 37 39 numeric 37 Pad Lock 37 38 Pause 38 power status 38 Scroll Lock 38 Standby 38 Status 38 system 37 toggle display 38 volume 38 Windows 37 L l...

Страница 309: ...ting 113 editing track information 114 playing 108 streaming 175 MPEG file 108 streaming 175 multimedia playing audio CD 104 105 playing DVD 109 recording audio 106 using Windows Media Player 104 108...

Страница 310: ...ine help 48 52 opening documents 72 files 42 folders 42 LCD panel 2 notebook 2 programs 42 58 shortcut menu 42 option bays changing modules 166 ORiNOCO Client Manager configuring 209 installing 208 P...

Страница 311: ...us indicator 35 status pop up menu 38 surge protector 26 troubleshooting 276 turning on notebook 27 printer 13 default 276 installing 46 parallel port 20 sharing 174 troubleshooting 276 USB port 3 5 2...

Страница 312: ...67 279 screen objects getting information 42 moving 43 selecting 42 screen saver 157 Scroll Lock status indicator 35 38 system key 38 Search utility 68 searching for files and folders 66 67 in HelpSpo...

Страница 313: ...81 resources 280 Technical Support 281 tips before contacting 280 tutorial service 281 telephone line protector 144 line tester 144 receiving and viewing faxes 126 sending a fax 124 sending faxes from...

Страница 314: ...ave IV 119 virus 235 protecting against 81 235 removing with Norton AntiVirus 236 volume adjusting 38 99 102 adjusting modem 274 controls 99 102 muting 38 99 102 W waking up your notebook 28 WAV file...

Страница 315: ...19 creating network 192 209 label 11 peer to peer networking 198 212 residential gateway 211 setting up 183 208 signal strength 206 220 turning off 206 219 turning on 206 219 using while traveling 144...

Страница 316: ...310...
Отзывы: