62
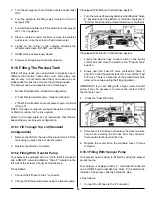
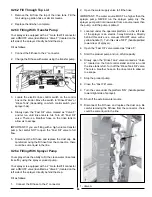
Fill as follows:
1. Connect the fill hose to the 2” connector.
2. Charge the fill hose with water using the transfer pump.
3. Turn the manual three way ball valve identified as
“Valve E” (located under platform on left side of sprayer)
to “Rinse Tank” (Point handle forward).
4.
Slowly open the “Fast Fill” valve marked as “Valve F”
and let run until rinse tank is full. Turn off “Fast Fill”
valve. There is a breather hose on the rinse tank to
allow air to escape.
IMPORTANT: If you are filling with a high volume transfer
pump, be careful NOT to open the “Fast Fill” valve to full
flow.
5.
Disconnect the fill hose and replace the dust cap. Be
careful removing the fill hose from the connector - there
could be some liquid in the line.
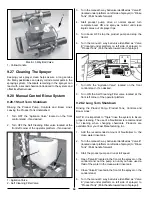
9.25.4 Filling With Sprayer Pump
Your sprayer has the ability to fill the clean water rinse tank
its self by using the sprayer product pump.
Your sprayer is equipped with a 2” male fast fill connector
and a ON/OFF valve (identified as “Valve F”) located on the
left side of the sprayer, directly behind the step.
Fill as follows:
1. Connect the fill hose to the 2” connector.
2. Open the water supply valve to fill the hose.
IMPORTANT: The water source MUST be higher than the
sprayer pump. NEVER run the sprayer pump dry. The
sprayer pump will not draw water from a source lower than
the pump, until the pump is primed.
3. Turn the manual 3 way ball valve identified as “Valve
E” (located under platform on left side of sprayer to the
“OFF” position (Point handle down).
4.
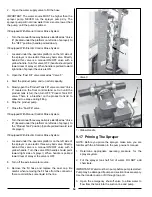
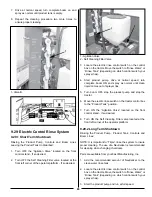
Open the “Fast Fill” valve marked as “Valve F.”
5.
Start the product pump and run at full capacity.
6.
Slowly open the “Rinse Tank” valve marked as “Valve
A” located on the front control stand and let run until
the rinse tank is full. Turn off the “Rinse Tank Fill” valve.
There is a breather hose on the rinse tank to allow air
to escape.
7. Stop the product pump.
8. Return the 3 way ball valve to the desired position
(“Rinse Tank” or “Product Tank”).
9. Close the “Fast Fill” valve.
10. Shut off the external water source.
11. Disconnect the fill hose and replace the dust cap. Be
careful removing the fill hose from the connector - there
could be some liquid in the line.
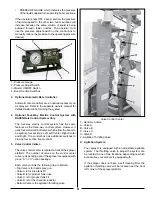
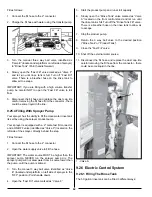
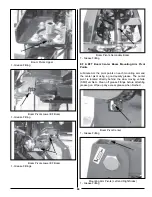
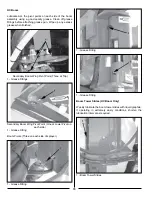
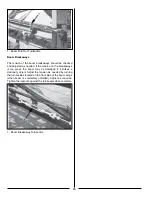
1 - Valve A
9.26 Electric Control System
9.26.1 Filling The Rinse Tank
The 50 gallon rinse tank can be filled 3 different ways:
Содержание BW750
Страница 18: ...18...
Страница 19: ...19 Decal A Decal B Decal C Decal D...
Страница 20: ...20 Decal E Decal F Decal G Decal H Decal I Decal J...
Страница 21: ...21 Decal K Decal L...
Страница 36: ...36 9 6 Spray Tip Wear...
Страница 43: ...43 9 8 TeeJet Air Induction Spray Tips 9 8 1 20 Inch Spacing At Various Speeds And Pressures...
Страница 49: ...49 9 10 TeeJet FloodJet Wide Angle Flat Spray Tips 9 10 1 40 Inch Spacing At Various Speeds And Pressures...
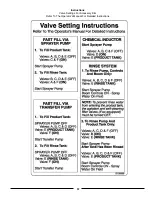
Страница 57: ...57 Instructions Valve Settings For Accessory Kits Refer To The Operator s Manual For Detailed Instructions...
Страница 81: ...81 12 3 Raven Console Calibration Information...
Страница 83: ...83 Notes...

