


76
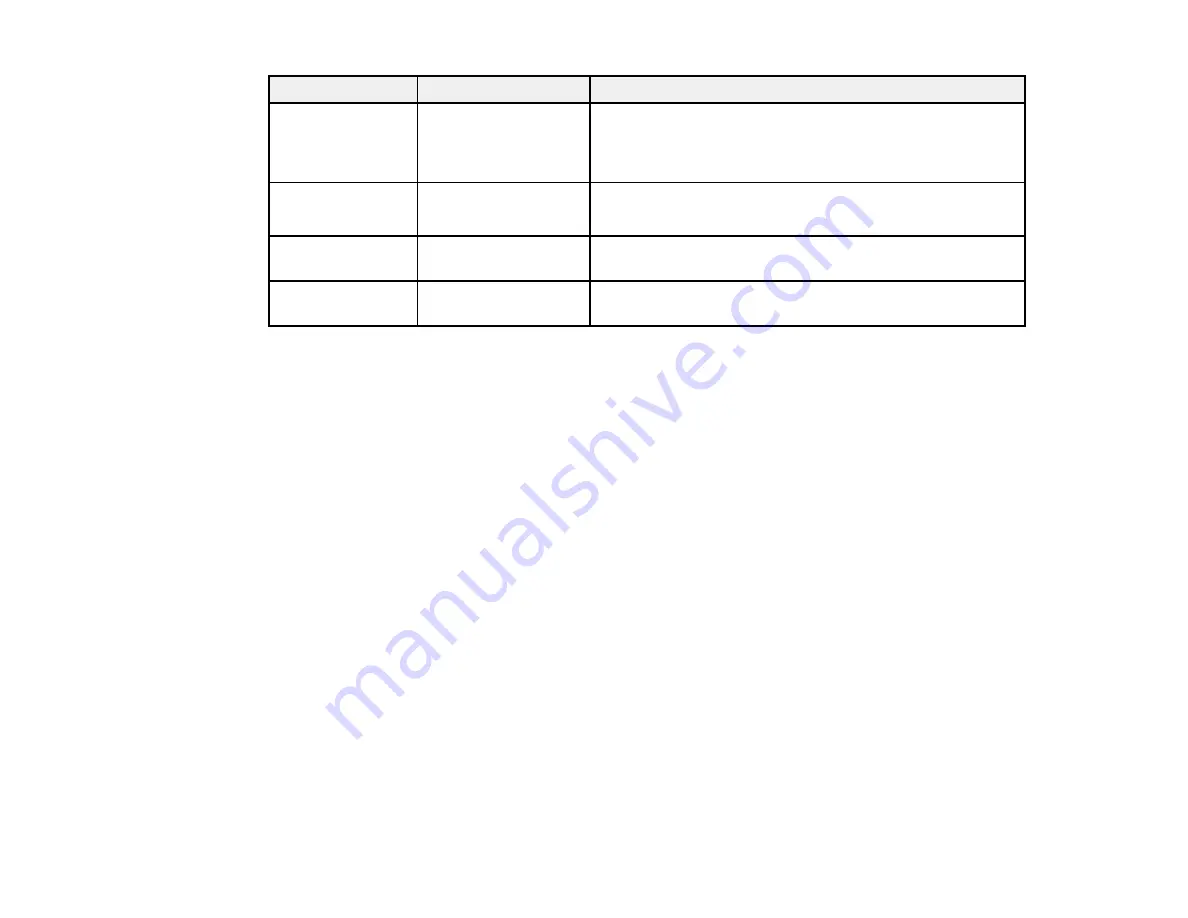
Setting name
Available options
Description
Secure
Connection
None
STARTTLS
SSL/TLS
Selects the encryption protocol used by the email server.
Used with the
SMTP AUTH
or
Off
authentication methods.
Certificate
Validation
Enable
Disable
Determines whether the CA Certificate is validated. You
must import a CA certificate to use this setting.
POP3 Server
Address
—
Lets you enter the address of the POP3 server using IPv4
or FQDN format.
POP3 Server Port
Number
—
Lets you enter the port number of the POP3 server. The
default port is 25.
Parent topic:
Configuring Email Server Settings
Changing or Updating Network Connections
See these sections to change or update how your product connects to a network.
Accessing the Web Config Utility
Changing a USB Connection to a Wi-Fi Connection
Changing a Wi-Fi Connection to a Wired Network Connection
Connecting to a New Wi-Fi Router
Disabling Wi-Fi Features
Parent topic:
Accessing the Web Config Utility
You can select your product's network settings and confirm its operating status using a web browser.
You do this by accessing your product's built-in Web Config utility from a computer or other device that is
connected to the same network as your product.
Note:
You can also access the Web Config utility from the product information area in the Epson Smart
Panel app.
1.
Print a network status sheet.
2.
Locate the IP address for your product that is listed on the network status sheet.
Содержание C11CH67201
Страница 1: ...WF 7820 WF 7840 Series User s Guide ...
Страница 2: ......
Страница 14: ......
Страница 37: ...37 Product Parts Inside 1 Document cover 2 Document mat 3 Scanner glass 4 Control panel ...
Страница 52: ...52 Parent topic Product Basics Related tasks Using Epson Email Print Related topics Wi Fi or Wired Networking ...
Страница 145: ...145 10 Select the Layout tab 11 Select the orientation of your document as the Orientation setting ...
Страница 183: ...183 You see an Epson Scan 2 window like this ...
Страница 185: ...185 You see an Epson Scan 2 window like this ...
Страница 197: ...197 1 Click the Settings button You see a screen like this 2 Click the File Name Settings tab ...
Страница 199: ...199 You see a screen like this 2 Click the Save Settings tab ...
Страница 202: ...202 You see a screen like this 2 Click the Customize Actions tab ...
Страница 204: ...204 You see this window ...
Страница 288: ...288 You see a window like this 5 Click Print ...


