EPSON AcuLaser C4000/C4100/C3000
Revision F
Troubleshooting
Level 2 FIP
3-215
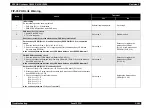
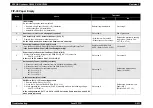
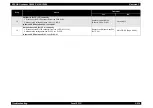
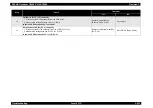
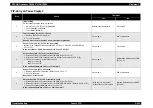
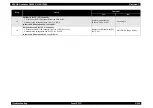
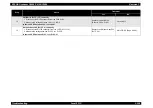
FIP-41 Full Stack
Step
Check
Treatment
Yes
No
1
Initial setting
Do the following checks show a problem?
• Sensor Paper (PL7.1.4) (Full Stack) installation
• Actuator Full Stack (PL7.1.5) installation
Reinstall applicable parts.
Go to step 2.
2
Actuator Full Stack (PL7.1.5)
Operate the full stack actuator manually, and look at the relationship between its movement
and the paper sensor (PL7.1.4) (Full Stack).
Does the Actuator Full Stack move smoothly?
• With the tool: Go to step 3.
• Without the tool: Go to step 4.
Replace the Actuator Full Stack.
(Refer to Ch4-4.2.10.3)
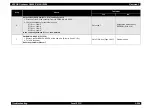
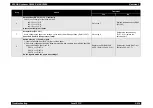
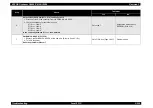
3
Sensor Paper (PL7.1.4) (Full Stack) check
Use the Sensor Paper (Full Stack) diagnosis tool to carry out a Digital Input Test.
Is the Sensor Paper (Full Stack) functioning normally?
Replace the PWBA MCU &
HVPS. (Refer to Ch4-4.2.18.1)
Go to step 4.
4
Power supply to Sensor Paper (PL7.1.4) (Full Stack)
1. Remove the Sensor Paper (Full Stack).
2. Measure the voltage between J134-3 <=> P/J134-2.
Is there 3.3V DC between P/J134-3 <=> P/J134-2?
Go to step 5.
Go to step 6.
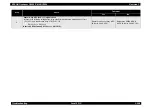
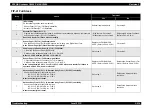
5
Sensor Paper (PL7.1.4) (Full Stack) signal check
1. Operate the Actuator Full Stack (PL7.1.5) manually.
2. Measure the voltage between P/J134-1 <=> P/J134-2.
Is the voltage between P/J13-3 <=> P/J13-2 +3.3V DC when the Actuator Full Stack is
operated, and 0V DC when it is released?
Replace the PWBA MCU &
HVPS. (Refer to Ch4-4.2.18.1)
Replace the Sensor Paper (Full
Stack). (Refer to Ch4-4.2.10.2)
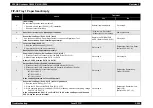
6
Harness Assy Front 2 (PL7.1.2), Harness Assy Front 1 (PL15.2.7) continuity
Check the continuity for the following lines.
J13-5 <=> P139-7/J139-5 <=> J134-2
J13-6 <=> P139-6/J139-6 <=> J134-1
Is there continuity in all lines?
Go to step 7.
Replace the Harness with no
continuity.
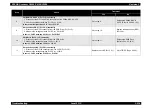
7
Harness Assy Front 2 (PL7.1.2), Harness Assy Front 1 (PL15.2.7) continuity
Check the continuity for the following lines.
J13-4 <=> P139-8/J139-4 <=> J134-3
J13-5 <=> P139-7/J139-5 <=> J134-2
Is there continuity in all lines?
Go to step 8.
Replace the Harness with no
continuity.
Содержание AcuLaser C3000 Series
Страница 1: ...EPSON AcuLaserC4000 AcuLaserC4100 AcuLaserC3000 Color Laser Page Printer SEPG01012 SERVICE MANUAL ...
Страница 20: ...C H A P T E R 1 PRODUCTDESCRIPTIONS ...
Страница 71: ...C H A P T E R 2 OPERATINGPRINCIPLES ...
Страница 118: ...C H A P T E R 3 TROUBLESHOOTING ...
Страница 318: ...C H A P T E R 4 DISASSEMBLYANDASSEMBLY ...
Страница 472: ...C H A P T E R 5 ADJUSTMENT ...
Страница 477: ...C H A P T E R 6 MAINTENANCE ...
Страница 491: ...C H A P T E R 7 AcuLaserC4100 ...
Страница 548: ......
Страница 549: ......
Страница 550: ......
Страница 551: ......
Страница 552: ......
Страница 553: ......
Страница 554: ......
Страница 555: ...C H A P T E R 8 AcuLaserC3000 ...
Страница 579: ...Model AcuLaser C3000 Board C569MAIN BOARD Sheet 1 of 5 Rev B ...
Страница 580: ...Model AcuLaser C3000 Board C569MAIN BOARD Sheet 2 of 5 Rev B ...
Страница 581: ...Model AcuLaser C3000 Board C569MAIN BOARD Sheet 3 of 5 Rev B ...
Страница 582: ...Model AcuLaser C3000 Board C569MAIN BOARD Sheet 4 of 5 Rev B ...
Страница 583: ...Model AcuLaser C3000 Board C569MAIN BOARD Sheet 5 of 5 Rev B ...
Страница 584: ...C H A P T E R 9 APPENDIX ...
Страница 617: ...EPSON AcuLaser C4000 C4100 C3000 Revision F Appendix Wiring Diagrams 9 602 Figure 9 6 P J Location 6 ...
Страница 644: ...EPSON AcuLaser C4000 C4100 C3000 Revision F Appendix Wiring Diagrams and Signal Information 9 629 ...
Страница 674: ......
Страница 675: ......
Страница 676: ......
Страница 677: ......
Страница 678: ......
Страница 679: ......
Страница 680: ......


