LT5
Installation
Hauser
63
5.12.6 Conster installation
Installation procedure
Install the conster after installing the measuring tape.
• Install the conster after installing the measuring tape.
• Never remove your hand when winding the conster. Letting it go may result in
injury due to the spring recoiling.
• Handle the conster with care, as removing it from the conster drum (large) or
applying excessive force may result in uneven torque generation, which may lead to
inaccurate readings.
• When winding the conster from the small conster drum to the large conster drum,
keep a firm grip on the large drum until the measuring tape is taut.
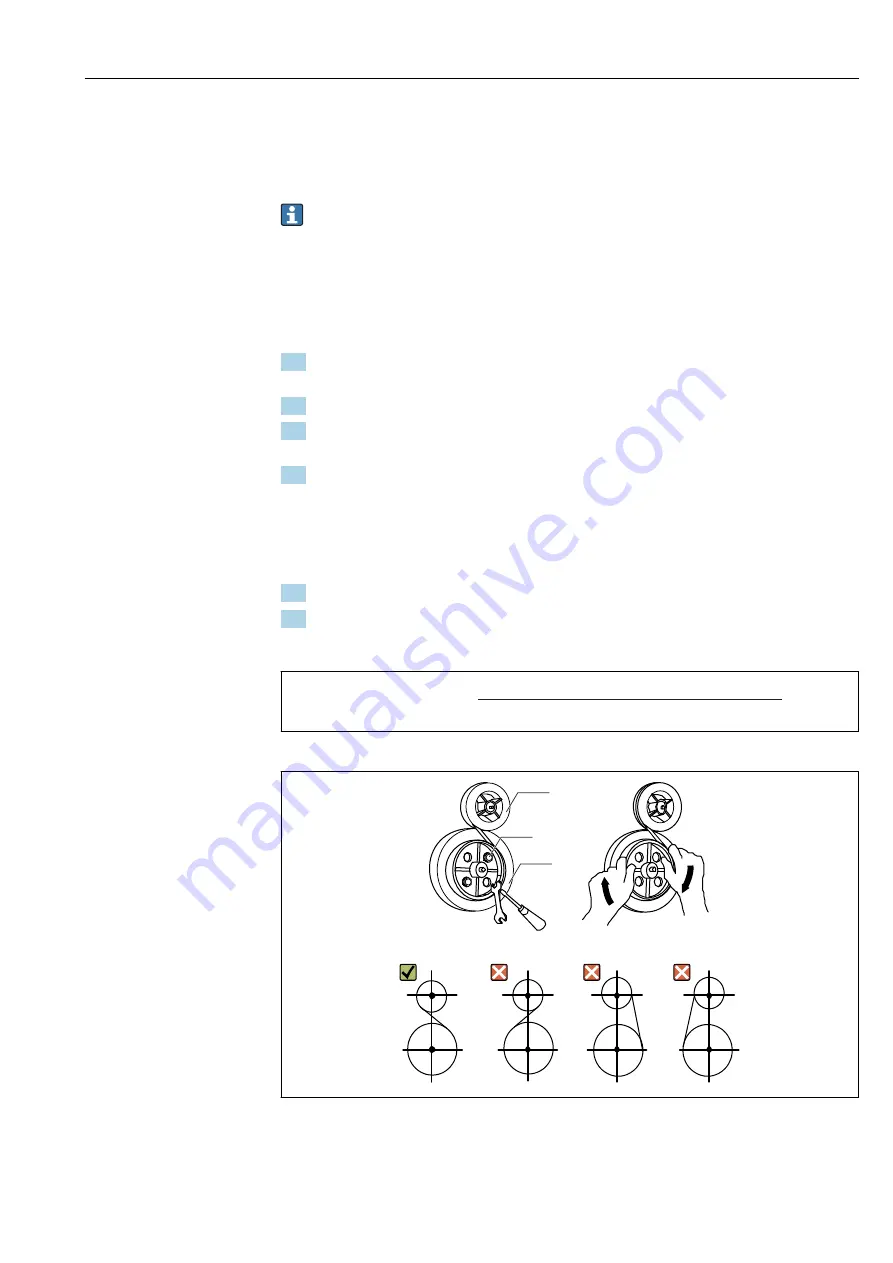
1. After confirming that the locking screw has been removed, secure the head of the
conster to the conster drum (large) with the bolts and nuts.
2. Rotate the conster drum (large) in the direction indicated by the arrow.
3. When securing the conster drum, rotate the tape drum counterclockwise to tauten
the tape before securing the conster drum.
4. When the tank is empty, coil the tape twice around the conster drum (small) and
secure it to the tape drum with locking screws.
If the tank contains liquid, measure the surface level of the fluid and use the
following equation to determine the number of times the tape should be coiled.
Coil the tape around the conster drum (large) the exact number of times required
based on the calculation.
5. Close the gauge head cover.
6. Close the gland of LT5-4 or LT5-6 rear cover.
This completes the conster installation process.
Number of turns =
Tank height (measuring span) - Actual liquid level
0.6 (unit: m)
A0041217-EN
1
2
3
A0041218
50
Conster installation
1
Conster drum (small)
2
Locking screw
3
Conster drum (large)


