Installing System Board Options 8-9
9. When the
System Memory
total is correct, press the <Esc> key to exit the System
Setup program.
10. Run the Dell Diagnostics to verify that the DIMMs are operating properly.
See your
Diagnostics and Troubleshooting Guide
for information on running the
diagnostics and troubleshooting any problems that may occur.
,QVWDOOLQJD',00
If a DIMM is already installed in the socket you want to use, you must remove it. To
do so, follow the instructions in the next subsection, Removing a DIMM.
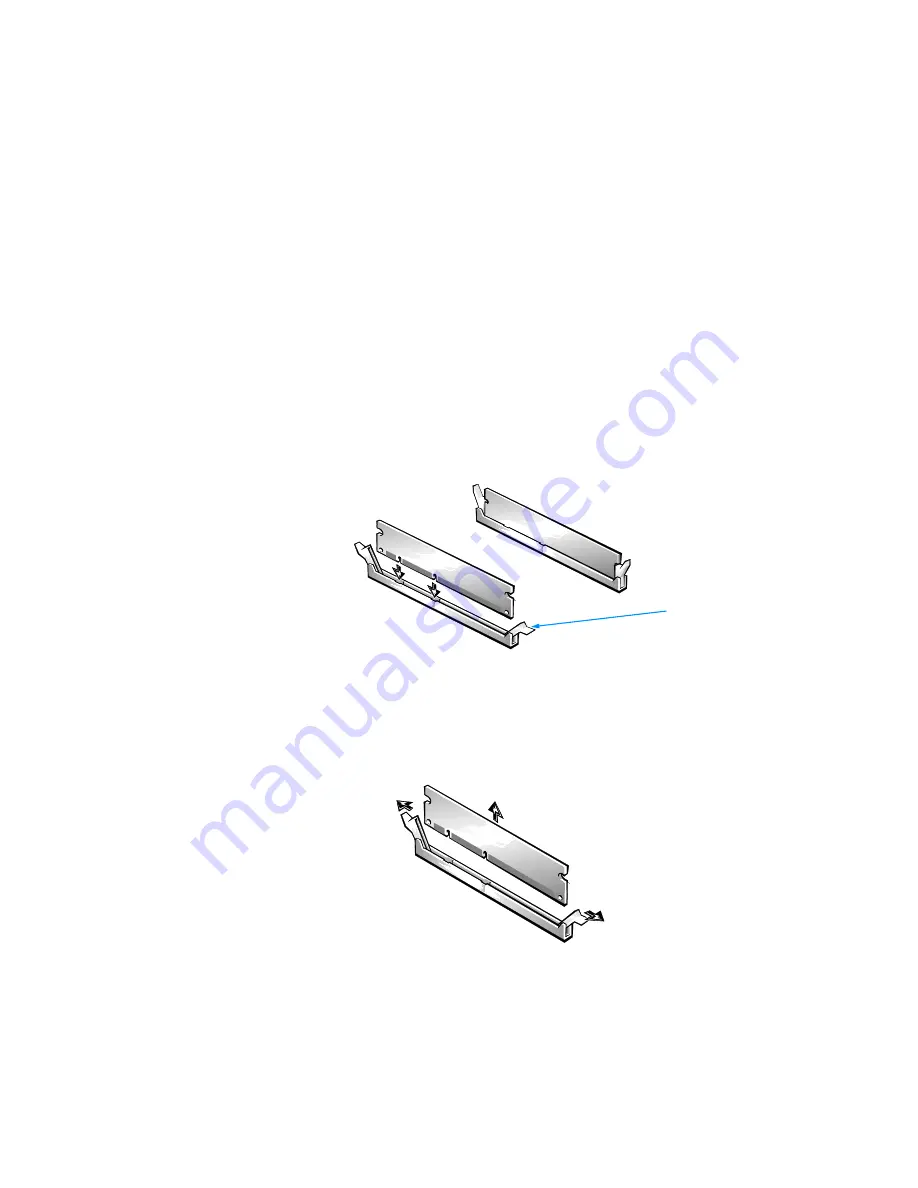
Use the following procedure to install a DIMM (see Figure 8-6):
1.
Locate the plastic securing clips at each end of the socket. Press the clips
outward until they snap open.
2. Press the DIMM straight into the slot running down the center of the socket until
the securing tabs snap into place around the ends of the DIMM.
)LJXUH,QVWDOOLQJD',00
5HPRYLQJD',00
To remove a DIMM, press the securing clips outward simultaneously until the DIMM
disengages from the socket (see Figure 8-7). It should pop out slightly.
)LJXUH5HPRYLQJD',00
securing
clips (2)
2.
1.
Содержание Precision WorkStation 210
Страница 1: ... ZZZ GHOO FRP HOO 3UHFLVLRQ RUN6WDWLRQ 0LQL 7RZHU 6 VWHPV 86 5 6 8 ...
Страница 8: ...x ...
Страница 26: ...xxx ...
Страница 76: ...3 26 Dell Precision WorkStation 210 Mini Tower Systems User s Guide ...
Страница 112: ...6 8 Dell Precision WorkStation 210 Mini Tower Systems User s Guide ...
Страница 136: ...8 16 Dell Precision WorkStation 210 Mini Tower Systems User s Guide ...
Страница 158: ...9 22 Dell Precision WorkStation 210 Mini Tower Systems User s Guide ...
Страница 200: ...D 10 Dell Precision WorkStation 210 Mini Tower Systems User s Guide ...
Страница 210: ...E 10 Dell Precision WorkStation 210 Mini Tower Systems User s Guide ...
Страница 218: ...F 8 Dell Precision WorkStation 210 Mini Tower Systems User s Guide ...
Страница 236: ...18 Dell Precision WorkStation 210 Mini Tower Systems User s Guide ...


