


44
7.2. How to Use the Chromakey function of the SE-1200MU
The SE-1200 MU provides users two chromakey settings including Key 1 and Key 2 buttons on the
AUX BUSES panel. Please see following examples for setting the Chromakey modes.
S t e p 1 : Please make sure that the network settings for the SE-1200MU are set and the control
software of the SE-1200MU is installed according to the
10.2 related chapters.
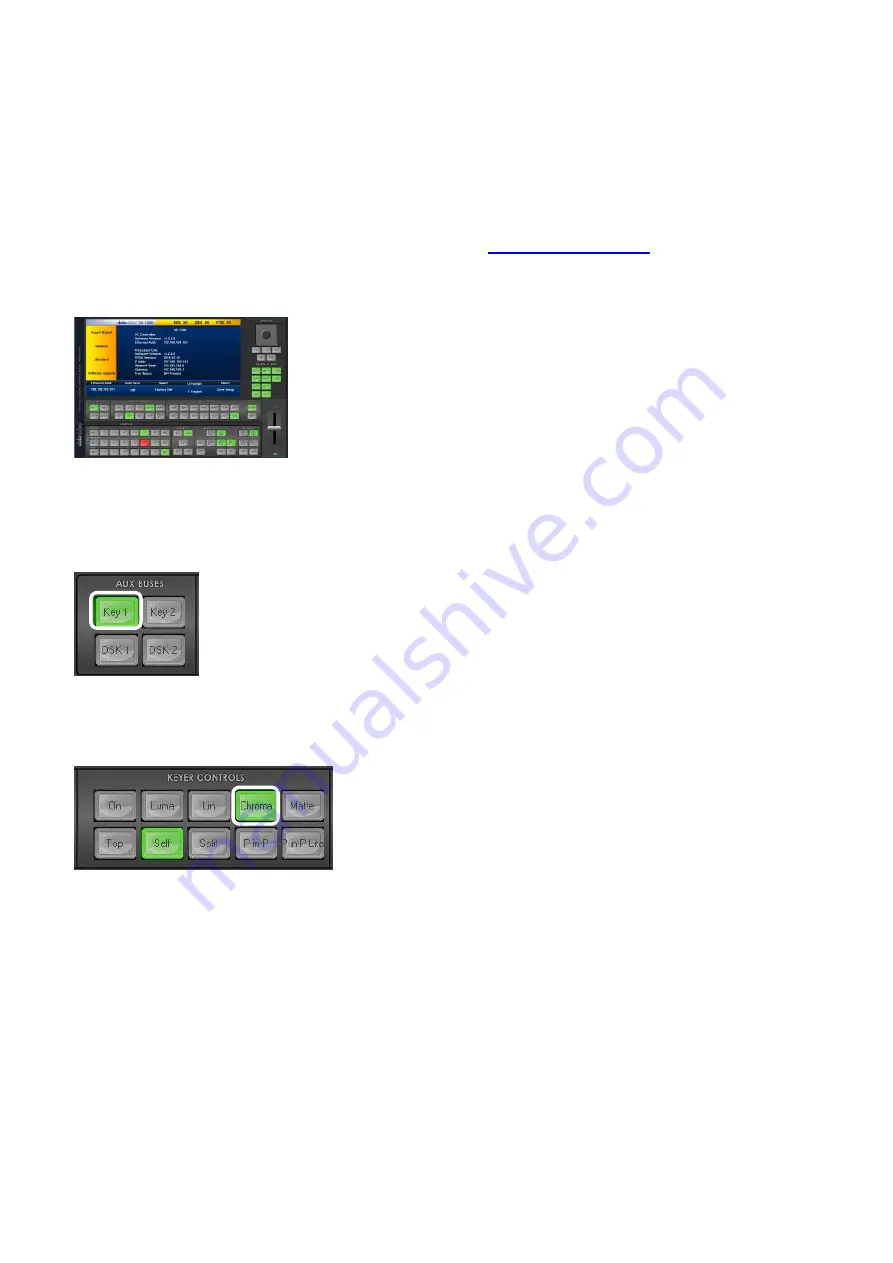
After that, please open
the software according to the 10.2 related chapters and the AUX BUSES panel will be shown as
following diagram.
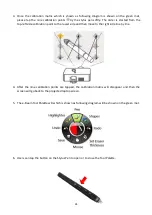
S t e p 2 : Please select your desired chromakey button such as Key 1 or Key 2 from the AUX BUSES
panel. In this example, you can select the Key 1 button.
S t e p 3 : P le as e s e l e ct y ou r de s i re d C h r om a t y pe . I n t h is e x a m p l e , y ou c a n s e l e ct
t he Ch r o m a b ut t on f r om t h e K EY E R C O N T RO LS pa ne l.
Step 4: Please select the foreground video source which is used for Chromakey. This video must
contain the object or talent for applying the chromakey effect. In this example, the green mat source
which is shot by the BC-100 is connected to the SDI 1 (Full-Body) or SDI 2 (Half-Body). After that,
please select the Input 1 button (Full Body) or Input 2 (Half-Body) from the button row of the AUX BUS.
After that, users can use the “Load Still” function to load the virtual scene still image and then to
assign this virtual scene to the input channel of Input 3 or Input 4. After that, please select the Input 3
or Input 4 button which is located on the Program button row to load the desired virtual scene to be
the background image for further synthesizing into the foreground image.
Содержание VGB-2000
Страница 1: ...VGB 2000 Instruction Manual...
Страница 7: ...7 1 2 System Diagram 2 Channel Pro Presentation System VGB 2000...
Страница 26: ...26 LBK 1 Look Back Kit Exploded View...
Страница 27: ...27 LBK1 1 1 Main Support Exploded View...
Страница 28: ...28 LBK1 1 2 22 Monitor and LCD Display Mount...
Страница 29: ...29 LBK1 1 3 22 Glass Frame Module and Hood Support Wire...
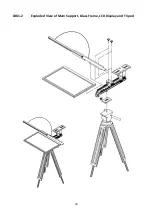
Страница 30: ...30 LBK1 2 Exploded View of Main Support Glass Frame LCD Display and Tripod...
Страница 31: ...31 LBK1 3 Look Back Kit Assembly...
Страница 71: ...71 Close Up with Chromakey Slides Close Up Interactive Pen Mark...
Страница 72: ...72 Wide Shot Interactive Pen Mark Logo Interactive Pen Mark Logo...
Страница 73: ...73 Dual Camera Effects Interactive Pen Mark Close Up Interactive Pen Mark...
Страница 74: ...74 Wide Angle with Chromakey Interactive Pen Mark Wide Shot Interactive Pen Mark Logo...
Страница 75: ...75 Interactive Pen Mark Logo Close Up with Chromakey...
Страница 76: ...76 Wide Angle with Chromakey...
Страница 79: ...79 14 Dimensions...
Страница 80: ...80 Unit mm...
Страница 83: ...83 Note...


