


45
It is no need to set the Preset source at this stage, however, after the transition is finished, it will
replace the background image.
Step 5: At this time, users can see the chromakey effect from the PVW screen. If the outcome is not
shown, please press the Key 1 PVW button (lighted in green) on the Transition Controls panel to open
the Key 1 Preview.
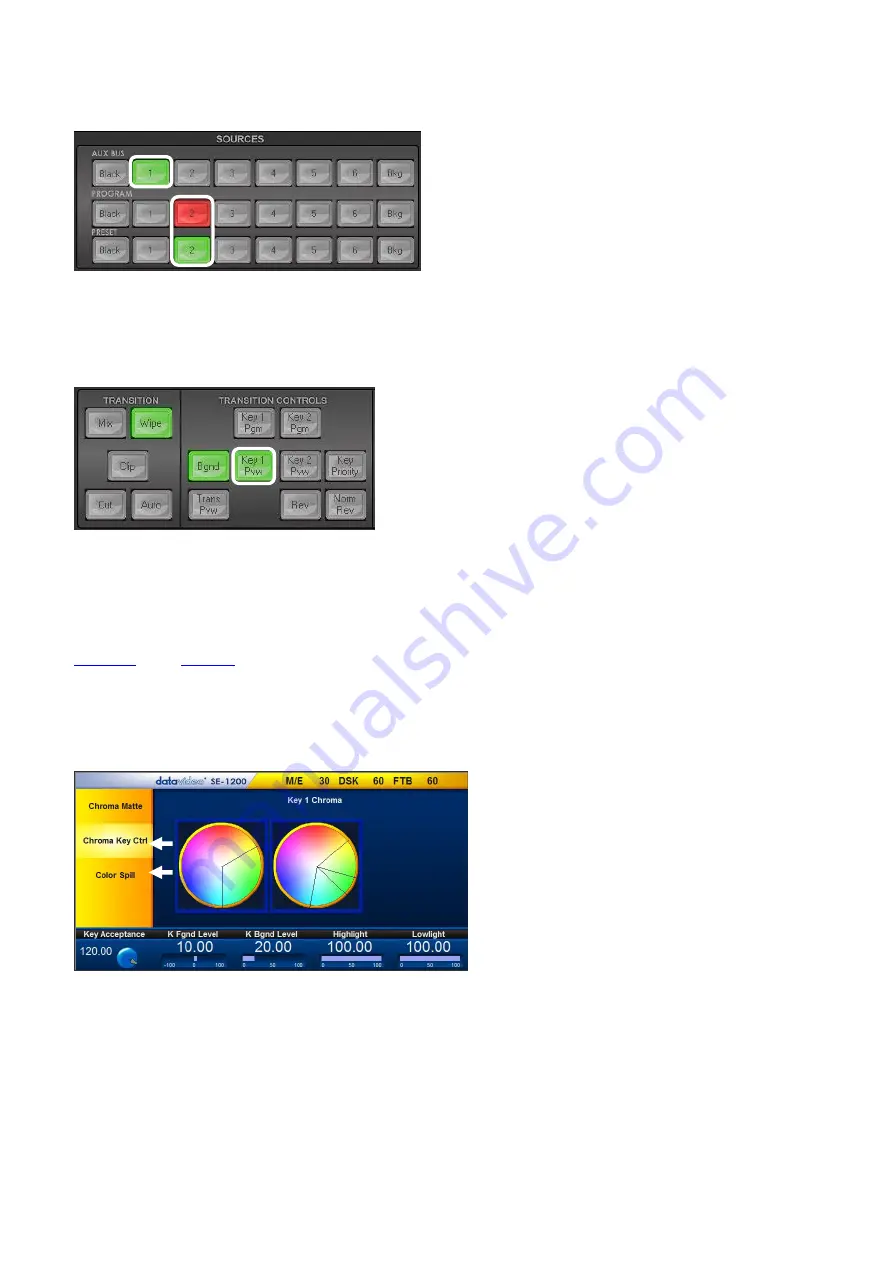
Step 6: Quick-Setting for the activated Chromakey button.
Please select the Chroma button from the MENU SELECT panel. After that, please slightly adjust the
chromakey settings according to the Chroma Key Ctrl and Color Spill which are mentioned in Chapter
O n c e t h e c h r o m a k e y s e t t i n g s a r e s e t , u s e r s c a n p r e s s t h e “ A u t o ”
b u t t o n w h i c h i s l o c a t e d a t t h e T r a n s i t i o n p a n e l f o r o p e n i n g t h e
c h r o m a k e y e f f e c t o n t h e P R O G R A M s c r e e n .
Содержание VGB-2000
Страница 1: ...VGB 2000 Instruction Manual...
Страница 7: ...7 1 2 System Diagram 2 Channel Pro Presentation System VGB 2000...
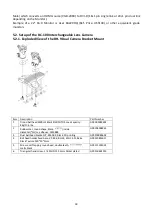
Страница 26: ...26 LBK 1 Look Back Kit Exploded View...
Страница 27: ...27 LBK1 1 1 Main Support Exploded View...
Страница 28: ...28 LBK1 1 2 22 Monitor and LCD Display Mount...
Страница 29: ...29 LBK1 1 3 22 Glass Frame Module and Hood Support Wire...
Страница 30: ...30 LBK1 2 Exploded View of Main Support Glass Frame LCD Display and Tripod...
Страница 31: ...31 LBK1 3 Look Back Kit Assembly...
Страница 71: ...71 Close Up with Chromakey Slides Close Up Interactive Pen Mark...
Страница 72: ...72 Wide Shot Interactive Pen Mark Logo Interactive Pen Mark Logo...
Страница 73: ...73 Dual Camera Effects Interactive Pen Mark Close Up Interactive Pen Mark...
Страница 74: ...74 Wide Angle with Chromakey Interactive Pen Mark Wide Shot Interactive Pen Mark Logo...
Страница 75: ...75 Interactive Pen Mark Logo Close Up with Chromakey...
Страница 76: ...76 Wide Angle with Chromakey...
Страница 79: ...79 14 Dimensions...
Страница 80: ...80 Unit mm...
Страница 83: ...83 Note...


