background image

SR200 & SR300 Card Printers and LM200 & LM300 Laminators User’s Guide

51


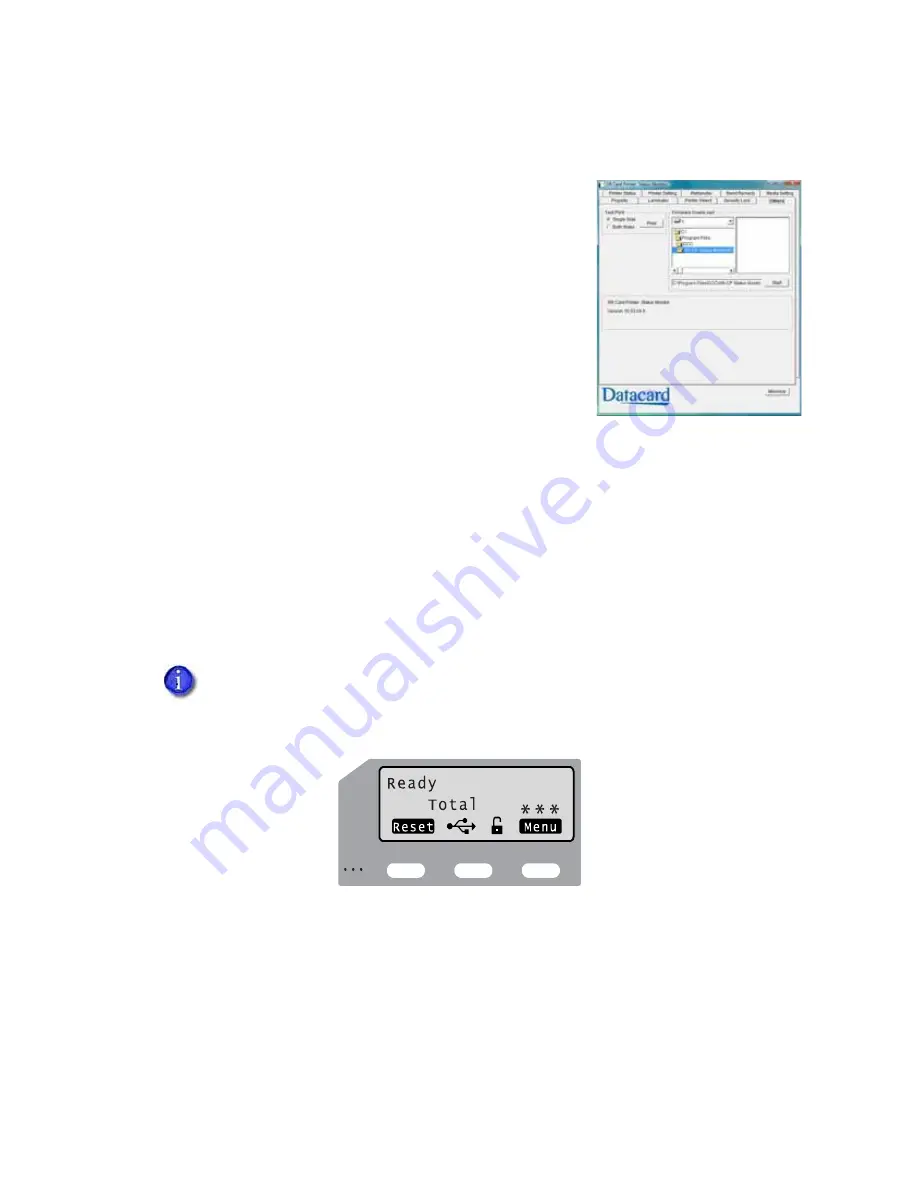
Others Tab

The


Others


tab


provides


the


following


for


a


USB

connected


printer:



Controls


for


printing


a


test


card.


The


printer


creates


one


test


card,


using


the


internal


test


pattern.



Controls


for


selecting


a


firmware


file


and


sending


it


to


the


printer.


Update


printer


firmware


only


when


your


service


provider


recommends


it.



Version


information


for


the


Status


Monitor.



Administrator


button.


Allows


administrators


to


make


specific


printer


functions


and


Status


Monitor


actions


available


to


non

administrative


users.

Status Monitor Messages

When


printer


errors


occur,


they


display


on


the


Printer


Status


tab


of


the


Status


Monitor.


Refer


to


Appendix A:


"Status


Monitor


Messages”


for


a


list


of


error


messages


and


possible


solutions.

Using the LCD Panel Menus

Use


the


LCD


panel


to


view


printer


status


and


settings.


You


can


change


some


printer


settings


and


perform


certain


functions


(for


example,


cleaning


the


printer)


using


the


LCD


panel.


The


LCD


background


color


changes


according


to


the


printer's


status.


The


background


color


is:



Bright


green


during


power


on.



Bright


blue


when


the


printer


is


operating


normally,


including


when


it


is


initializaing,


preheating,


and


printing


cards.



Medium


blue


when


recovering


from


errors.



Red


on


printer


error.

Most


printer


settings


displayed


on


the


LCD


panel


can


be


changed


using


either


the


printer


driver


or


the


Status


Monitor.


Refer


to


“Introduction


to


Printer


and


Laminator


Settings”


on


page 26

,


Using


the


Status


Monitor


on


page 38

,


and


“Using


the


Status


Monitor”


on


page 38


for


instructions.

Содержание LM200

Страница 1: ...Datacard SR200 SR300 Card Printers and LM200 LM300 Laminators User s Guide March 2014 Part No 527473 001 Rev A ...

Страница 2: ... registered trademark of MasterCard International Incorporated Visa is a registered trademark of Visa International Service Association Adobe and Reader are registered trademarks of Adobe Systems Incorporated Windows is a registered trademark of Microsoft Corporation All other product names are the property of their respective owners Proprietary Notice The design and information contained in these...

Страница 3: ...nterface The following basic safety tips are given to ensure safe installation operation and maintenance of Datacard equipment Connect equipment to a grounded power source Do not defeat or bypass the ground lead Place the equipment on a stable surface table and ensure floors in the work area are dry and non slip Know the location of equipment branch circuit interrupters or circuit breakers and how...

Страница 4: ...ration is subject to the following two conditions 1 this device may not cause interference and 2 this device must accept any interference including interference that may cause undesired operation of the device Cet appareil est conforme avec Industrie Canada RSS standard exemptes de licence s Son fonctionnement est soumis aux deux conditions suivantes 1 ce dispositif ne peut causer des interférence...

Страница 5: ...r Interference VCCI class A statement Korea Communications Commission KCC statement California Proposition 65 Compliance WARNING This product contains chemicals including lead known to the State of California to cause cancer and birth defects or other reproductive harm Wash hands after handling ...

Страница 6: ...vi Revision Log Datacard SR200 SR300 Card Printers and LM200 LM300 Laminators User s Guide Revision Date Description of Changes A March 2014 First release of this document ...

Страница 7: ...egin 12 Loading Supplies 12 Loading Cards 12 Removing the Card Hopper and Cards 13 Replacing the Card Hopper 14 Adjusting Card Thickness 14 Loading an Ink Ribbon 15 Loading Retransfer Film 16 Loading Top Side Laminate Film 17 Loading Bottom Side Laminate Film 18 Powering On 19 Checking the PC Connection 19 Checking the Laminator Connection 20 Powering On the Laminator 20 Powering On the Printer 21...

Страница 8: ...4 Media Setting Tab 44 Property Tab 46 Laminator Tab 47 Printer Select Tab 48 Security Lock Tab 49 Setting up Security 49 Locking the Printer 49 Unlocking the Printer 50 Deleting the Password 50 Changing the Password 50 Others Tab 51 Status Monitor Messages 51 Using the LCD Panel Menus 51 Connection and Lock Symbols 52 Key Functions 52 Example Using the Printer LCD Menus 53 LCD Panel Menu Structur...

Страница 9: ...the Laminator Cartridge 78 Cleaning the Fan Filter 78 Preparing the Printer and Laminator for Transport 79 Chapter 5 Magnetic Stripe Encoding 81 Inline Encoding 82 Character Code Table 83 Start and End Sentinels 84 Chapter 6 Error Recovery and Messages 85 Printer Roller Layout 86 Recovering from Printer Errors 86 Clearing a Hopper Jam 86 Clearing a Transfer Jam 87 Clearing a Turnover Jam 88 Cleari...

Страница 10: ...x B Site Requirements and Specifications B 1 Site and Usage Guidelines B 2 Operating Environment B 2 Ventilation Clearance B 3 Storage Environment for Supplies B 3 Printer Specifications B 4 Operating Environment Conditions B 5 Storage Environment Conditions B 5 Laminator Specifications B 5 Operating Environment Conditions B 6 Storage Environment Conditions B 6 ...

Страница 11: ...ur Printer and Laminator Contains procedures for cleaning maintaining and transporting the card printer and laminator Chapter 5 Magnetic Stripe Encoding Contains information about using the card printer to encode magnetic stripe information on cards Chapter 6 Error Recovery and Messages Contains procedures for clearing card jams mending broken ribbons adjusting laminator patch position and correct...

Страница 12: ...fer printing process uses two ribbon types a color ink ribbon and a retransfer film The ink ribbon is available in YMCK yellow magenta cyan and black or YMCKK format First the printer uses these colors to print images on the retransfer film Then the heat roller transfers the resulting image onto a card An ink ribbon with a peel off PO panel is available to remove retransfer material from areas of ...

Страница 13: ... the printer door Printer Door Open the door to access the ink ribbon and retransfer film cartridges Power Switch Press the switch to power on the printer Card Hopper Load blank cards into the card hopper and attach to the card printer here Consists of the hopper and hopper cover Reject Card Slot Cards for which the printer issued an error are ejected here Fan Filter and Cover Open to clean the fa...

Страница 14: ...a network hub Connect a USB data cable or a USB smart card cable here if used Ethernet Port Connect a network data cable here if used Option Label Indicates the options installed in the printer For example the following label is for a printer that has Duplex Bend Remedy and Magnetic Encoder options Cable Guides Secure the data cable here to prevent damaging it Power Receptacle Plug in the power co...

Страница 15: ...ard stacker brackets As cards exit the printer they collect in the card stacker Infrared Port Sends or receives data via infrared communication to the laminator if used Lift Area Use this area to lift the printer when carrying it Jog Dials Home Use these removable dials when clearing a card jam Return them to the home locations after use Refer to the procedures described in Recovering from Printer...

Страница 16: ...ion of the key directly beneath the indicator Keys Press keys to navigate the menu and display information about the printer and laminator and to view or change settings or perform functions Locked Indicates whether the printer and laminator if used is locked or unlocked Connection Indicates whether the printer is connected through a USB cable or a network connection and whether or not the printer...

Страница 17: ...The LM300 selects the side s of the card to be laminated by the presence of one or both film cartridges To laminate on the top side of the card load the top side cartridge To laminate on the bottom side of the card load the bottom side cartridge To laminate on both sides of the card load both cartridges Messages and other information about the laminator are displayed on the printer LCD panel and o...

Страница 18: ...ock in this location Power Receptacle Plug in the power cord here Card Outlet Cards exit the laminator here Card Stacker Attachment Slots Attach the card stacker here As cards exit the laminator they collect in the card stacker Filter Cover Remove to access the air intake filter Lift Area Use this area to lift the laminator when carrying it Card Inlet Printed cards enter the laminator here Infrare...

Страница 19: ...he LM200 Jog Dial Insertion Slot Attach the jog dial here to clear a card jam Refer to Clearing a Card Jam on page 91 for instructions Top Side Film Cartridge Green Holds the laminate film for the top side of the card Cartridge Release Button Press the button to remove the top side laminate film cartridge Jog Dial Home Use this removable dial when clearing a card jam Return it to the home location...

Страница 20: ...ght A blinking or steady red light indicates a laminator error Blue Status Light A blinking or steady blue light indicates that the laminator is functioning normally Operator Button Press this button after loading a laminator film cartridge to reset the laminator settings When no film cartridge is loaded press the operator button for two seconds or longer to start the cleaning operation Refer to C...

Страница 21: ... Loading an Ink Ribbon on page 15 Loading Retransfer Film on page 16 Loading Top Side Laminate Film on page 17 Loading Bottom Side Laminate Film on page 18 Power on the laminator and printer Checking the PC Connection on page 19 Checking the Laminator Connection on page 20 Powering On the Laminator on page 20 Powering On the Printer on page 21 Initializing the Ink Ribbon and Retransfer Film on pag...

Страница 22: ...uirements Ask your service provider for assistance if needed to make your design work Loading Supplies Before using the printer make sure that the correct cards have been loaded into the card hopper that ink ribbon and retransfer film cartridges are installed in the printer and that if used laminate film cartridge s are loaded in the laminator Loading Cards The card hopper can hold up to 100 0 030...

Страница 23: ...tripe up and toward the printer For most applications load contact chip cards with the chip down and toward the back of the printer For custom applications the card load orientation may be different 4 Slide the hopper cover over the cards 4 5 Slide the card hopper latch closed 5 Removing the Card Hopper and Cards The card hopper can be removed from the printer for secure storage to adjust card thi...

Страница 24: ...that the silver dial faces you 3 Use a pointed item such as a pen to slide the dial Counterclockwise to print thinner cards Clockwise to print thicker cards A setting of 1 0 mm corresponds to cards 0 040 inch thick A setting of 0 75 mm corresponds to cards 0 030 inch thick A setting of 0 5 mm corresponds to cards 0 020 inch thick A setting of 0 25 mm corresponds to cards 0 010 inch thick 4 Replace...

Страница 25: ...ew roll of ink ribbon on the cartridge a Put the full spool of ribbon on the orange supply spindle A b Put the empty take up spool on the black take up spindle B c Align ribbon along the three ribbon guides C d Make sure that the ribbon panels match the colored diagram in the cartridge D e Take up any slack by turning the supply knob counter clockwise Gently pull the take up knob and turn E If sla...

Страница 26: ... line is positioned next to the film guide as shown on the label inside the cartridge e Take up any slack by turning the take up knob clockwise Gently pull the take up knob and turn If slack cannot be removed verify that the supply and take up spools are firmly seated on the spindles To ease inserting into the printer the film must be tight along the film guides Turning the supply and take up knob...

Страница 27: ...f the material to the empty take up spool making sure that the edges are even 6 Load the new roll of material on the cartridge a Put the full roll of material on the supply spindle b Put the empty take up spool on the take up spindle c Align the material along the four metal guides as shown on the cartridge label d Wind two or three rotations of film onto the take up spool Take up slack between th...

Страница 28: ...g sure that the edges are even 6 Load the new roll of material on the cartridge a Put the full roll of material on the supply spindle b Put the empty take up spool on the take up spindle c Align the material along the four metal guides as shown on the cartridge label d Wind two or three rotations of film onto the take up spool Take up slack between the spools by turning the supply knob countercloc...

Страница 29: ...make sure that all supplies are properly loaded and in position before powering on the printer Before you begin processing cards make sure that The printer door and card hopper are closed securely The power cord is securely connected to the printer and an appropriate grounded power source The card stacker is attached to the printer or to the laminator if used The cards and all other supplies are l...

Страница 30: ...or LM300 laminator is used power on the laminator before powering on the printer 1 Press the laminator power switch 2 Make sure that the laminator is ready before proceeding to power on the printer The printer LCD panel displays Initializing and the blue status indicator light blinks Preheating displays on the printer LCD panel for approximately four minutes while the heat roller warms to operatin...

Страница 31: ...l displays the following status messages When operation checks are complete Preheating is displayed on the LCD panel for approximately two minutes while the retransfer roller and optional bend remedy roller warm to their operating temperatures When ready to print the LCD panel displays Ready 3 The first time you print cards initialize the ink ribbon and retransfer film Refer to Initializing the In...

Страница 32: ...et Printing Cards Print cards after installing the printer and printer driver and after setting up your card design Refer to Before You Begin on page 12 Card designs can be printed from ID software which handles the types of information used on cards If you do not have ID software you can use a different PC application to design the cards However most PC applications do not support magnetic stripe...

Страница 33: ... margins to zero for edge to edge printing 2 Format and save the card information 3 Select the SR CP U1 printer from the Print dialog box SR CP U1 is the default name of the printer when connected with a USB cable Your printer may have a different name 4 Click Printer Properties to open the Printing Properties dialog box Use the Setup Print and Encode tabs to set printer properties Setup Tab Set t...

Страница 34: ...inished click OK to close the Printing Preferences dialog box 6 Click Print in the Print dialog box to print the card For a complete description of settings that can be viewed or changed refer to Introduction to Printer and Laminator Settings on page 26 ...

Страница 35: ...ings This chapter describes Printing Properties on page 26 Printing Preferences on page 27 Using the Status Monitor on page 38 Using the LCD Panel Menus on page 51 Connection and Lock Symbols on page 52 Key Functions on page 52 LCD Panel Menu Structure on page 54 Using a Printer Security Key on page 63 Laminator Status and Settings on page 68 Displaying Laminator Status on the LCD Panel on page 68...

Страница 36: ... allows you to view many current printer and laminator settings as read only To change those settings use the Status Monitor or the Printing Preferences or Printing Properties dialog box Some printer functions can be performed and some settings entered using the LCD panel Printing Properties The Printing Properties dialog box options are set up when the printer is installed or by your system admin...

Страница 37: ...ork printer The name of your printer might be different 4 Right click the printer icon and select Printing Preferences from the pop up menu The Printing Preferences dialog box opens 5 Click to select the desired tabs and make any desired changes as described below 6 Click OK or Apply to save the settings or Cancel to close the Printing Preferences window without saving any changes Setup Tab Use th...

Страница 38: ...ndows Save As dialog box displays 4 Save the printer settings file a Select a location to which you have permission to save settings b Type a file name that reflects the program printer serial number or other significant information c Select Printer Profile dat for the file type d Click Save Loading Settings Follow these steps to load a saved dat file onto an additional card printer with printer d...

Страница 39: ... print on both sides of the card For each side you can select the ribbon panels to use and whether to rotate the image your ID software might specify these settings which override the Print tab Use ribbon panels such as peel off or UV only if the ribbon includes them and your ID software sends data for them Sending data for panels that are not present causes errors Use the Printing area settings t...

Страница 40: ...cify in the File Information area The bitmap can be Monochrome one bit per pixel where white is printed with full intensity 255 If white is the no printing color black is printed with full intensity 16 colors or 4 bit color printed with 256 gradations 256 colors or 8 bit color printed with 256 gradations 32K colors or 16 bit color printed with 256 gradations Only the MSB GGGBBBBB XRRRRRGG LSB form...

Страница 41: ...side of a card 1 Panel 2 Panels or Auto UV and YMCK inks cannot be transferred in the same area on the same retransfer panel so this setting determines what data will print The following table shows the result for data outside the MAC address area and data overlapping the MAC address area Printing Data Setting for Number of Retransfer Film Panels to Use 1 Panel Auto 2 Panels Printing data that ove...

Страница 42: ...lit Page Split informs the printer driver that you plan to use a multipage input document one page for YMC color another page for black K and if you use UV ink an additional page for a UV panel in that order You can specify Page Split for black K printing and for UV panel printing The following example shows a two page document with YMC and K printing on one side of the card and Page Split chosen ...

Страница 43: ...ide and Back side settings on the Print tab must also be set to support printing B Printed on the back of the card K Ink Split UV Ink Split Page Numbers Front Back Front Back 1 2 3 4 5 6 YMC KB YMCK YMCKB Yes YMC K YMCKB Yes YMCK UV YMCKB Yes Yes YMC K UV YMCKB Yes Yes YMC K YMCKB UVB Yes Yes YMC K YMCB KB Yes Yes YMCK UV YMCKB UVB Yes Yes Yes YMC K UV YMCB KB Yes Yes Yes Yes YMC K UV YMCB KB UVB ...

Страница 44: ...k ribbon and the transfer ribbon after printing each card This illustration shows the retransfer film after using the Security Erase feature Without Security Erase This illustration shows a printed card and the ink ribbon used to print it without using the Security Erase feature With Security Erase This illustration shows the same printed card and the ink ribbon used to print it after using the Se...

Страница 45: ...t area ink type card side and energy settings You can add up to three non printing areas per side However none of the non printing areas can overlap each other To define a non printing area 1 Enter the x and y coordinates of the start position and the height and width in millimeters 2 Select 1 Peeloff or 2 YMCK from the Ink list 3 Select 1 Front or 2 Back from the Side list For ISO magnetic stripe...

Страница 46: ... for using smart card IC and magnetic stripe encoding Your ID software might specify these settings which override the Encode tab You can also specify whether to turn over the card after an encoding step Only options installed in the printer display in this tab Refer to Chapter 5 Magnetic Stripe Encoding on page 81 for more information about encoding magnetic stripes Refer to the Datacard SR200 SR...

Страница 47: ... are restored To enable temporary printer settings 1 Select Start from the Windows task bar 2 Open your PC s Printers or Devices and Printers window following the steps for your operating system 3 Right click the SR CP printer and select Run as Administrator 4 Select Properties 5 In the General tab of the Properties dialog box select Printing Preferences 6 Click the Configuration tab 7 Select the ...

Страница 48: ...if you want to change settings The first time you open the Status Monitor on Windows Vista you must open it as administrator If you do not the Status Monitor displays the following message If you click Cancel you can try to open the Status Monitor as an administrator If you click OK Windows Vista displays the error shown When you receive the error uninstall the Status Monitor restart Windows Vista...

Страница 49: ...ick the icon to open it A prompt indicates that you cannot change settings Click OK to continue 4 The Status Monitor window opens Use these Status Monitor tabs to view or specify settings 5 Tabs that allow you to change settings contain a Refresh button and an Update button Click Refresh to obtain current values from the printer and display them on the Status Monitor Click Update to send settings ...

Страница 50: ...led select the printer to work with using the Printer Selection list Click Update to search for additional SR200 SR300 printers The information displayed on the Status Monitor changes automatically when you select another printer If the PC is network connected only printers on the same subnet as the PC can be found If the PC is USB connected all printers connected to the PC will be found Card Quan...

Страница 51: ...nds it goes into Ready state Preheating Yellow The heat roller is heating When it reaches the correct temperature the printer goes into Ready state Heating Yellow The printer is adjusting the heat roller temperature Card Loading Card Transporting Contact IC Encoding Non Contact IC Encoding MG Encoding Printing Retransfer Yellow The printer is issuing cards The operating status during card issuing ...

Страница 52: ...ses the card after printing and before transferring the card to the laminator Back Side Cooling Select Enable to cool the card when printing on both sides of the card Controls for viewing or changing magnetic stripe settings Number of Retry Sets the maximum number of retries when writing or reading magnetic stripe data fails Default value is 1 ISO Mode Sets the power used by the magnetic card enco...

Страница 53: ...ter to be displayed on the LCD panel Retransfer Tab Use the Retransfer tab to specify how images are moved from the retransfer film onto the cards The Retransfer tab displays the Front Side matrix and a Back Side matrix for setting the retransfer speed and temperature Click a square to select the temperature setting UV Speed slider for setting the speed of the retransfer heat roller card front and...

Страница 54: ...the printer Bend remedy is effective for single side printing For double sided printing select the Disable option If you select Disable and the bend remedy option is installed the printer goes into Preheat state for about 10 minutes while the roller temperature drops Wait until the printer status changes to Ready before printing If bend remedy is performed the printed card may have a matte finish ...

Страница 55: ... sample cards to verify settings before using cards of a different thickness or material type Print on one side of thin cards Do not print on both sides Set the input hopper for the card thickness Refer to Adjusting Card Thickness on page 14 Thin PVC cards are not supported Display Reasons for ink recognition error Solutions 252 Invalid TAG Data The data for the ink ribbon is incorrect Replace the...

Страница 56: ...f cards that have printed correctly The counter can be reset on the Printer Status tab Cleaning Counter The number of cards printed since the last cleaning card Error Counter The number of cards that were not printed correctly The counter can be reset on the Printer Status tab Printer Total Counter The total number of cards printed Thermal Head Counter The total number of printed sides for the sam...

Страница 57: ...or 30 minutes or longer This setting works with the card printer setting refer to Printer Setting Tab on page 42 This is always set to On automatically when overlay film is selected Put the laminator into standby mode if you will not be printing cards for a long time Cleaning Counter Displays how many laminations have been performed since the last roller cleaning Bottom and Top Side Settings Casse...

Страница 58: ...on you can use this tab to set the IP address and other network values See Network Installation in the Installation Guide If scanning does not find a printer you can register it by entering the IP address Printers with IPSec enabled must be registered before information is displayed If you need to assign a printer name that is different from a name provided by the printer make sure that the printe...

Страница 59: ...assword before the printer can be locked 1 Select New Password to enable the password area 2 Enter the desired password in both areas The password can be up to eight alphanumeric characters 3 Click Update 4 Click OK to enable the new password Locking the Printer Locking the printer activates the security lock and prevents the door from being opened and the card hopper from being removed The printe...

Страница 60: ...d Delete the password to remove the ability to lock the printer or to change the password 1 Click Delete Password 2 Enter the password in the Type a password area 3 Click Update 4 Click OK to delete the password The security lock cannot be activated until a new password is created Refer to Setting up Security on page 49 If you entered the incorrect password an error message is displayed Click OK a...

Страница 61: ...onitor Refer to Appendix A Status Monitor Messages for a list of error messages and possible solutions Using the LCD Panel Menus Use the LCD panel to view printer status and settings You can change some printer settings and perform certain functions for example cleaning the printer using the LCD panel The LCD background color changes according to the printer s status The background color is Bright...

Страница 62: ...ddress The printer is connected through a USB cable It also has an IP address Printing data is sent using the USB cable The printer is connected through a network connection The printer does not have an IP address The printer is connected through a network connection The printer has an IP address The printer is unlocked The printer is locked The laminator is connected to the printer Reset Initiali...

Страница 63: ...s the Next key in the Cleaning submenu to view cleaning choices 5 Press the Exit key at any time to exit that level of the menu system Continue to press Exit to Ready status Next View the next item in the menu Continue to press Next to access the settings in the order listed in LCD Panel Menu Structure on page 54 Arrow Keys Use the up and down arrow keys to display list items within a menu level E...

Страница 64: ... Printer and Laminator Settings LCD Panel Menu Structure The following chart depicts the structure of the LCD panel menu Some menu items may not display depending on the options installed in your printer ...

Страница 65: ... and Error counter Test Print Test Pattern Printer Setting Network Setting Lami Setting Select the type of sample card to print 1 Press the Change key to enter the list of choices 2 Use the down arrow key to select a test pattern 3 Press Return to print the test pattern Test Print can be used with or without a host PC Download To prepare the printer for a firmware download press the Enter key The ...

Страница 66: ...Card Thickness Standard Thin Displays the thickness set using the Status Monitor Select Standard for 0 030 inch 0 75 mm thick cards or Thin for 0 010 inch 0 25 mm thick cards Set the card hopper for this thickness also Refer to Adjusting Card Thickness on page 14 Contact your dealer or service provider before using 0 010 inch 0 25 mm thick cards Print YMC Level Black Level Black Mode UV Level PO L...

Страница 67: ...b on the Status Monitor Setting Display Counter Total Cnt Head Cnt Free Cnt Cleaning Cnt Error Cnt Use the up and down arrow keys to select the card counter type to be displayed on the LCD panel The Total counter is the default setting It displays the number of cards printed The Total counter cannot be reset The Head counter displays the number of complete dye panels The Head counter cannot be res...

Страница 68: ...e printer off and then back on Option MG None Lo Co Hi Co Displays the coercivity for writing data to ISO magnetic stripe cards if a magnetic stripe option is installed None No magnetic stripe Lo Co 238 x 102 A m 300 Oe Hi Co 218 x 103 A m 2750 Oe IC Antenna None Installed Displays whether the contactless card option is installed None for no antenna Installed when a smart card antenna is used IC C...

Страница 69: ...or does not display if not installed Mode Laminate Pass Displays whether the laminator applies material to the card or passes the card through without laminating Cassette None Both Bottom Top Displays which laminator cartridges are loaded Film T Patch Overlay Displays the type of film in the top cartridge Film B Patch Overlay Displays the type of film in the bottom cartridge Film T Pos 7 6 5 4 3 2...

Страница 70: ...er Setting tab of the Status Monitor This is always set to On automatically when overlay film is selected on the Laminator tab Regardless of the setting put the laminator into standby mode if you will not be printing cards for a long time Count Displays the number of laminations performed after the last roller cleaning This number is reset to 0 each time a roller cleaning is performed Network Prin...

Страница 71: ...is displayed when the printer is powered on for the first time or when DHCP is set to On If you do not use DHCP ask your network administrator for the IP address to use Subnet Mask The default subnet mask of the printer is 255 255 255 0 If you do not use DHCP ask your network administrator for the subnet mask Gateway The default gateway of the printer is 192 168 0 1 If you do not use DHCP ask your...

Страница 72: ...o 60 minutes MAC Address The MAC address is unique to each printer The MAC address is displayed and cannot be changed IPSec Mode ON OFF Displays whether Internet Protocol IP security is on or off After setting up security using a PC and USB connection this setting cannot be changed IPSec Type not Setting Preshard Certificate Displays the type of IP security set using the Status Monitor Not Setting...

Страница 73: ...Press the right arrow to enter the next digit The previous digit is replaced by a symbol c Reat steps a and b until you have entered the number you want The printer door and card hopper can be locked only by using the Security Lock tab on the Status Monitor Refer to Security Lock Tab on page 49 Using the Status Monitor is the preferred method for unlocking the printer The printer security key is s...

Страница 74: ...ber and enter a new one Unlocking the Printer If the printer and laminator if used has been locked from the Status Monitor follow these steps to unlock using the printer LCD panel 1 Press the middle key for at least three seconds When you release Unlock Sec Key OK is displayed 2 Press Return 3 Enter the security number using the down arrow and right arrow keys as described above 4 Press If the num...

Страница 75: ...t three seconds When you release Unlock Sec Key OK is displayed 2 Press the Next key Delete Sec Key OK is displayed 3 Press Return 4 Enter the security key number using the down arrow and right arrow keys as described above 5 Press If the numbers match the LCD panel displays Ready and the security key has been deleted If the numbers do not match the LCD panel displays Delete Sec Key OK Return to s...

Страница 76: ...es to display the Overcoat menu 5 Press Enter to display the Mode Front menu To apply an additional retransfer layer to the front of the card press Change 6 Press the down arrow key once to change Line 2 to On and then press Return to accept the change 7 Press Next to continue Do not plan to apply a second retransfer layer to a card if it has a magnetic stripe signature panel hologram or smart car...

Страница 77: ...s needed to determine the best retransfer results for your card type To change the speed values continue with step 10 If you do not want to change the speed values go to step 16 10 Press Next to continue 11 The Speed Front menu displays next To change the front speed press Change 12 Press the down arrow to change the speed and then press to accept the change 13 Press Next to continue 14 The Speed ...

Страница 78: ...e the mode to Laminator State Press Return 6 Press Exit three times to exit the menu system The laminator status is now displayed on the printer LCD panel This table describes each laminator status as displayed on the PC status monitor and LCD display It also indicates the condition of the laminator status lights and printer LCD panel for each status Laminator Status Red Status Light Blue Status L...

Страница 79: ...ting Off Blinking Fast Laminating Lamination in progress Error mode Blinking Slow Off Error message Errors that do not require the laminator to power off and then on Refer to Error Messages on page 95 Blinking Fast Off Error message Errors that require the laminator to power off and then on Refer to Error Messages on page 95 Roller cleaning in progress Blinking Slow Blinking Slow Cleaning Cleaning...

Страница 80: ...mm s 6 0 mm s Cooling Time 0 sec 0 sec 0 sec Card Printer SR300 Retransfer Settings Temperature Level 2 2 2 Speed Front 0 0 0 Speed Back 2 2 2 Bend Remedy Temperature Level Off Off Off Film 1mil Patch 0 6mil Patch Overlay Laminator LM300 Temperature Top Side 155 C 155 C 125 C Speed 5 0 mm s 12 0 mm s 5 0 mm s Cooling Time 0 sec 0 sec 0 sec Card Printer SR200 SR300 Retransfer Settings Temperature L...

Страница 81: ...d Feed Rollers and Heat Roller on page 73 Cleaning the Magnetic Head on page 74 Cleaning the Thermal Head on page 75 Cleaning the Printer Fan Filter on page 75 Clean the laminator Cleaning the Card Feed Rollers and Heat Roller on page 76 Cleaning the Internal Components on page 77 Cleaning the Laminator Cartridge on page 78 Cleaning the Fan Filter on page 78 Transport the printer and laminator Pre...

Страница 82: ... door 2 Pull the cleaning unit out 3 Wash the blue cleaning rollers with water Rub rollers gently under running water Do not use isopropanol or detergents to clean the rollers 4 Allow the card cleaning rollers to dry thoroughly 5 Reinstall the cleaning unit with the blue rollers facing to the right 6 Close the printer door Cleaning the Card Load Roller The card load roller is located under the car...

Страница 83: ...ilm cartridge release button and remove the retransfer film cartridge If the laminator is installed remove the laminator film cartridges 6 Close the printer door and the laminator door if installed 7 Remove the card hopper 8 Power on the laminator if installed and the printer The Film search A1 message is displayed on the LCD panel 9 Remove the protective paper from a cleaning card 10 Press the Me...

Страница 84: ...tic stripe cards the magnetic head does not require cleaning 1 Power off both the printer and laminator if installed 2 Power on the printer 3 Move the laminator if installed away from the printer to avoid a card jam during the cleaning process 4 Remove the card hopper 5 Press the Menu key Cleaning is displayed 6 Press Enter and use the Next key to select MG OK 7 Place three or four drops of isopro...

Страница 85: ...ilm cartridge 5 Wipe the thermal head with a Datacard printhead cleaning swab provided in the Cleaning Kit Refer to Cleaning Supplies on page 109 6 Reinstall the ink ribbon cartridge and the retransfer film cartridge 7 Close the printer door 8 Power the printer on Cleaning the Printer Fan Filter The printer has a fan filter to prevent airborne particles from entering the print area Clean the filte...

Страница 86: ...s or longer This starts the cleaning process 6 Remove the protective paper from a cleaning card 7 Insert the cleaning card into the card outlet of the laminator The card is drawn in by the roller Cleaning starts automatically and the card is discharged from the card outlet 8 Press the Operator button for two seconds or longer 9 Reverse the adhesive face of the cleaning card and insert it into the ...

Страница 87: ...artridge release button and pull out the top laminate film cartridge LM200 only and the bottom laminate film cartridge 4 Use a Datacard printhead cleaning swab provided in the Cleaning Kit Refer to Cleaning Supplies on page 109 to clean the following components a Bobbin holders two for each film cartridge b Rear guide rails on each side of the heat roller Clean upper and lower surfaces c Front gui...

Страница 88: ...eaning Supplies on page 109 5 Replace the supply and take up spools on the cartridge Refer to Loading Top Side Laminate Film on page 17 6 Replace the loaded laminator cartridge in the laminator until it clicks in position 7 Close the laminator door Cleaning the Fan Filter The laminator fan filter keeps airborne particles from entering the unit Clean the filter regularly and replace it when the foa...

Страница 89: ...ator door and remove the top and bottom laminate cartridges Remove the patch or topcoat material and replace the empty cartridges into the laminator 5 Close the doors to the printer and laminator Press the Reset key 6 The Initialize OK message displays Press the key 7 The Film Search error message is displayed 8 Set the printer to transport mode using the LCD panel Refer to Transport Mode on page ...

Страница 90: ...80 Maintaining Your Printer and Laminator ...

Страница 91: ...R200 SR300 card printers Use this chapter to help you produce magnetic stripe encoding on cards The information in this chapter is useful when creating encoding using applications other than Datacard ID software products Refer to the Datacard SR200 SR300 Plug in User s Guide for instructions and more information This chapter includes Inline Encoding on page 82 Character Code Table on page 83 ...

Страница 92: ...mum number of characters does not include the three prefix characters or the start and end sentinels The Datacard SR CR retransfer printer plug in used with the Datacard SR CR retransfer magnetic stripe plug in adds the start and end sentinels Make sure that the ID software or PC application does not process the encoding data as graphics Magnetic stripe data must be on the first page of the card d...

Страница 93: ...g data They are reserved for use by the driver as start or end sentinels b7 0 0 0 0 1 1 1 1 b6 0 0 1 1 0 0 1 1 b5 0 1 0 1 0 1 0 1 b4 b3 b2 b1 0 1 2 3 4 5 6 7 0 0 0 0 0 0 P p 0 0 0 1 1 1 A Q a q 0 0 1 0 2 2 B R b r 0 0 1 1 3 3 C S c s 0 1 0 0 4 4 D T d t 0 1 0 1 5 5 E U e u 0 1 1 0 6 6 F V f v 0 1 1 1 7 7 G W g w 1 0 0 0 8 8 H X h x 1 0 0 1 9 9 I Y I y 1 0 1 0 A LF J Z j z 1 0 1 1 B K k 1 1 0 0 C L...

Страница 94: ...nd Sentinels The following table provides the characters used to mark the start sentinel and the end sentinel Start Sentinel Hexadecimal End Sentinel Hexadecimal 4 unit code TTS ABA 3B 3F 6 unit code IATA 25 3F 7 unit code JIS DEL 7F DEL 7F ...

Страница 95: ...ller Layout on page 86 Recovering from printer errors Clearing a Hopper Jam on page 86 Clearing a Transfer Jam on page 87 Clearing a Turnover Jam on page 88 Clearing a Retransfer Section Jam on page 89 Mending a Broken Ink Ribbon or Retransfer Film on page 90 Laminator Roller Layout on page 91 Recovering from laminator errors Clearing a Card Jam on page 91 Adjusting the Patch Position on page 93 C...

Страница 96: ...rd hopper section Jam Hopper is displayed on the LCD panel To remove the jammed card 1 Slide the card hopper latch open 2 Slide the card cover up and remove any cards 3 Try the following in the order presented a If you can reach the jammed card pull it out b On the printer LCD panel press the Reset key and then Return If possible the printer moves the card and ejects it from the reject card outlet...

Страница 97: ...hopper and cards 3 Open the printer door 4 Locate the jammed card 5 Place one jog dial on the cleaning unit shaft and the other jog dial on the card feed rollers shaft 6 Turn both shafts clockwise to move the card toward the hopper area Do not force the card to move Instead ask your service provider for assistance 7 Remove the card from the hopper area or the reject card outlet 8 If the printer ha...

Страница 98: ...Place a jog dial on the turnover unit shaft 9 Turn the jog dial until the turnover unit is horizontal and the bar on the dial points to the right This is the home position for the turnover unit 10 Using the jog dial on the cleaning unit turn it to move the card back into the turnover unit 11 If the card is still stuck place the second jog dial on the lower cleaning unit shaft 12 Turn both the turn...

Страница 99: ...or displays the retransfer film cartridge is stuck Push it back into the printer close the door and return to step 2 4 Remove the card from the printer or from the retransfer film cartridge 5 If the card is stuck to the right of the heat roller refer to Clearing a Transfer Jam on page 87 6 If the card is stuck near the retransfer heat roller use the supplied tweezers to remove the card as shown 7 ...

Страница 100: ...ken portions evenly Do not remove the used ink ribbon or film from the take up spool Removing and then reinstalling the ribbon on the take up spool may cause print quality issues for the next few cards 5 Align the ends of the broken media evenly and apply tape to secure them 6 Turn the take up spool counterclockwise until the mended portion is wound onto the spool two or three turns 7 Make sure th...

Страница 101: ...inator messages Refer to Error Messages on page 95 for a list of messages Clearing a Card Jam The printer LCD panel displays the location of the laminator card jam Card Jam In Card Jam Middle or Card Jam Out Use the following steps to remove card jams 1 Open the laminator door 2 Turn the take up knob clockwise bottom or counterclockwise top to remove slack in the laminator material ...

Страница 102: ...ial on the cartridge is in one piece Turn the bottom side cartridge take up knob counter clockwise until all damaged material is wound neatly on the take up spool Turn the top side cartridge take up knob clockwise until all the damaged material is wound neatly on the take up spool If the material is split or broken Trim the ends of the broken portions evenly Align the end of the supply material wi...

Страница 103: ... the patch position to the front or back by 1 0 mm Use the following steps to change the front to back patch position 1 Power off the laminator and allow it to cool 2 Open the laminator door and remove the laminator cartridge 3 Remove the supply film from the cartridge 4 Pull the sprocket up 4 5 Turn the sprocket knob to move the patch 5 Turn the knob counterclockwise to move the patch position to...

Страница 104: ...top side or bottom side film cartridge Moving the slider to the left moves the patch to the left side of the card Moving the slider to the right moves the patch to the right side of the card 3 Click Update to update the laminator settings 4 Laminate a card to verify the new patch position Correcting Card Warping When laminated cards warp the optional printer bend remedy can correct the problem Ref...

Страница 105: ... heat roller is too high 1 Power off the printer and allow the heat roller to cool for about 20 minutes 2 Power on the printer and start cleaning again Make sure that the retransfer film cartridge has been removed 3 Refer to Cleaning the Card Feed Rollers and Heat Roller on page 73 for instructions regarding how to clean the card feed and heat rollers Contact your service provider if HR is too hot...

Страница 106: ...s securely attached to the stacker receptacle An incorrectly mounted card stacker can cause discharge jams Jam Retrans There is a card jam near the retransfer rollers 1 Remove the jammed card from the retransfer section 2 Press Reset and then to initialize the printer 3 Refer to Clearing a Retransfer Section Jam on page 89 Film Search The retransfer film is broken or missing 1 Repair the retransfe...

Страница 107: ...n 1 Turn the unit to the home position using a jog dial as described in Clearing a Turnover Jam on page 88 2 Press Reset and then to initialize the printer Call for service if the problem persists Cam Error There is a heat roller operation error 1 Press Reset and then to initialize the printer 2 Call for service if the problem persists No Card There are no cards in the card hopper The card hopper ...

Страница 108: ...ice if the problem persists RR Thermistor The bend remedy roller thermistor is not working Power the printer off and then on again Call for service if the problem persists Overcool It is too cold for the printer to operate The temperature in the printer area is too low Use at the recommended operating environment temperature as described in Appendix B Site Requirements and Specifications Head Over...

Страница 109: ...tion Jam In There is a card jam in the entrance area Make sure that the laminator is properly connected to the printer as described in Checking the Laminator Connection on page 20 Refer to Clearing a Card Jam on page 91 to clear the jam Jam Middle There is a card jam near the heating roller The laminating temperature is too high or the speed is too slow Set the temperature or speed as described in...

Страница 110: ...or door is open Install the laminator cartridge as described in Loading Top Side Laminate Film on page 17 Press the Reset key and then to initialize the laminator No Cassette The film cartridge is not inserted Insert the film cartridge Thermostat The thermostat is not connected Power the laminator off and then on again Contact your service provider if this does not correct the condition HR B Overh...

Страница 111: ...ition Thermistor T A heating roller sensor temperature error has occurred Power the laminator off and then on again Contact your service provider if this does not correct the condition Cam B A heating roller pressing operation error has occurred Power the laminator off and then on again Contact your service provider if this does not correct the condition Cam T A heating roller pressing operation e...

Страница 112: ...this does not correct the condition Supply ENC T A supply side motor encoder rotation detection error has occurred Power the laminator off and then on again Contact your service provider if this does not correct the condition Wind ENC T A supply side motor encoder rotation detection error has occurred Power the laminator off and then on again Contact your service provider if this does not correct ...

Страница 113: ...SR200 SR300 Card Printers and LM200 LM300 Laminators User s Guide 103 ...

Страница 114: ...104 Error Recovery and Messages ...

Страница 115: ...his chapter outlines the recommended supplies to use with the SR200 SR300 card printers and the LM200 LM300 card laminators This chapter describes the following recommended supplies Ink Ribbon Retransfer Film and Laminator Material on page 106 Cards on page 107 Cleaning Supplies on page 109 ...

Страница 116: ...ingle sided cards Laminator Material Datacard provides two types of materials for use in laminators Topcoat which is a continuous film Patch which has die cut patches sized to fit on a card The LM200 LM300 laminator can apply any of the following types of laminator supply materials Type Part Number Panel Sets Roll Purpose YMCK 568971 001 1 000 Full color and black K on one side or full color and b...

Страница 117: ...ations ISO IEC 7810 Type ID 1 ISO IEC 7811 2 Magnetic stripe optional ISO IEC 7816 Smart card optional Specification ISO IEC 7810 includes a requirement that cards have an optical density of 1 5 or greater If you use a laminator cards with an optical density lower than 1 5 do not work Contact your service provider before using a preprinted magnetic stripe card or smart card Dark color preprinted c...

Страница 118: ... service provider before using 0 010 in 0 25 mm thick cards Card Material Use cards made from the following materials PVC PET PET G Polycarbonates ABS Tips for Success PVC cards less than 0 027 inches thick are not recommended Cards with more heat resistance are recommended for use with an LM200 or LM300 laminator Length 3 375 inches 85 60 mm Width 2 125 inches 53 98 mm Thickness 0 010 to 0 040 in...

Страница 119: ...wab 507377 001 isopropanol saturated cleaning swabs for cleaning debris and dust from printheads and hard to reach internal printer areas Cleaning kit 509630 001 pack of five magnetic head cleaning cards five large and five small cotton swabs and one box cleaning wipes Magnetic head cleaning card 564729 166 pack of 10 cards Cleaning roller unit 534717 101 Printer fan filter 534717 134 Laminator fa...

Страница 120: ...110 Supplies ...

Страница 121: ...e Status Monitor Status Monitor Messages When a printer error occurs the error code number and message are displayed on the Printer Status tab as shown below Refer to Printer Status Tab on page 40 A corresponding message is displayed on the printer LCD panel and the background turns red Refer to Using the LCD Panel Menus on page 51 Indicates a printer error Error code number with description and r...

Страница 122: ... the Cleaning Unit on page 72 2 Press Reset and then Return to initialize the printer 0102D300 0102D400 0102D500 The printer is busy 0102DA00 Preheating is in progress Wait until preheating is complete 0102DB00 The printer is initializing Wait until initialization is complete 0102DC00 Offline testing is in progress Wait until the offline test is complete Cleaning is in progress Wait until cleaning...

Страница 123: ...r to Clearing a Turnover Jam on page 88 to remove the card 3 Power on the printer 01039200 Card jam near the magnetic encoder 1 Power off the printer 2 Refer to Clearing a Turnover Jam on page 88 to remove the card 3 Power on the printer 01039300 Card jam near the card feed roller 1 Power off the printer 2 Refer to Clearing a Retransfer Section Jam on page 89 to remove the card 3 Power on the prin...

Страница 124: ... Check the card specifications 0103AE00 An error has occurred during magnetic encoding data reading Check the card specifications 0103B000 An incorrect ink ribbon is installed Install a correct ink ribbon 0103B100 Ink ribbon is broken 1 Repair the ink ribbon as described in Mending a Broken Ink Ribbon or Retransfer Film on page 90 2 Press Reset and then Return to initialize the printer Ink ribbon ...

Страница 125: ... or retransfer heating roller is too high 0104C300 An internal 24v instantaneous interruption is detected 0104D800 A hardware error has occurred during initialization 0104F000 The temperature of the retransfer heating roller is too high Power the printer off and on again If the same problem recurs power the printer off and contact your service provider 0104F100 The retransfer heating roller is fau...

Страница 126: ...is incorrect Contact your service provider 01052000 01052100 A security key has already been set A new security key cannot be specified 01052200 Entry does not match the preset security key 01052300 Security key has not been specified The security lock function is not enabled 01052400 Printer command is incorrect Contact your service provider 01052600 01052700 Ink ribbon specification is incorrect...

Страница 127: ...that the host PC and the printer are connected properly Make sure that the printer is powered on 05000050 Failure occurred during card loading Make sure that that the laminator is properly connected to the card printer Refer to Checking the Laminator Connection on page 20 Remove the card 05000051 Card jam near the card feed roller The temperature of the heating roller may be too high or the card t...

Страница 128: ...e that that the laminate film is correctly set 05000059 The laminator door is open Close the laminator door 0500005A The film cartridge is detached Insert the film cartridge 05000060 Thermostat is broken Power the printer off and then power it on again If the same problem occurs consult an authorized dealer or service personnel 05000061 The temperature of the top side heat roller is too high 05000...

Страница 129: ...e temparature is within the prescribed range When powering on the laminator in a low temperature environment the temperature of the interior may remain low even though the surrounding temperature has gone up Power on the laminator again after waiting about one hour 0500006E A hardware error has occurred in the top side film supply encoder Power the printer off and then power it on again If the sam...

Страница 130: ...disconnect the USB cable from the printer 03 Printer is not found Make sure that the host PC and the printer are connected properly Make sure that the printer is powered on A communication error has occurred 04 A communication error has occurred 09 A command error has occurred Verify that the computer settings are correct 0x10000103 An error has occurred during magnetic encoding data writing Verif...

Страница 131: ... data writing Verify that the card specifications are correct 10000504 An error has occurred during magnetic encoding data reading Verify that the card specifications are correct 10000505 A magnetic encoding command error has occurred Contact your service provider 10000601 End notification program is not found Contact your service provider or application provider 10000603 An error is returned for ...

Страница 132: ...or Messages 10002000 Printer is not found Make sure that the host PC and the printer are connected properly Make sure that the printer is powered on 1000200 The printer is not ready Error Code Displayed Message Solution ...

Страница 133: ...the operating environment recommended for the SR200 SR300 card printer and LM200 LM300 laminator This appendix contains Site and Usage Guidelines on page B 2 Operating Environment on page B 2 Ventilation Clearance on page B 3 Storage Environment for Supplies on page B 3 Printer Specifications on page B 4 Laminator Specifications on page B 5 ...

Страница 134: ... Store all supplies in the original packaging until you load them in the printer Keep the original packaging closed Store all supplies in a clean cool and dry location Do not use supplies or cards that have been dropped on the floor or have otherwise become contaminated Keep the printer powered off and covered when not in use Operating Environment The performance of the printer and laminator is st...

Страница 135: ...25 C with a maximum of 40 60 relative humidity Do not store supplies in direct sunlight or high humidity locations The print ribbon maintains its quality for about one year For optimal card quality purchase and store quantities that you can use up in less than a year The print ribbon and card stock might require secure storage and tracking Follow your policy for storing and tracking the supplies u...

Страница 136: ...llow Y magenta M cyan C two for black K Printing time 29 seconds single sided excluding data transfer time Interface USB 2 0 High Speed Full Speed Ethernet 100Base Tx or 10Base T Power supply 100 120VAC or 220 240VAC 10 Current dissipation 3 5A for 100V system and 1 6A for 200V system Weight SR200 29 1 lbs 13 2 kg SR300 29 8 lbs 13 5 kg Sound level less than 70dB A according to DIN45635 part 19 EN...

Страница 137: ...35 70 without condensation Temperature 5 131 F 15 55 C Humidity 20 80 without condensation Transfer method Halogen lamp built in heat roller method Transfer time About 20 seconds depending on settings used Power supply 100 120VAC or 220 240VAC 10 Power consumption Approximately 190W Weight LM200 17 6 lbs 8 kg LM300 19 8 lbs 9 kg Sound level Less than 70dB A according to DIN45635 part 19 EN27779 ...

Страница 138: ...B 6 Site Requirements and Specifications Operating Environment Conditions Storage Environment Conditions Temperature 59 86 F 15 30 C Temperature 5 131 F 15 55 C Humidity 30 80 without condensation ...

Отзывы: