26
E.
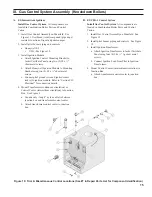
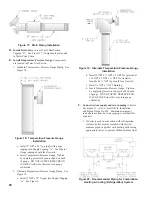
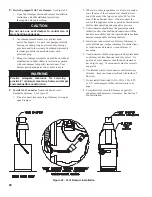
Boiler Equipped With Vent Damper.
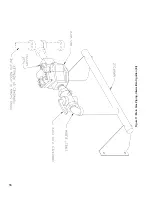
See Figure 24.
1. Open Vent Damper Carton and remove Installation
Instructions. Read Installation Instructions
thoroughly before proceeding.
CAUTION
Do not use one vent damper to control two or
more heating appliances.
2. Vent damper must be same size as draft hood
outlet. See Figure 1. Unpack vent damper carefully.
Forcing vent damper open or closed may damage
gear train and void warranty. Vent damper assembly
includes pre-wired connection harness with
polarized plug.
3. Mount vent damper assembly on draft hood without
modification to either (Refer to instructions packed
with vent damper for specific instructions). Vent
damper position indicator to be visible to users.
WARNING
Provide adequate clearance for servicing -
provide 6” minimum clearance between damper
and combustible construction.
F.
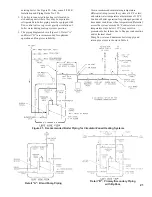
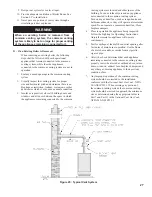
Install Vent Connector
from draft hood or vent
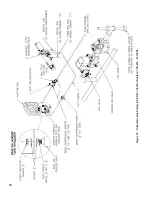
damper to chimney. See Figure 25.
1. Do not connect into same leg of chimney serving an
open fireplace.
Figure 24: Vent Damper Installation
2. Where two or more appliances vent into a common
vent, the area of the common vent should at least
equal the area of the largest vent plus 50 % of the
area of the additional vents. Do not connect the
vent of this appliance into any portion of mechanical
draft system operating under positive pressure.
3. Vent connector should have the greatest possible
initial rise above the draft hood consistent with the
head room available and the required clearance from
adjacent combustible building structure.
4. Install vent connector above bottom of chimney to
prevent blockage - inspect chimney for obstructions
or restrictions and remove - clean chimney if
necessary.
5. Vent connector should slope upward from draft hood
to chimney not less than one inch in four feet. No
portion of vent connector should run downward or
have dips or sags. Vent connector must be securely
supported.
6. Use thimble where vent connector enters masonry
chimney - keep vent connector flush with inside of
flue liner.
7. Do not install Non-listed (AGA, CGA, CSA, ETL,
or UL) vent damper or other obstruction in vent
pipe.
8. Locate Boiler as close to Chimney as possible
consistent with necessary clearances. See Section I:
Pre-Installation.
Содержание 16H-340
Страница 11: ...11 Figure 6 Flame Roll out Switch Installation Figure 7 Burner Burner Access Panel Installation ...
Страница 13: ...13 Figure 8 Jacket Assembly ...
Страница 14: ...14 Figure 9 EP CSD 1 Control Installation ...
Страница 16: ...16 Figure 11 Main Gas Piping Intermittent Ignition EI ...
Страница 17: ...17 Figure 12 Schematic Pilot Piping Honeywell EI USA ...
Страница 18: ...18 Figure 15 Schematic Gas Piping EP CSD 1 Control System 16H 410 16H 505 ...
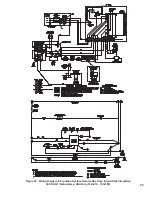
Страница 31: ...31 Figure 31 Wiring Diagram Honeywell EI USA Intermittent Circulation 16H 340 16H 510 MegaStor Relay MegaStor ...
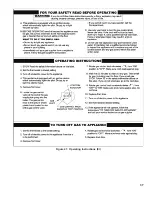
Страница 37: ...37 Figure 41 Operating Instructions EI ...
Страница 47: ...47 Honeywell EI Trouble Shooting Guide ...
Страница 48: ...48 THIS PAGE LEFT BLANK INTENTIONALLY ...
Страница 58: ...58 ...
Страница 60: ...60 ...

