2-7
Cisco Customer Response Solutions Servicing and Troubleshooting Guide, Release 5.0(1)
Chapter 2 Simple Network Management Protocol Support
Setting up SNMP Traps
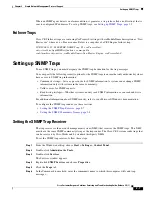
When an SNMP agent detects an alarm condition, it generates a trap (also called a notification) that is
sent to configured IP addresses. To set up SNMP traps, see
Setting up SNMP Traps, page 2-7
.
Failover Traps
Cisco CRS failover traps are sent using CvaProcessStart trap with cvaModuleName description as "New
Master xxx" where xxx = Process name. Below is a snapshot of a CRS Engine failover trap.
12/8/2006 13.51:28 SERVER-NAME Trap: P3 cvaProcessStart,
ent=ciscoVoiceAppsMIBNotifications, comm-public,
cvaAlarmSeverity=notice, cvaModuleName=New Master Engine, cvaProcessId=0
Setting up SNMP Traps
To use SNMP traps, you must designate the SNMP trap destination for the trap messages.
You can specify the following security options for the SNMP traps to ensure that only authorized systems
have access to SNMP trap information:
•
Community strings—Serve as passwords for SNMP information. A system can exchange SNMP
information only with systems in the same community.
•
Valid sources for SNMP requests.
•
Read/write privileges—Whether systems can only read SNMP information or can read and write
information.
For additional information about SNMP security, refer to your Microsoft Windows documentation.
To configure the SNMP trap sender, see these sections:
•
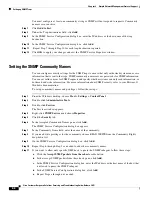
Setting the SNMP Trap Receiver, page 2-7
•
Setting the SNMP Community Names, page 2-8
Setting the SNMP Trap Receiver
The trap receiver is the network management system (NMS) that receives the SNMP traps. This NMS
must have the same SNMP community string as the trap sender. The Cisco CRS system sends traps that
can be received by CiscoWorks and by standard third-party NMSs.
To set the SNMP trap receiver, follow these steps:
Step 1
From the Windows desktop, choose
Start > Settings > Control Panel
.
Step 2
Double-click
Administrative Tools
.
Step 3
Double-click
Services
.
The Services window appears.
Step 4
Right-click
SNMP Services
and choose
Properties
.
Step 5
Click the
Traps
tab.
Step 6
In the Community name field, enter the community name to which this computer will send trap
messages.
Содержание Cisco Unified Queue Manager
Страница 12: ...Contents x Cisco Customer Response Solutions Servicing and Troubleshooting Guide Release 5 0 1 ...
Страница 21: ...P A R T I Serviceability ...
Страница 22: ......
Страница 61: ...P A R T I I Troubleshooting ...
Страница 62: ......

