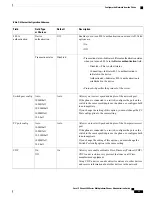
DHCP support
•
•
Manual assignment of IP address, gateway, and subnet mask
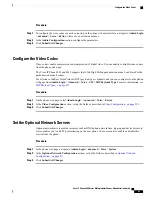
Install the Cisco IP Phone
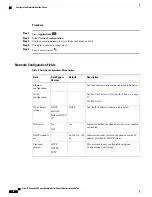
After the phone connects to the network, the phone startup process begins, and the phone registers with
Third-Party Call Control system. To finish installing the phone, configure the network settings on the phone
depending on whether you enable or disable DHCP service.
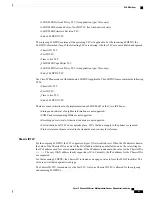
If you used autoregistration, you need to update the specific configuration information for the phone such as
associating the phone with a user, changing the button table, or directory number.
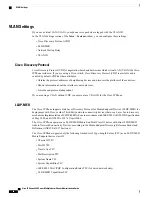
Before using external devices, read
External Devices, on page 18
.
Note
Procedure
Step 1
Choose the power source for the phone:
•
Power over Ethernet (PoE)
•
External power supply
For more information, see
Phone Power Requirements, on page 12
.
Step 2
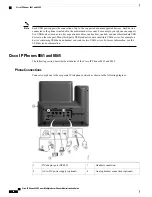
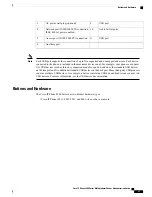
Connect the handset to the handset port.
The wideband-capable handset is designed especially for use with a Cisco IP Phone. The handset includes a
light strip that indicates incoming calls and waiting voice messages.
Step 3
Connect a headset to the headset port. You can add a headset later if you do not connect one now.
Step 4
Connect a wireless headset. You can add a wireless headset later if you do not want to connect one now. For
more information, see your wireless headset documentation.
Step 5
Connect a straight-through Ethernet cable from the switch to the network port labeled 10/100/1000 SW on
the Cisco IP Phone. Each Cisco IP Phone ships with one Ethernet cable in the box.
Use Category 3, 5, 5e, or 6 cabling for 10 Mbps connections; Category 5, 5e, or 6 for 100 Mbps connections;
and Category 5e or 6 for 1000 Mbps connections. For more information, see
Pinouts, on page 11
.
Step 6
Connect a straight-through Ethernet cable from another network device, such as a desktop computer, to the
computer port on the Cisco IP Phone. You can connect another network device later if you do not connect
one now.
Use Category 3, 5, 5e, or 6 cabling for 10 Mbps connections; Category 5, 5e, or 6 for 100 Mbps connections;
and Category 5e or 6 for 1000 Mbps connections. For more information, see
Pinouts, on page 11
for guidelines.
Cisco IP Phone 8800 Series Multiplatform Phones Administration Guide
34
Install the Cisco IP Phone
Содержание 8851
Страница 23: ...P A R T I About the Cisco IP Phone Technical Details page 9 Cisco IP Phone Hardware page 21 ...
Страница 24: ......
Страница 36: ...Cisco IP Phone 8800 Series Multiplatform Phones Administration Guide 20 USB Port Information ...
Страница 48: ......
Страница 96: ...Cisco IP Phone 8800 Series Multiplatform Phones Administration Guide 80 Administrator and User Accounts ...
Страница 98: ......
Страница 118: ...Cisco IP Phone 8800 Series Multiplatform Phones Administration Guide 102 Troubleshoot the Key Expansion Module ...
Страница 134: ...Cisco IP Phone 8800 Series Multiplatform Phones Administration Guide 118 Adjust the Handset Rest ...
Страница 136: ......
Страница 142: ...Cisco IP Phone 8800 Series Multiplatform Phones Administration Guide 126 Documentation Support and Security Guidelines ...
Страница 168: ...Cisco IP Phone 8800 Series Multiplatform Phones Administration Guide 152 XML Services ...
Страница 204: ...Cisco IP Phone 8800 Series Multiplatform Phones Administration Guide 188 Capture Packets ...
Страница 208: ...Cisco IP Phone 8800 Series Multiplatform Phones Administration Guide 192 Configure the XML Directory Service ...
Страница 210: ......
Страница 292: ...Cisco IP Phone 8800 Series Multiplatform Phones Administration Guide 276 Cisco IP Phone Web Page ...


