


Installation & Setup
Roadster & Mirage S+/HD User Manual
2-29
020-100002-04 Rev. 1 (12-2008)
Lens Adjustments
NOTE:
Not applicable to fixed lenses. Focus fixed lens by turning focus ring on lens.
With the input image displayed:
•
If remote keypad: Press
Zoom
or
.
•
If built-in keypad: Press Zoom
or
.
Hold the key down to see the effect –arrows in the display indicate the
direction of the zoom (Figure 2.40).
With the input image displayed:
•
If remote keypad: Press Focus
or
.
•
If built-in keypad: Press Focus
or
.
Hold the key down to see the effect – arrows in the display indicate the direction
of the focus (Figure 2.41).
To move the image:
•
If remote keypad: Press either Lens H
or Lens V
(Figure 2.42).
•
If built-in keypad: Press
Lens
Shift
and use the arrow keys.
Both styles of remote IR keypads—ergonomic or “brick”
rental staging—can be converted to a wired remote by adding
the appropriate cable (provided). This is most useful for
simple applications in which it is impractical to communicate
via IR, such as when the projector is in another room and
cannot respond to an IR signal, or when you wish to connect
to and control individual projectors within a group.
To control the projector when signals from a remote keypad cannot reach the
projector, use the projector’s built-in keypad. The nearby LED display provides
feedback indicating current status and activities of the projector. Because the built-in
keypad has fewer keys than the remote keypad, certain projector functions are
accessible only through the menu system rather than via a direct key.
NOTE:
The built-in keypad cannot be disabled
Zoom
Figure
2.40
Focus
Figure 2.41
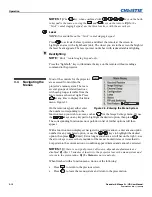
Lens Offset
Figure 2.42
2.11 Keypad
Protocols and
Conversion
Sample Keypad
Cable


